

BarCampCHS Session Wrap-Up
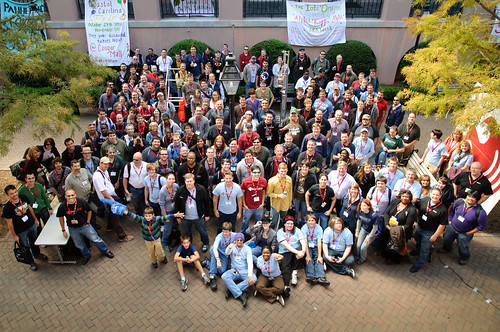
Group Photo of the BarCampCHS attendees
Yesterday was the 3rd annual BarCampCHS event, and like last year it was held over at the College of Charleston campus in downtown Charleston, SC. As mentioned in an earlier post, I held a session on Off-Camera Flash. Before I talk about the highlights of my presentation, I wanted to share a bit of the BarCamp experience.
30 Seconds To Pitch
After you register and get your bag o’ swag, the attendees gather in an auditorium and the people who plan on holding sessions get 30 seconds each to pitch their idea. As you tell everyone what you plan to do, a counter is counting down behind you (a few people did have to get the mic taken away from them mid-thought). In reality, you only got about 25 seconds to pitch since people started counting down the final 5 seconds. I found it quite entertaining, especially when some mouthy participant trying to hawk a couponing network-marketing scheme went over his 30 seconds and tried to continue without the mic. He was followed by @CaananTully who pitched a session on saving money at the supermarket without using coupons. The crowd applauded loudly. Afterward, the attendees lined up to vote on which sessions they’d like to attend.
With that, sessions began about a myriad of topics, although it was highly concentrated on computer programming. Some of the more popular sessions focused on geek culture, including a session about modifying old Nintendo Entertainment System games such as Super Mario Brothers.
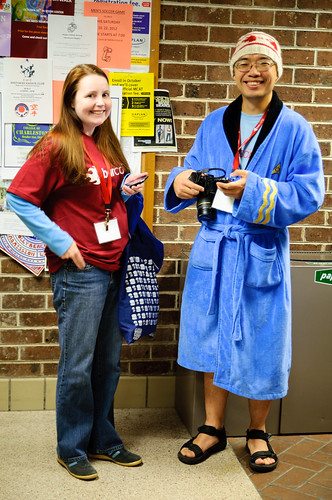
Eugene Mah Flaunts His Bathrobe Style
Eugene Mah took a lot of great photos of the days events, and they can be seen here. There is a BarCampCHS Flickr Group to check out, as well as my full set of photos. Twitterer @Pataford has a Ustream channel with some video he took. If you have some content I missed, please let me know in the comments! Now, on to my creative session:
Off-Camera Flash 101 Session

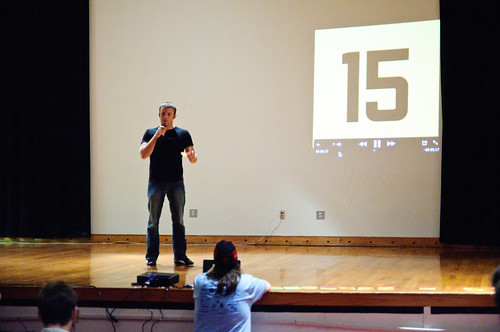
Slides from my BarCampCHS presentation
I started off the presentation by a short introduction and recap of my session from last year on photo editing. I showed some of the photos we made and edited and started talking about the creative use of lighting in the shots. This led to a brief discussion on why you would want to use off-camera flash. I also touched a little on why you would ever use your on-camera flash, and showed an example of fill flash outdoors during a bright and sunny day.

Next, we talked about shooting in manual mode – both on the camera and on the flash. We talked about the benefits of TTL as well as its shortcomings and why it’s important to know how to use manual flash, especially when working with light modifiers. I explained how when dealing with off-camera flash, you can control your ambient light with your shutter speed and your flash power with your aperture settings. Someone asked about ISO settings, and I explained that you want to shoot in your camera’s native ISO when dealing with lighting to produce consistent and clean images.
The next part of the session dealt with the different methods of getting your flash off of your camera. The first method was using bounce flash. I explained that even though the flash is still technically on the camera, the light source is now whatever you are bouncing the flash off of, which is indeed off of the camera. @TheKingOfGames volunteered to be our model as we took some sample shots. We started with a shot with the flash on the camera to reference the difference.

Straight Flash on the Camera
As you can see, the shot is not all that flattering. Someone in the class said “It looks like something you might see on Facebook”. I then showed the differences when bouncing the flash off of the ceiling or wall. In the following shot, I used the projector screen to bounce off of, which was really bright and reflective:

Bounce Flash Off A Wall
You can immediately see the difference in the quality of light. I talked about the softness and direction of the light, which made for a more defined image whereas the straight flash shot was very flat.
Next we talked about using a wire to move the flash off of the camera. The benefit being reliability while being able to cheaply transmit TTL information, with the downside being limitations of the cable’s length. We briefly talked about the different standards in cables, including PC Cables, 1/8″ Audio-Style Cables, and TTL Cables. I had a TTL cable that I use with my bracket, so we took a test shot using the bare flash:

Bare Flash Using a TTL Wire
Since I only had a short cable, I was able to demonstrate the limitation of the distance I could place the flash away from the camera (about arm’s length).
We then talked about wireless flash. I covered the three main methods of shooting wireless: Optical, Infrared, & Radio. We discussed the benefits and issues with each method. Optical is cheap but unreliable. Infrared can transmit TTL information, can be cheap depending on the hardware you already own (it also can be quite expensive if your camera doesn’t support it), and how you can control the flash settings from the camera. It’s also limited to line of sight and is very unreliable outdoors. I took a test shot using the pop-up flash on my D90 in commander mode to fire an SB-600 on a mini tripod to camera right:

IR Wireless Flash Test Shot Using an OmniBounce Diffuser
I spent the most time on radio triggers. I talked about the Pocket Wizards and Chinese knock-offs. I explained that you can buy about six Cactus v5 triggers for the price of one Pocket Wizard Plus II and according to many reviews and tests, the Cactus v5 is more reliable! I also touched on the newer Pocket Wizards and Radio Poppers that are able to transmit TTL information. I explained that for the cost of that convenience, you could be investing in some great lights! Sure it would be nice to justify having the top of the line triggers, but there’s no shame in buying a set of reliable knock-offs when you can achieve the same end-result for a fraction of the cost.

Photo by Daniel Vice @sharpstick on Twitter
I started doing some shots using an umbrella. I demonstrated how to control the flash power by changing the aperture, and then mixing ambient light with flash by adjusting the shutter speed. I showed how to match the ambient florescent lighting and flash lighting by gelling the flash with a green gel and setting the white balance in the camera to florescent.

Umbrella Look
I also talked about sync speed. I demonstrated what happens when you shoot faster than your sync speed:

Shooting Faster Than Your Sync Speed
I then changed the umbrella and set it up as a shoot-through umbrella and showed how it created a different look.

Photo by Daniel Vice @sharpstick on Twitter
I took a few shots as I moved the light around to get a softer look.

Shoot-Through Umbrella Look
I also altered the model’s position a bit and added another flash onto my camera at its lowest power setting to try and achieve a small catchlight in his eyes. This was our final result, which will hopefully make for a nicer Facebook profile pic than what we started with 😉

Final Shot
We did some Q&A, and I shared some resources for learning about camera lighting. Here’s my list:
joemcnally.com – Joe McNally
strobist.com – David Hobby
zackarias.com – Zack Arias
kelbytraining.com -Scott Kelby
I also wanted to add a pair of new eBooks by Piet Van den Eynde on Craft & Vision. You can pick up each of the two eBooks for $5 each, or buy them both at the same time for only $8. He’s done an excellent and thorough job in the first book of introducing the reader to off-camera flash, and takes you much further in the second one. I think it’s definitely worth more than $8!
Tech Specs For My Presentation
Gear:
Camera: Nikon D90
Lens: Tamron 17-50 f/2.8 VC
Flash: Nikon SB-600
Light Stand: Manfrotto 5001B
Umbrella: Photek Softliter II
Wireless Triggers: Cactus v5
Gels: Cokin Photogels
Mini Tripod: Jobi GorillaPod
I ran the presentation on an iPad hooked up through a projector using Keynote for the slides and Photosnitch for the live demo. I used an EyeFi wireless SD card to transmit the photos to the iPad sans cables.
Pingback: CupcakeCamp Charleston 2011 | JWNPhoto
Pingback: BarCampCHS 4 | JWNPhoto