Category: Gear

JWNPhoto Gear Sale

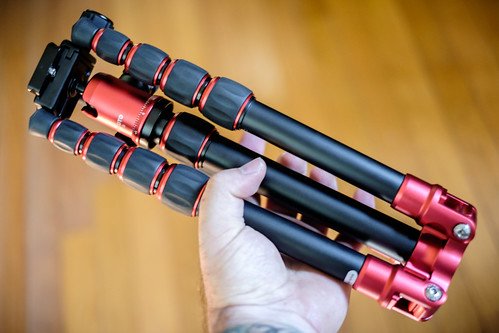
I’m selling a bunch of my gear in order to fund newer gear and to clear out equipment that I’ve long since upgraded. While I was listing these products on eBay, I started adding images I made using said gear and I thought I’d share those here as well.

I’ll link to the listings before each image if you care to buy any of this equipment (or if you know someone who’s in the market this holiday season).

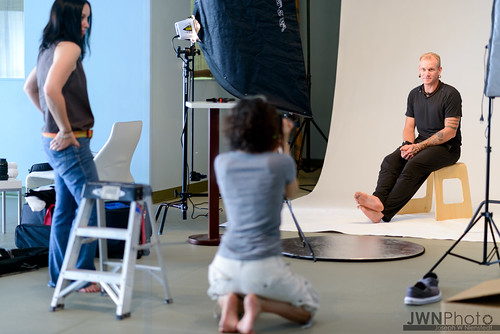
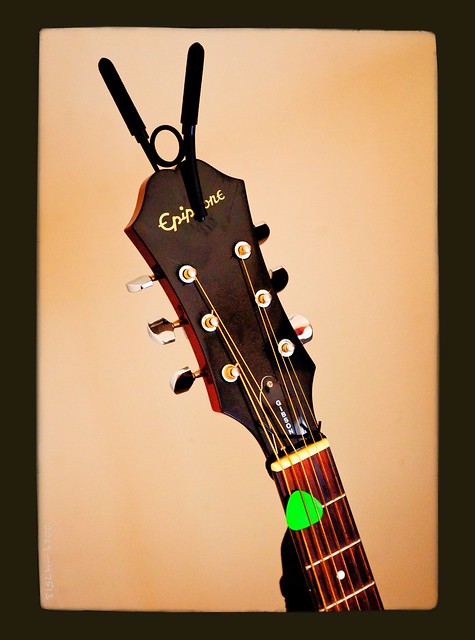
Here goes. First we’ll start with my Nikon D40 – My first ever Digital SLR! Check out this image:

Gorilla Face

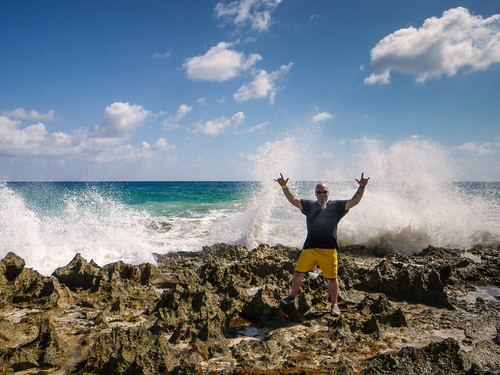
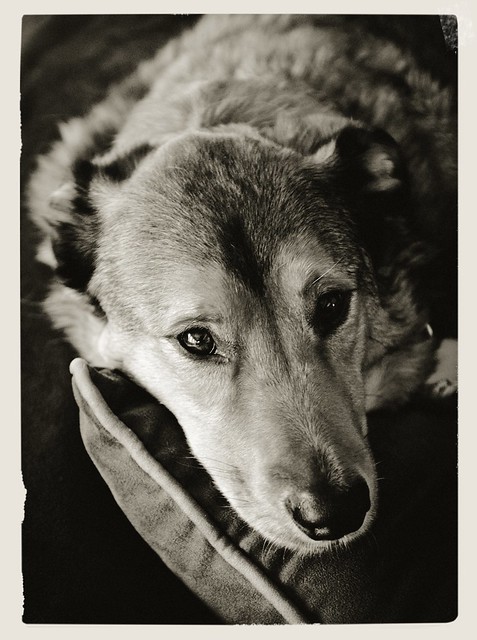
Then we have my Nikon D90 – I really pushed this camera to its limits and then some:

Day 233 - Christopher The Grasshopper

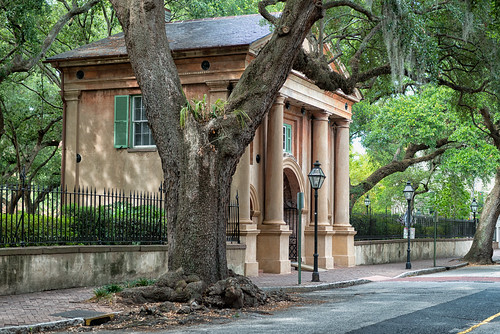
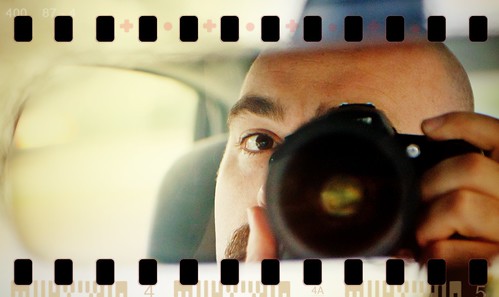
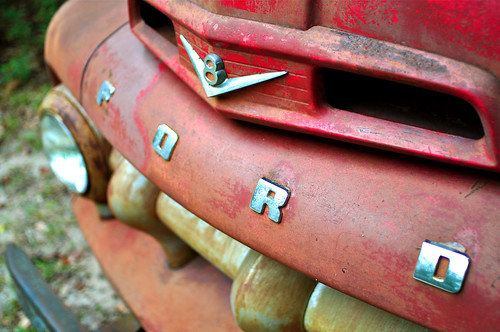
My street/travel camera, the Nikon Coolpix P7000 is up for grabs. I made this image with it:

Manhattan 2011

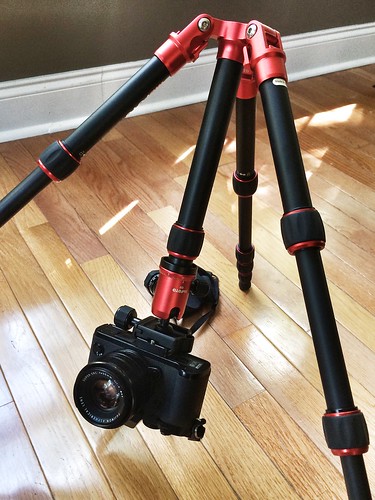
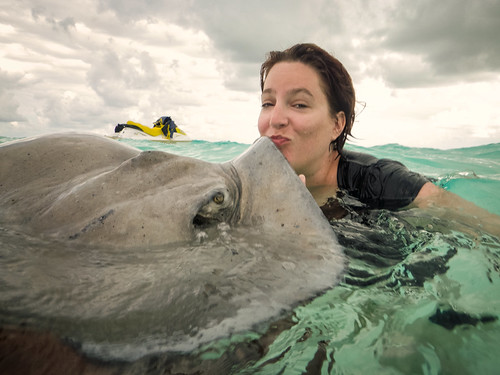
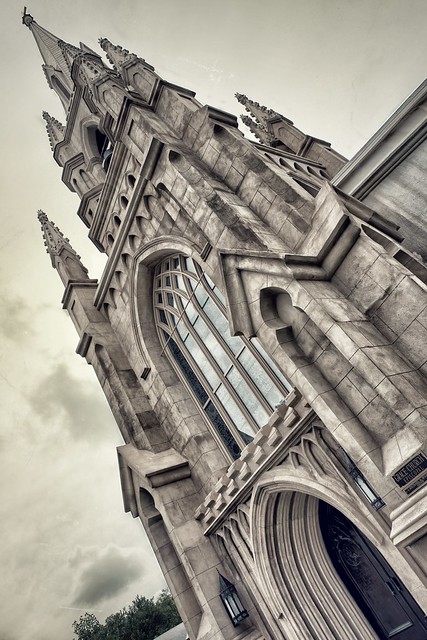
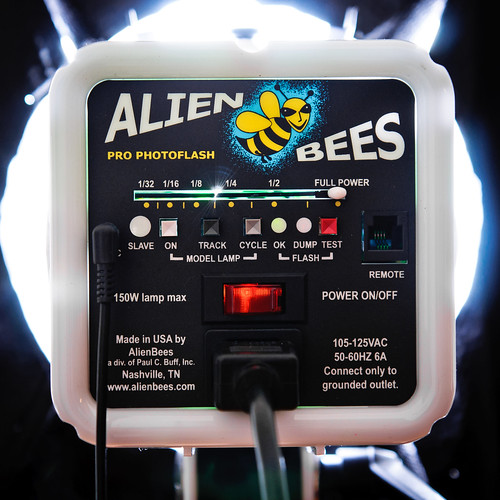
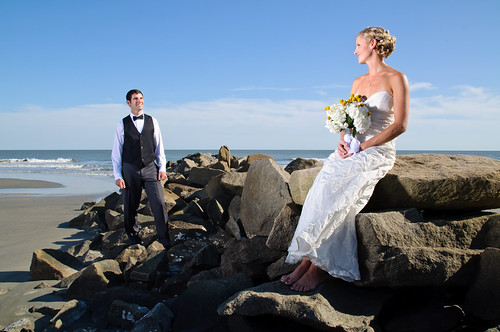
All right folks, now we’re going to get real serious here. My flagship camera, the Nikon D800 is currently up for sale!!!

Grand Canyon Sunrise (Nikon D800)

OK, so let’s talk about lenses. I’ve got some DX and FX Nikon mount lenses for sale.

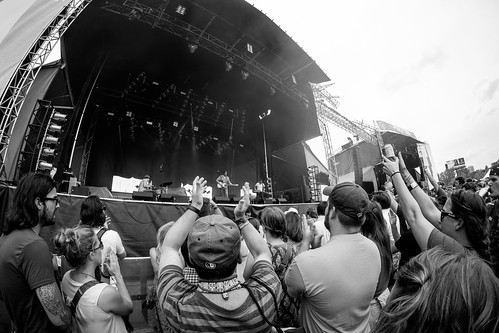
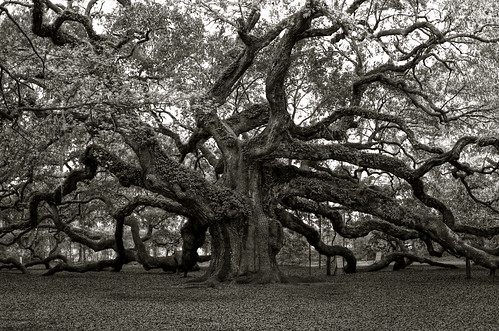
The Tokina 11-16mm f/2.8 is a wide angle beast. Here’s one of my all-time favorite images, which was taken on my D90 with the Tokina:

Day 358 - Abandoned Trailer

**SOLD** The Nikkor 28mm f/2.8 is a fast prime lens that I used to make this image (it’s also a full-frame lens that works on DX cameras as well):

Day 13 - Rusty Red Ford V8

The Nikon 55-200 DX lens is a steal for what it can do:

Snuggle

**SOLD** The Nikon 55-300 DX lens goes a little farther. It’s like it goes to 11!

Dragonfly At The Beach

**SOLD** You can’t beat a nifty 50, and the Nikkor 50mm f/1.8 D lens is a great choice (and it also works on full-frame Nikons as well as cropped sensor ones):

Day 191 - Old Sunflower

A 50 is nifty, bbut on a cropped sensor camera, the Nikon 35mm f/1.8 DX is where it’s at:

Angel Oak 2009 B&W HDR

**SOLD** And finally, the best DX lens you can buy for under $50 is the Nikon 18-55 VR:

ZIp Line

Please share this post with anyone you know who’s interested in getting some Nikon gear because there’s stuff here for every level of shooter! Have a great Thanksgiving everyone.


A Tale of Two Cameras

Grand Canyon National Park
Grand Canyon South Rim 7/25/2014 at 1:30PM

Grand Canyon 2014
Grand Canyon South Rim 7/25/2014 at 6:55PM

What we have here are some photos I stumbled upon from my recent west coast vacation that are very similar compositions of roughly the same area of the Grand Canyon taken with two different cameras. I didn’t do this on purpose, but I was pretty impressed with the similarities in the overall quality of the images that two very different cameras produced. If I had planned out this post while I was out there, I would have shot two identical shots on a tripod with both cameras back-to-back so the time was the same, but I didn’t and still found the quality of the images comparable. Artistically, these are pretty ordinary photos of an extraordinary place, but I could spend all day from sunrise to sunset shooting and at the end of the day, and if I’m lucky, I might have a photo or two that I would be proud of (I’ll show you those in a different post soon).

Let’s talk about the non-technical differences of these first two photos caused by the time of day. The photo at the top was taken in mid-day sunlight. You can see a lot of hard contrast, you can see the shadows of the clouds on the canyon below, and everything is lit pretty evenly from the front to the back of the image. The second photo is at the tail-end of the day, the light is directional and lower in the sky to the left of the frame. Everything in the front and middle are in the shadows, while the back is hit with very warm sunlight. So when I’m comparing these two images, I’m not thinking about which image is more aesthetically pleasing, but how well the camera’s handled the situations at hand.

Both of these images display what I would consider a fantastic demonstration of dynamic range. There are details in both the shadows and highlights, and the transition and color is very much like what I saw with my naked eyes. If you had a less-than-capable camera, the top image’s areas of contrast would be completely black, while the bottom image’s highlights would be blown out.

One photo was made with my “Pro” camera, the Nikon D800 – The camera I use for commercial work, and the other was made with my “Fun” camera, the Fuji X-T1 – The camera I use for just about everything else these days. The Nikon is a full-frame 36 Megapixel beast of a camera, while the Fuji is a 16 Megapixel cropped sensor camera that is quite small because it’s also a mirror-less camera. Can you guess which one is which?

Here are the settings for the top image: f/11, 1/210, 55mm ISO 200

Here are the settings for the bottom image: f/8, 1/250, 70mm ISO 400

The top image was made with the Fuji X-T1 using the 18-55mm f/2.8-4 “kit” lens, and the bottom was made with the Nikon D800 using the 24-70 f/2.8 lens. You could get the Fuji with the kit lens for less than the cost of just the Nikkor 24-70 lens itself!

Now, let’s take a look at two images taken at wider angles closer to the same time of day with the two different cameras. These two images are very different compositions so it’s a little harder to compare them.

Grand Canyon 2014
Grand Canyon South Rim 7/25/2014 at 6:00PM

Grand Canyon 2014
Grand Canyon South Rim 7/25/2014 at 7:00PM

Here are the settings for the top image: f/8, 1/160, 27.7mm ISO 200

Here are the settings for the bottom image: f/8, 1/250, 28mm ISO 400

Once again, the Fuji is on top and the Nikon on the bottom. It’s pretty crazy how well the Fuji stands up to the Nikon. Realistically, you can make similar exposures with an iPhone, although there wouldn’t be nearly as much detail when blown up or printed and the dynamic range wouldn’t be as defined. But, when looking at them at this size on your phone or computer, they would look pretty close.

So that leads me to this last comparison that lesser cameras would crumble under – A sunrise.

Grand Canyon Sunrise (Nikon D800)
Grand Canyon South Rim 7/26/2014 at 5:45AM

Grand Canyon Sunrise (Fuji X-T1)
Grand Canyon South Rim 7/26/2014 at 5:50AM

Same two cameras and same two lenses. This time the exposures are only 5 minutes apart. Now, there is a huge difference in the focal distance as the image above is wider than the second sunrise image. Also, the image on top was sitting on a tripod using a smaller aperture and a long exposure so it’s definitely sharper. The handheld image was shot with a faster shutter speed, larger aperture and higher ISO to compensate. These differences certainly affect the look of the image, so the comparison isn’t technically ideal.

Here are the settings for the top image: f/11, 0.4 seconds, 42mm ISO 100

Here are the settings for the bottom image: f/5.6, 1/60, 55mm ISO 400

As you may have figured out by the settings (the Fuji’s native ISO is 200), this time the Nikon is on top. The Fuji doesn’t compete with the clarity of the Nikon, but I believe that’s mostly because of the difference in the way the image was captured. Overall though, the Fuji made an image that if I told you that I used the same camera for both images, nobody would question it. Given the setup, I was able to compensate for my use of the Fuji handheld instead of on a tripod and make a very solid and richly colorful image. Therefore, I think the comparison works aesthetically.

In conclusion, this very unscientific comparison interested me simply because I never set out to do it in the first place. All of the images were created with no bias for comparing them later – They were just made to capture the scenes with the tools at hand. The fact that I’m able to use a smaller, cheaper, and all-around more enjoyable camera and make images that stand up against a top-of-the-line DSLR makes me happy. The Nikon still technically out-performs the Fuji, but not by a whole heck-of-a lot in these situations.

One last thing – All of these images were given very similar post processing RAW conversions using Lightroom/PS/Color Efex Pro. No elements were removed, and the only cropping was to straighten some of the images.

Another last thing – Robert Donavan sent me this link to Tom Grill’s blog where he did a very similar comparison using a D810 and the X-T1. I think he was a bit more concise with his argument about the use of the final image and how they compare for what he does.


MeFoto Travel Tripod First Impressions

MeFoto A0350 Travel Tripod

It’s been quite a while since I’ve talked about gear on the blog, so in light of my recent obsession with my Fuji X-T1 camera, I asked my wife to get me a new tripod specifically meant for smaller cameras for my birthday. She delivered with the MeFoto BackPacker Travel Tripod – And she made me this awesome raspberry-filled almond wedding cake too:

Cake!

Anyway, I took a closer look at the tripod this morning and this thing is pretty awesome for what it is.

MeFoto A0350 Travel Tripod

It’s only 12.6 inches long when folded up, and it expands to 51.2 inches. It also only weighs 2.6 lbs. While I prefer a much taller and heavier set of legs for my Nikon, the whole point of the Fuji is to minimize your gear. It’s a camera that makes you want to always bring it with you. So for traveling, I can take a tiny tripod like the MeFoto and fit it in my bag without really noticing it.

MeFoto A0350 Travel Tripod

It has twist locking legs, which I prefer because with one twist of my hand I can unlock all 4 joints on a leg. They also minimize the bulk of the whole thing. The ball head has an Arca-Swiss style compatibility quick release plate, which is cool because you can get an L-Plate without changing out the base. That’s a great thing on such a small ball head for shooting in portrait mode so the camera’s weight can remain centered and balanced. There’s also a little bubble level built into the head, which is always a time saver when setting up a landscape photo that you want to be level. Sure, the X-T1 has a level built in, but this saves you time while setting up before you even get the camera mounted.

MeFoto A0350 Travel Tripod

Hold on, I just remembered that there’s still cake in the house…

Cake!

YUMMMMMMM!

OK, so the other thing that really impresses me about this set of sticks is the versatility of its design. Because the legs fold up over the ball head, you can invert the tripod to get down low!

MeFoto Flipped

I was a little concerned about the overall height of the tripod, as one of the reasons to want a travel sized tripod is to take self & family portraits while on a trip. I setup the tripod fully extended and stood as close as I could to fill up the frame from waste-up. I think for this purpose, the angle is flattering enough, and if I were standing in front of something that I’d want included in the photo, it would work. Please take no notice of the 14 year-old trying to photo-bomb this shot – f/1.4 FTW!

MeFoto A0350 Travel Tripod Selfie Test Shot

My first impression of the MeFoto BackPacker Travel Tripod is that this thing is loaded with great features and the only compromise is its height, which for what it’s designed to do isn’t a deal-breaker. You wouldn’t want this as your main tripod for professional work, but if you’re someone who leaves the tripod at home because it’s too inconvenient for you to lug a giant pro set of sticks around, then something like this is the way to go. I’ve yet to try it out with any long exposures, but I was impressed to see that it does feature a retractible hook to hang a weight (more than likely your camera bag) to help keep it steady in the wind. Also, in theory the lightness of the tripod shouldn’t be a problem with a mirror-less camera for long exposures since there’s no vibration caused by a mirror flipping up.

Now, I think there’s still more cake left…


Capturing Live Music With A Fuji X-T1

Willie Nelson B&W
Willie Nelson | Fuji X-T1 | Fujifilm XF 55-200mm

Last year I entered the world of mirror-less interchangeable lens cameras with a score on the Canon EOS-M. I love that camera. The touch-to-focus LCD screen is amazing only because it’s just like the way I use a camera phone, but it also has the option to actuate the shutter when you touch-to-focus (which is doing my phone one better). Anyway, the love affair with the EOS-M got cut short because of one glaring issue – Canon gave up on the system and there’s no glass for the damn thing. I looked at the options out there and as far as lens selection goes for a APS-C mirror-less class of camera, it really came down to Sony or Fuji. I’ll just say it – I have no love for Sony’s cameras (even though they make excellent ones). They’re just not for me.

The Replacements in Atlanta
The Replacements | Fuji X-T1 | Fujifilm XF 55-200mm

My first digital camera ever was a Fuji Finepix (which I still have stuffed in a drawer) and I’ve always had fond memories of that P&S. I had no hesitation diving right into the Fuji X system of cameras and lenses. There are things about the Canon I wish existed on the Fuji (mostly the touch screen), but everything else on the Fuji blows it out of the water. I’m happy to have a useable viewfinder in such a small camera. I’m impressed with its tilting screen (It was used a lot for the images in this post). I’m overjoyed at the WiFi capabilities. But most importantly – There are amazing lenses galore and they keep on coming out with new ones!

Avett Brothers at First Flush Festival 2014
The Avett Brothers | Fuji X-T1 | Fujifilm XF 55-200mm

The Fuji X-T1 really has the ability to blur the line between fun camera and work camera because for a lot of applications, it’s results are of professional quality. It’s also lightweight, I can push photos right to my iPhone and post them just as I would from my phone’s camera, and I’m able to tackle difficult lighting conditions because it gives me choices. Not only choices in fast lenses, but expandability due to it’s hot shoe, PC port, and WiFi remote control. It’s also the first camera I’ve ever owned where I enjoy using it to convert RAW files right in camera. I can quickly get a great looking jpeg out of the camera and post it online immediately. It’s truly revolutionary in that respect.

Cusses Live At The Charleston Pour House 4/19/14
Cusses | Fuji X-T1 | Fujifilm XF 18-55mm

There comes a point with professional photography when it all turns into actual work. When you start looking at your camera as a tool that you use to do a job, and not as a magical box that you create memories and artwork with, that’s when you start justifying “play” cameras. The truth is, modern pro cameras and lenses are too damn good. They’re very efficient and they are designed to be world-class tools of a trade. The size, control system, and aesthetics of the Fuji X-T1 make you want to experiment. I know when I put it up to my eye in public, nobody is asking if I’m working. It’s under the radar enough that I can walk into almost any location with it on my shoulder without so much as a cursory glance from the powers that be. The only time I get comments on the camera is when I hold it up at a show and the people behind me can see the review images on the LCD screen. I’ve received business cards and/or email addresses scribbled on scraps of paper from the people standing or sitting near me at every show that I’ve shot for this post.

The Replacements in Atlanta
The Replacements W/ Billie Joe Armstrong | Fuji X-T1 | Fujifilm XF 55-200mm

So, enough gear talk. You can see what lenses I’ve been sporting underneath each image in this post. Part of the fun of going to a show for me is capturing a piece of the performers while they’re in their zone. I’ve shot from the photographers pit in the past, and it’s not the same as being out in the audience. Sure it’s safer, but it then begins to feel like work. I’m not there to work – I’m there to have an experience… To have fun. I love music and I love photography. They’re a perfect match for me to have fun with. Hopefully you can get a sense of that from these images – They’re truly a labor of love.

Gillian Welch
Gillian Welch | Fuji X-T1 | Fujifilm XF 18-55mm

And The Devil Makes Three
The Devil Makes Three | Fuji X-T1 | Fujifilm XF 55-200mm

Fitz & The Tantrums at the Music Farm in Charleston, SC 5/15/2014
Fitz & The Tantrums | Fuji X-T1 | Fujifilm XF 55-200mm

Alison Krauss & Union Station
Alison Krauss & Union Station | Fuji X-T1 | Fujifilm XF 55-200mm

Avett Brothers at First Flush Festival 2014
The Avett Brothers | Fuji X-T1 | Fujifilm XF 55-200mm

Hayes Carl in Atlanta 2014
Hayes Carl | Fuji X-T1 | Rokinon 8mm Ultra Wide Angle Fisheye

Fitz & The Tantrums at the Music Farm in Charleston, SC 5/15/2014
Fitz & The Tantrums | Fuji X-T1 | Fujifilm XF 55-200mm

Avett Brothers at Charleston Tea Plantation @theavettbros
The Avett Brothers | Fuji X-T1 | Fujifilm XF 55-200mm


Sleeping With The Enemy

Collage1

I’m not one to get into the whole brand war when it comes to “stuff”. I really do make educated guesses about the equipment I use for the specific jobs they perform. That said, every DSLR I’ve owned has been a Nikon. The reason has nothing to do with the quality of the system or anything like that. They just feel best in my hand. It’s the one “stuff” decision that has nothing to do with specs or functionality. It’s based purely on ergonomics and the way I use the camera.

Disney World Thanksgiving 2013

I have been on the hunt for a “Family Camera” that suits my nerdier photography needs. I love my Nikon P7000, but when it comes to low-light conditions, its small sensor leaves a gaping whole in its functionality. The newer Nikon 1 system uses pretty much the same sensor. I’ve been lusting over the micro 4/3’s systems, but I’m weary that their small sensors will leave me wanting just a little more than they can deliver also. When Fuji came out with the x100 and put a APS-C sensor into it, I thought “That’s it”, but it’s just too expensive to justify as a family camera. Sony has a fantastic system with the NEX line as well, but unfortunately the interface on those is way too nutty for my liking. Being quite happy with my iPhone, I gave up on paying much attention to what’s been going on in the world of small mirror-less cameras. I didn’t even know that Canon tried and failed miserably with the EOS M earlier this year. Their failure = My gain!

Disney World Thanksgiving 2013

So, why would I buy into a failed camera system? Short Answer: I got one with a lens for well under $300. This camera has the same sensor as the Canon 650D, and it costs a fraction of the price of anything even near it in it’s class. Why is it so cheap? Because reviewers panned the camera into submission. The camera sucks at autofocusing in comparison to other cameras in its class, but Canon recently upgraded the firmware to greatly improve the M’s performance. Now I can even focus on a honey bee’s ass!

Disney World Thanksgiving 2013

I learned about the camera at this year’s BarCamp when fellow photog Phillip Guyton let me play around with his EOS M. As annoying as on-screen controls can be, the touch screen combined with some really smart layout of the controls make for a great compromise for those of us who’ve been using iPhones for many years. I was immediately obsessed. It’s almost everything I want from a walk-around family camera. Sure, the auto-focus issue can sometimes be a challenge, but I was able to hand the camera over to other people and got great results:

Disney World Thanksgiving 2013

Also, it has a hot shoe! Yay for off-camera lighting. One of the first things I did was grab a remote trigger and use on of my Nikon flashes in manual mode to see how it works (It gets a 1/200 sync speed btw). Here’s one of the images I made while I tested it:

Dee Dee Ramone

What other stuff can this camera do that my iPhone can’t? How about slow shutter speeds! I took this shot of a fountain inside the Polynesian resort in Disney World this past weekend:

Disney World Thanksgiving 2013

The M also has much better dynamic range than other compact cameras. While not nearly as good as a full-frame Nikon, this little guy is pretty damn good in a tough lighting situation (that’s not noise in the 2nd shot – it’s foam flying around as simulated snow at the Osborne Family Christmas Lights in Epcot Center):

Disney World Thanksgiving 2013

Disney World Thanksgiving 2013

Disney World Thanksgiving 2013

After spending the holiday weekend with the M, I’m happy to say that for the price of the camera, I definitely have found my “Walk-Around” system (and then some), and would happily recommend it to any photography enthusiast!

Disney World Thanksgiving 2013


In The Water

Cruise-Grand Cayman-20

In my previous post, I showcased some of my favorite sun-related shots from my recent trip to the Caribbean. Today’s post will feature some shots in and around the water, mostly with my Pentax Optio W80 compact point-and-shoot camera. I bought this camera a few years ago after realizing that a proper underwater DSL housing costs more than a DSLR. I just wanted to play around, so a point-and-shoot was perfect for the job. Nowadays, waterproof point-and-shoots are relatively inexpensive and every major manufacturer has something to offer. I highly suggest picking one up – they make capturing moments like these a lot simpler.

Cruise-Cozumel-3

The shot of my wife Amy at the top was taken at Stingray City at Grand Cayman. This is my favorite shot of the whole trip because it tells a very concise and complete story of the day, which is simply that we rode out to Stingray City on jet skis and kissed some ‘rays. The shot just above was from Cozumel. After a long day of riding up and down the coast on dune buggys, I was able to rinse off some of the dust and sand in the sea. Here’s a shot my wife took of me while we took a break during the buggy adventure:

Cruise-Cozumel-19

Here’s a shot of Amy snorkeling off the coast of Grand Cayman:

Cruise-Grand Cayman-11

This last shot was taken with my D90 on the coast of Haiti. While I’m not technically in the water, I was right at the shoreline trying to capture the sea-spray. I must have looked like a maniac shuffling back and forth trying to avoid getting doused every time the water broke. But, I got a few shots from it that I like:

Cruise-Haiti-29

Check back again soon for some more Caribbean coverage.


Yogi Portrait

Eco Fitness-4

Grace, one of the owners of Charleston’s Eco Fitness and Blue Turtle Yoga studios is also a photographer who’s new to studio lighting so she asked me to help her out with a portrait session with Mark, one of her studio’s Yoga instructors. Grace’s idea was to capture some images of her staff members with an item that helps to define them. Above, Mark’s posing with a dragon fruit, and below he’s with his harmonium.

Eco Fitness-1

Eco Fitness-5

Of course, I needed to shoot Grace. I told her to give me her “sexy librarian” and this is what she gave me:

Eco Fitness-2

And here’s Grace in action with Amy assisting. This was a shot of the mirror behind us in the yoga studio.:

Portrait-Shoot-FB

These were all shot with my new Nikon D800 with the 85mm 1.8G lens. I cannot stress how amazing this combination is for portraiture. Looking at the full resolution files is just stunning. The clarity is unlike anything I’ve ever seen before from a digital camera. Just tack sharp, amazing contrast, and full of detail. It’s truly a game changer for me. A new camera or lens doesn’t change my style, my lighting, or any of my other abilities. What they do do is expand my ability to capture the images more like the way I actually see them. I can achieve a great look with nothing but my iPhone, but I can’t achieve the level of professional quality that is possible with the D800. Grace was using a kit 18-105 lens with her D7000 (which is another fantastic camera), and then I let her use my 24-70 f/2.8 and the difference in quality was quite obvious even on her camera’s LCD screen. I’m not big on pixel peeping, but when you’re editing portraits in Photoshop with such high resolution files, the quality of lens is obvious – and it makes your job easier as there’s a lot less work to do in post.

Here’s one last shot I want to show you. It’s Amy, who was assisting us on the shoot today. She was very playful in front of the camera, and this was about as serious as I could get her 😉

Eco Fitness-3


Walking With The D800

21st Century Photography Group Photo Walk

Warning: Nerdy Photographer Talk Below

After Nikon announced the D800, I started watching for the D700 prices to fall enough to where I felt justified in purchasing a previous generation body. But the day after I rented a D800 from CharlestonAVGear for a wedding I found myself placing an order for Nikon’s newest (and IMO finest) camera.

Then I started reading the various photography forums and panic started to creep in because it appeared that I might not get this camera until August!

I had a delivery estimate from Amazon, and then early last week the estimate vanished and was replaced with “unknown”. Gahh! I started following this thread on NikonRumors because some posters were letting people know when various retailers had stock available. I got lucky on Tuesday morning because someone posted that NikonUSA.com had them listed in stock. I quickly ordered one and moments after I placed my order they were listed as out of stock again. Regardless, on Wednesday morning I had the new camera in hand! The funny thing was that I got a notice from another fine camera retailer, Robertscamera.com, later in the day on Wednesday that they had some in stock, so I shared that info on the Nikonrumors forum that helped me out and some other shooters were able to get D800’s from them. Paying back on the forum that helped you is a good recipe for internet karma. And as of now it seems that a lot of people are getting the camera’s they’ve had on back-order for months, so I am assuming that the supply is reaching the level of demand to some degree.

21st Century Photography Group Photo Walk

So, I was itching to go out and use my new tool, since it’s a very different animal than my previous body. The local photography group, the 21st Century Photography Group, was hosting a photo-walk at the College of Charleston on Sunday. A perfect opportunity!

21st Century Photography Group Photo Walk

I brought my son Kegan along, who was shooing with my P7000.

21st Century Photography Group Photo Walk

Unfortunately it was quite hot and he was not feeling the whole walking part of the photo-walk. He did get a box of crackers to snack on, but even that couldn’t sooth the savage Kegan 😉

21st Century Photography Group Photo Walk

I’ve been shooting with a cropped sensor for so long now that switching to a new full-frame sensor is introducing a whole new way for me to approach the things I am used to. The focal lengths are now properly represented, so my 50mm lens is a true 50mm instead of the 80mm equivalent on a cropped sensor camera. This means I’ve got to get closer! That has the effect of decreasing the available depth of field, so focusing properly is crucial. The 36 mega-pixel sensor in the D800 also brings another challenge: The resolution is so high that it is not forgiving at all if you have bad technique hand-holding the camera. You can see the effects of camera shake when you view things at the full resolution. Luckily, most people aren’t viewing your images like that, but I think it’s a valuable thing because it challenges you to improve your technique!

21st Century Photography Group Photo Walk

It’s not easy changing the class of bodies either. My D90 is laid out very differently than the D800, so I’m constantly hitting the wrong buttons because they’re not where I’m used to finding them. That’s OK, it’s only a matter of going out and shooting as much as possible that will quickly remedy it. I did have some moments of panic when shooting a wedding with it, but I’ll talk more about that in a future post.

21st Century Photography Group Photo Walk

I can’t wait to shoot some studio stuff with this camera. The resolution is so amazing. I’ll be sure to write another post soon about that experience. For now, I’m buried with post-processing from previous shoots. The good news is that my computer seems to be dealing with the giant NEF RAW files from the D800 quite well, so one of my biggest fears has been put to bed. It does take a tremendous amount of time uploading the full resolution jpegs to Flickr though, but that’s something I can happily deal with 😉

On a side note, I checked out one of Apple’s new Retina Display MacBook Pro’s this afternoon. Holy Balls. My D800 photos look even better on that thing than I could have imagined. It looks like I’m going to need to book a bunch of these real soon!


Building

AlienBees Mac

Isn’t she dramatic? Oh, the trials and tribulations of a pre-teen. Actually, most of the pictures of my daughter I took were of extremely goofy faces and the ridiculous looks she likes to give me when I use her as my test model. I happened to get a couple of in-between shots where she wasn’t ready with a smirk 😉 Here’s one with her grinning:

AlienBees Mac

Of course, my son couldn’t let her take all of the glory…

AlienBees Kegan

So the point of these test shots was to try out my new giant softbox from Paul C. Buff, which is being powered by an AlienBees B800 monolight. I’ve been primarily a speedlight kind of guy for a long time, only renting bigger lights for special occasions. I’ve recently decided to expand my photography and some of the things I’m going to start shooting are more in the fashion, portraiture, and editorial style of work. That means proper studio lighting. Now, I’m not going to jump into a Profoto system right off the bat, and since I’ve used AlienBees in the past, I’ve decided to start with a couple of B800’s.

AlienBees B800

*Warning* Here comes a bunch of technical talk…

Here are the reasons I chose to go with this particular model: The AlienBees line has a 6 full f/stop range on their lights, so the highest power B1600 can only be stopped down to 20 Ws, while the B800 can go down to 10 Ws at 1/32nd power. I’ll rarely (if ever) need to shoot at full power on the B800 for the applications I’m intending them for, but for shooting wide open like I did in the two shots of my daughter above, I need lower power. Even with the B800 I had to lower the ISO to 100 (the native ISO on my Nikon is 200) to shoot at f/2.8. The shot of my son was at f/8, and you can see there is a lot more detail in that shot overall – it’s a totally different look. I like to have options easily available without having to throw light eating filters on my lens or lights. In this beach wedding shot taken in harsh mid-day sunlight, I had rented a B1600 and never went over half-power, so I don’t see myself needing the extra daylight-crushing power just yet.

Emily & Joe

The best choice of the Paul C. Buff line of lights for versatility is the Einstein, but since I’m trying to gradually build up, I know that the B800 will be versatile enough for almost 1/2 the price. In the future I hope to add an Einstein as my main light and then move the Bees to fill and/or accent lights, but for now I’m very happy with the range of the B800.

I also had one very important and extremely technical choice to make when getting the AlienBees lights. Which color to get? I really like the white since it’s different enough without looking goofy – I saw someone using a pink one lately and it was a bit much for my taste 😉 I didn’t want to go with black since the Einsteins are only available in black and I want to be able to quickly differentiate between the different models in the future. Telling a less knowledgeable assistant to move the white light is easier than calling out a model number!

AlienBees B800


What’s in the CameraBag 2.0?

Self-Portrait CameraBag Edit

Guess what’s on my camera now? The photo of my reflection in my car’s rearview mirror up top was the first shot I took with my new lens in the parking lot of FedEx, where I picked it up. In case you’re wondering, I’m now slinging a Nikkor 24-70mm f/2.8 lens, and it’s a beast. It’s heavier and longer than my 300mm DX lens (when it’s not extended)! I’m so happy with it, especially since I got such a great deal on it. I bought it from BorrowLenses.com used, and the thing doesn’t have a single scratch on it. The glass is as clean and flawless as the day it was shipped from the factory. It’s simply amazing. But, I’ve yet to use it in a professional setting. I’ve only shot my dogs while trying out various focal lengths and apertures. It’s meant for a full frame DSLR, so on one end it’s not as wide, but on the other it’s longer. No worries though, because I didn’t usually shoot portraits at less than 24mm with my previous lens, so it can only be for the better with the extra length at 70mm. But enough about that for now, lets talk about Nevercenter’s CameraBag 2.0.

Lola CameraBag Edit

This cross-platform desktop editing software is fast and powerful. I’ve been jumping around it’s various features today on my Mac and the program is very polished. It has a very pro look about it with it’s dark gray and black interface, and the layout is extremely intuitive if you’ve used any other photo editing application before.

I love how you can stack different effects and go back and change each setting for each individual effect. It also has an extremely handy feature called “Quicklook”, which lets you see all of the various effects on one screen so you can easily scroll through the different looks visually and choose the one that looks best with your photo.

Epiphone CameraBag Edit

Another fantastic idea is that you can create your own “recipe” for a photo edit, and not only save it as a preset in the “Favorites” section, but you can drag and drop a photo right on the screen and it will take on the active edits you have in the window. This would be great for editing a group of photos that you want to have the same look. Just drag each photo one by one and export each one as you go. Pretty darn slick.

Mac Monkey CameraBag Edit

The programmers are also big fans of curves, which is a good thing. One of my favorite editing elements is “R.G.B. Curves”. As you can see from the screenshot below, it gives you 3 separate curves for red, green, & blue. This is a such a powerful tool by itself because you can easily control color saturation independently. In fact, all of the tools are pretty powerful as most can be tweaked pretty heavily. The presets serve as a starting point, but you can get lost for hours nudging sliders and pulling curves.

So what are my gripes about CameraBag 2.0? Well, the only true gripe I have is that it’s not a plugin for Adobe’s Lightroom, Photoshop, or Apple’s Aperture. It would be nice for it to behave similarly to Nik’s Color FX Pro and allow me to return back to my cataloging software after I’m done with an edit. As it stands now, I have to do my RAW conversion and export the photos before I can edit them with CameraBag 2.0. It’s also the same problem I have with Snapseed. It’s hard to streamline your workflow as a standalone application, but by no means is that a deal breaker.

Jackson Sepia CameraBag Edit

The most amazing thing about this software is it’s price. You can get it right now in the Apple App Store for only $18.99. Not sure if it’s for you? Download the free trial from their website. Even at $24, this is a steal. Sure you can do some of these edits in iPhoto or Picassa on the cheap, but you can’t do them nearly as extensively. This doesn’t replace apps like Snapseed or Color FX Pro either. It’s similar, yet different enough to stand on it’s own. It’s also very quick and stable. I’m happy to have it in my virtual editing toolbox.


Privacy Settings
We use cookies to enhance your experience while using our website. If you are using our Services via a browser you can restrict, block or remove cookies through your web browser settings. We also use content and scripts from third parties that may use tracking technologies. You can selectively provide your consent below to allow such third party embeds. For complete information about the cookies we use, data we collect and how we process them, please check our Privacy Policy
Youtube
Consent to display content from - Youtube
Vimeo
Consent to display content from - Vimeo
Google Maps
Consent to display content from - Google