

What’s in the CameraBag 2.0?
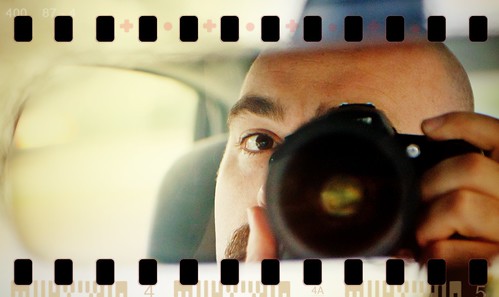
Guess what’s on my camera now? The photo of my reflection in my car’s rearview mirror up top was the first shot I took with my new lens in the parking lot of FedEx, where I picked it up. In case you’re wondering, I’m now slinging a Nikkor 24-70mm f/2.8 lens, and it’s a beast. It’s heavier and longer than my 300mm DX lens (when it’s not extended)! I’m so happy with it, especially since I got such a great deal on it. I bought it from BorrowLenses.com used, and the thing doesn’t have a single scratch on it. The glass is as clean and flawless as the day it was shipped from the factory. It’s simply amazing. But, I’ve yet to use it in a professional setting. I’ve only shot my dogs while trying out various focal lengths and apertures. It’s meant for a full frame DSLR, so on one end it’s not as wide, but on the other it’s longer. No worries though, because I didn’t usually shoot portraits at less than 24mm with my previous lens, so it can only be for the better with the extra length at 70mm. But enough about that for now, lets talk about Nevercenter’s CameraBag 2.0.

This cross-platform desktop editing software is fast and powerful. I’ve been jumping around it’s various features today on my Mac and the program is very polished. It has a very pro look about it with it’s dark gray and black interface, and the layout is extremely intuitive if you’ve used any other photo editing application before.

I love how you can stack different effects and go back and change each setting for each individual effect. It also has an extremely handy feature called “Quicklook”, which lets you see all of the various effects on one screen so you can easily scroll through the different looks visually and choose the one that looks best with your photo.

Another fantastic idea is that you can create your own “recipe” for a photo edit, and not only save it as a preset in the “Favorites” section, but you can drag and drop a photo right on the screen and it will take on the active edits you have in the window. This would be great for editing a group of photos that you want to have the same look. Just drag each photo one by one and export each one as you go. Pretty darn slick.

The programmers are also big fans of curves, which is a good thing. One of my favorite editing elements is “R.G.B. Curves”. As you can see from the screenshot below, it gives you 3 separate curves for red, green, & blue. This is a such a powerful tool by itself because you can easily control color saturation independently. In fact, all of the tools are pretty powerful as most can be tweaked pretty heavily. The presets serve as a starting point, but you can get lost for hours nudging sliders and pulling curves.

So what are my gripes about CameraBag 2.0? Well, the only true gripe I have is that it’s not a plugin for Adobe’s Lightroom, Photoshop, or Apple’s Aperture. It would be nice for it to behave similarly to Nik’s Color FX Pro and allow me to return back to my cataloging software after I’m done with an edit. As it stands now, I have to do my RAW conversion and export the photos before I can edit them with CameraBag 2.0. It’s also the same problem I have with Snapseed. It’s hard to streamline your workflow as a standalone application, but by no means is that a deal breaker.
The most amazing thing about this software is it’s price. You can get it right now in the Apple App Store for only $18.99. Not sure if it’s for you? Download the free trial from their website. Even at $24, this is a steal. Sure you can do some of these edits in iPhoto or Picassa on the cheap, but you can’t do them nearly as extensively. This doesn’t replace apps like Snapseed or Color FX Pro either. It’s similar, yet different enough to stand on it’s own. It’s also very quick and stable. I’m happy to have it in my virtual editing toolbox.
I shoot a lot of music venues – mainly for my blog – and stage lighting is a bear! I use PSE 10 now and it’s better than previous Elements but it’s a fine line to color shift and not block up everything. Thanks for the suggestion.
CameraBag 2 can process Raw files directly, so you don’t need to convert them in other software. Of course, if you need to do any fancy Raw conversion stuff, you would, because CB2 doesn’t give you any control over the conversion at all. But when the intended output is a lo-fi image, that fancy stuff probably isn’t needed.
Pingback: Michelle | JWNPhoto