

DIY Speedlight Diffuser
As I mentioned in Saturday’s post, I have a wedding shoot on the beach this coming weekend. The challenge is that it is going to be an outdoor event – both the wedding and reception! I’m going to be thoroughly tested on my lighting skills because I’m going to need to light most shots in some way. It gets even more challenging when you realize that it’s a whole hell of a lot windier on the beach. That means umbrellas and soft-boxes are going to be near impossible. Not that I won’t try – I ordered a set of tent spikes and rope to add to my sandbags. I also ordered some stronger metal umbrella brackets.
 Lets get back to the subject at hand. As I ran through the day’s schedule I started envisioning each setup. when I thought about the reception, which will start around sundown, I realized that I will not be able to rely on a light stands and off-camera lighting. I spent some time researching various methods. I have a Flash Bracket, which allows me to move the flash up and off the camera at about arms length (I usually have it set about 12″ to the left as well). This is perfect for these kinds of events. The light is still pretty hard, but at least it has direction. I also have a Sto-Fen Omni Bounce, which is fantastic if you’re indoors as it lets you bounce the flash off of the ceiling or a wall while throwing some light 360˚. Alas, I’ll be outside!

Sto-Fen Omni Bounce
 I started doing some research. There are quite a lot of solutions out there, and the ones that looked most promising were also well over $100.00. I liked the idea of the Lastolite 20″ umbrella that’s meant to be handheld. My bracket actually has a hole for an umbrella shaft and I could easily mount it. Perfect! Except it’s no longer available. B&H does have a kit with it, but from the reviews it would appear that there are quality issues with it and that makes me think there is a valid reason that it’s on backorder. What to do now?
I started to look for DIY softboxes and modifiers, There are a lot of great options out there, and I was going to have to try something. I have a week to get ready, so that gives me time to figure it out. After dinner, we stopped at the local Publix grocery store and I saw this plastic flask hanging on a hook in one of the isles. The curvature of the white translucent bottle reminded me of a modifier by Graslon. Speedlights started to pop in my head (OK, lame), and I threw the $4.00 flask into the cart.
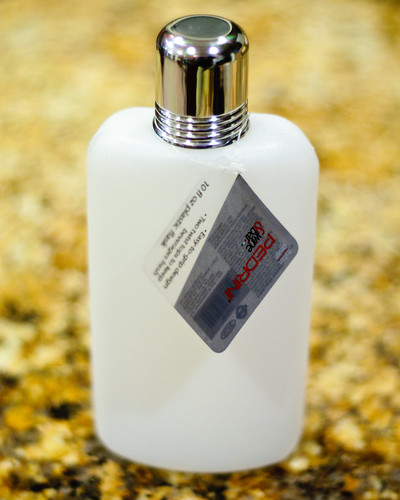
The Pedrini Wine & Bar 10oz Plastic Flask
I was delighted to see that the silver cap was false – a much smaller white plastic cap was hidden underneath (which makes it look slightly less obvious that I’m sticking a plastic bottle on my flash). I grabbed my flash and outlined the two longer horizontal sides on the back of the flask with a Sharpie. I then put a line in the center to make an H. This is how I marked my incision:
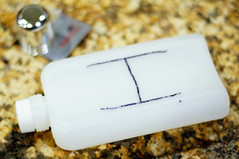
Mark Your Incision
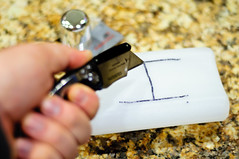
I used a locking straight razor to cut the H. The plastic is pretty thick, so I had to give it a bit of pressure to make the cuts. Take it slowly and cut away from your body. I still have a 1″ scar on my wrist from a razor incident that I got from cutting up a cardboard box when I was a teenager. 1/2″ to the left and I might not be here today!
Ready to Attach
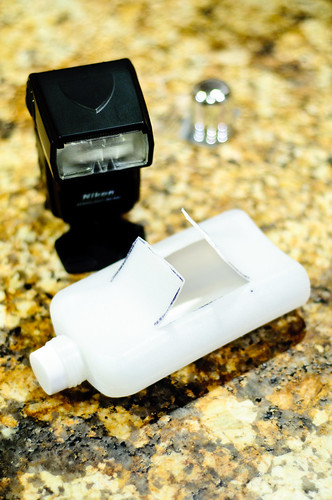
Now, slowly fold the two flaps outward. You should be able to snugly slide your flash head right in. Self-adhesive velcro or gaffer’s tape would work perfectly to hold it on. I actually put my Omni Bounce on my flash and slid that inside the flask. I shook it pretty hard and the thing wouldn’t budge! It’s not necessary if you don’t have an Omni Bounce, but it sure does make things easy.
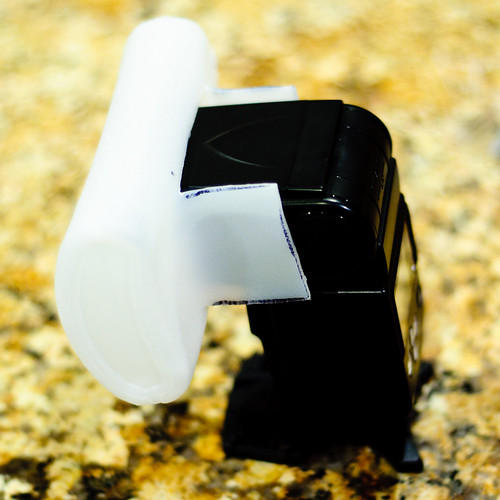
Attached
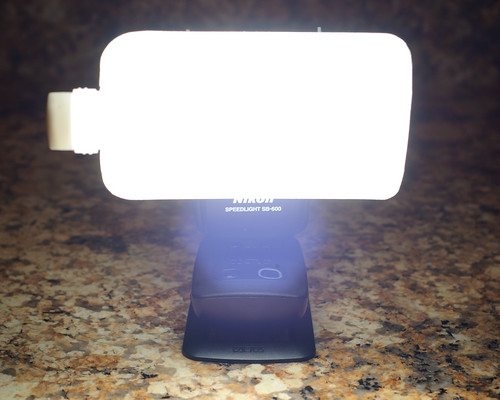
It Works!
OK, now it’s time to test it. I put the flash on a Cactus v5 wireless trigger and fired her up. She’s a thing of beauty. The flask adds about 5x the surface area of the Omni-Bounce to the flash. Larger light sources = softer light. Let’s try it on a person. My daughter was practicing her keyboard in her room, so I shut her lights completely off and snapped this:

Test Shot of Mac
She looks great! There’s direction to the light from being on my flash bracket, there’s an even spread, and it’s a bit softer than a bare flash head. Mission accomplished! Now I’ll have to see how she performs in a real shooting situation. More to come…
Pingback: Turn a White Plastic Flask into a Quick DIY Flash Diffuser
Pingback: Turn a White Plastic Flask into a Quick DIY Flash Diffuser
Oh man! What an AMAZING idea! Thanks for sharing!!
Pingback: Hack a $4 Plastic Flask into a Flash Diffuser | CisforComputers
Pingback: DIY Speedlight Diffuser | JWNPhoto « Happy24n7′s Blog
Pingback: 10 Wacky Photography Hacks That Work | Contrastly