Articles Tagged with: D800

JWNPhoto Gear Sale

I’m selling a bunch of my gear in order to fund newer gear and to clear out equipment that I’ve long since upgraded. While I was listing these products on eBay, I started adding images I made using said gear and I thought I’d share those here as well.

I’ll link to the listings before each image if you care to buy any of this equipment (or if you know someone who’s in the market this holiday season).

Here goes. First we’ll start with my Nikon D40 – My first ever Digital SLR! Check out this image:
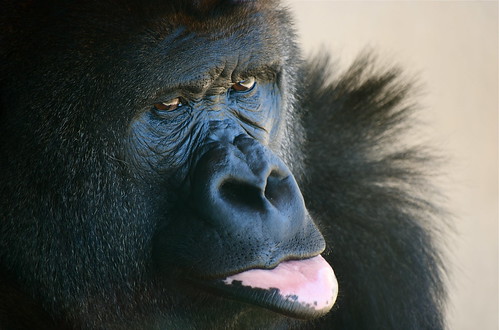
Gorilla Face

Then we have my Nikon D90 – I really pushed this camera to its limits and then some:
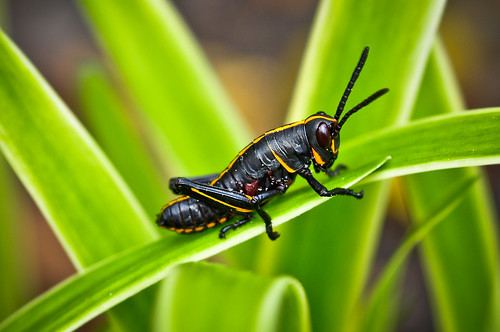
Day 233 - Christopher The Grasshopper

My street/travel camera, the Nikon Coolpix P7000 is up for grabs. I made this image with it:
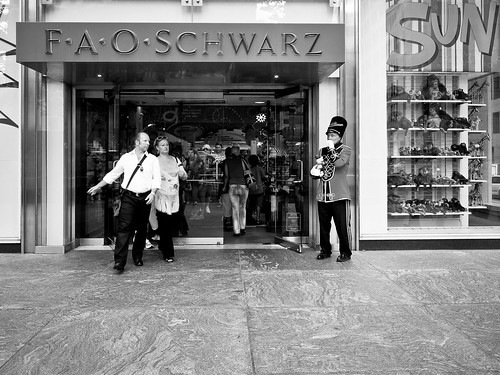
Manhattan 2011

All right folks, now we’re going to get real serious here. My flagship camera, the Nikon D800 is currently up for sale!!!
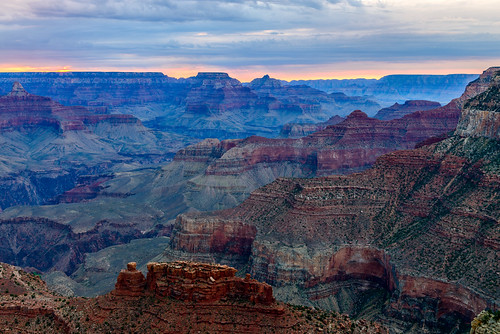
Grand Canyon Sunrise (Nikon D800)

OK, so let’s talk about lenses. I’ve got some DX and FX Nikon mount lenses for sale.

The Tokina 11-16mm f/2.8 is a wide angle beast. Here’s one of my all-time favorite images, which was taken on my D90 with the Tokina:
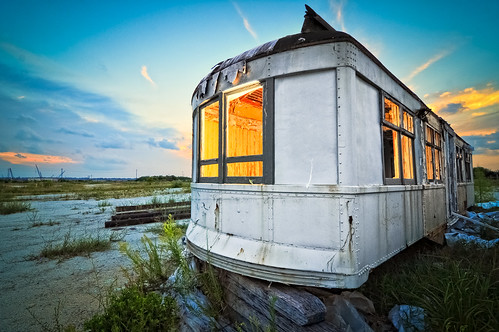
Day 358 - Abandoned Trailer

**SOLD** The Nikkor 28mm f/2.8 is a fast prime lens that I used to make this image (it’s also a full-frame lens that works on DX cameras as well):
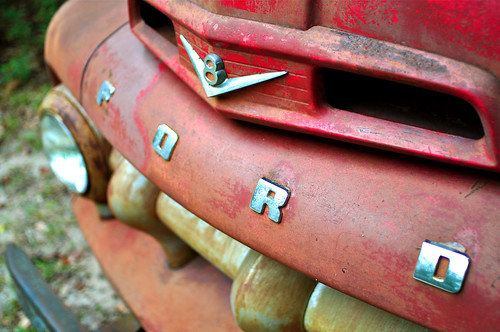
Day 13 - Rusty Red Ford V8

The Nikon 55-200 DX lens is a steal for what it can do:

Snuggle

**SOLD** The Nikon 55-300 DX lens goes a little farther. It’s like it goes to 11!
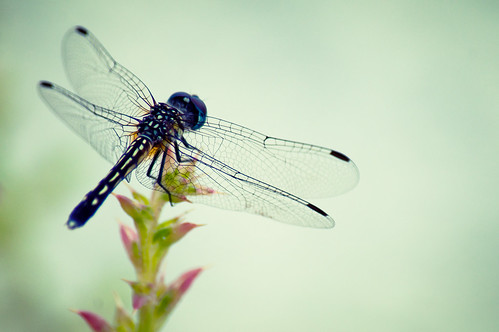
Dragonfly At The Beach

**SOLD** You can’t beat a nifty 50, and the Nikkor 50mm f/1.8 D lens is a great choice (and it also works on full-frame Nikons as well as cropped sensor ones):
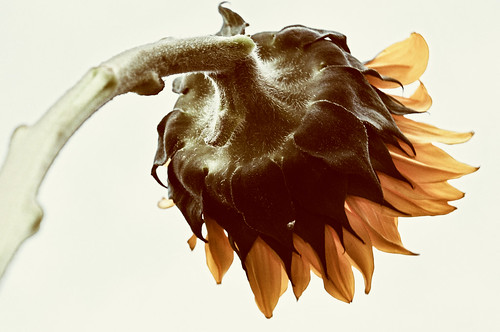
Day 191 - Old Sunflower

A 50 is nifty, bbut on a cropped sensor camera, the Nikon 35mm f/1.8 DX is where it’s at:
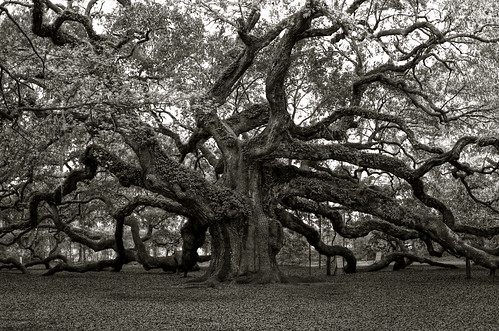
Angel Oak 2009 B&W HDR

**SOLD** And finally, the best DX lens you can buy for under $50 is the Nikon 18-55 VR:
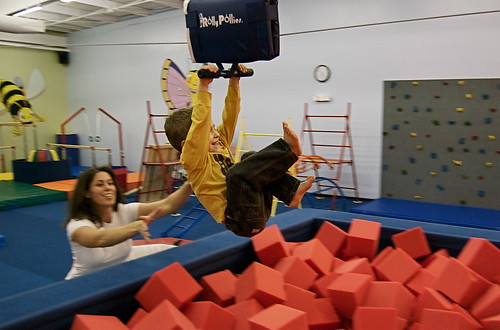
ZIp Line

Please share this post with anyone you know who’s interested in getting some Nikon gear because there’s stuff here for every level of shooter! Have a great Thanksgiving everyone.

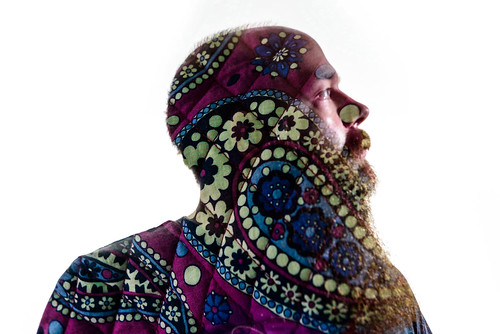
Multiple Exposure at BarCampCHS 6

Barcamp-2014

I’ve led a photographically themed session at the annual BarCamp “unconference” in Charleston since 2010, with sessions on post-processing, lighting, retouching, and iPhonography. This year I tried to tap into the technical aspects of creative photography that have existed since the film days – Multiple exposures. We explored two different techniques, one involving a long exposure with multiple speedlights, and the other using the in-camera multiple exposure feature.

The first demonstration involved off-camera lighting. I used two speedlights and radio triggers to get this effect. I use Cactus v5 radio triggers, which allow me to assign a separate channel to each flash as well as fire them both at the same time. I set the flash on camera left to channel 3 and the one on camera right to channel 2. I set the camera to bulb mode, shut off all of the lights, and shot at ISO 100 and f/9 from a tripod. Rachel is the model, and her brother controlled the radio channels. As I held the shutter open, I had her do each pose and had her brother switch to the appropriate channel and fire the flash. This was the result:

Rachel - BarCampCHS

That’s not a Photoshopped image. It’s all one exposure as far as the shutter actuations are concerned. The multiple exposures come from the separate speedlight actuations. Pretty cool, huh?

The next technique is a function of most DSLRs – a feature called “Multiple Exposure”. I learned something new about this feature on my Nikon – It’s not available when you’re shooting tethered! Oh well, after a long minute of trying to figure out why I couldn’t get it to work, I unplugged my camera from the presentation computer and got started. The way I set my camera up this time was to set the Multiple Exposure setting to 2 images in a series and then disable the auto-gain. For the effect of constraining the 2nd exposure within the 1st exposure’s silhouette, I wanted the background to be blown out (which is why you want to disable the auto-gain). This technique doesn’t require any special lighting, but since we were in a classroom, I used my speedlights to blow out a white wall behind my subjects.

This is John, who certainly had the best beard in the whole conference (probably in all of the Charleston peninsula for that matter). Another attendee had this vibrant purple paisley laptop bag with her that I used for the second exposure. Together they made quite the juxtaposition:

John - BarCampCHS

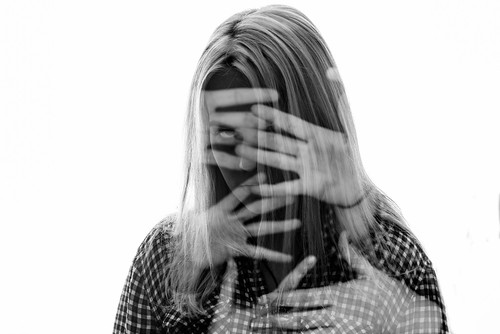
We had time for one more example, so using the same technique, I had this idea that came from something I saw that day at the College of Charleston campus. All over the walkways there were messages about speaking out about rape. There were hashtag messages such as #nomeansno and #itsnotyourfault written in chalk everywhere.

I asked my daughter Mackenzie to pose with a very sad and angry expression, and then I got a few people to stick their hands out for the second exposure. The idea of the shot was to see where you can take the technique creatively. In trying to make a visual interpretation of these messages we all saw that day, this was the result. I didn’t let on that that was what I was going for while we were setting this up because we were having fun during the session, so I hope that anyone who was there didn’t misinterpret my light-hearted presentation as making light of the seriousness of sexual assault in all of its forms.

Mackenzie - BarCampCHS

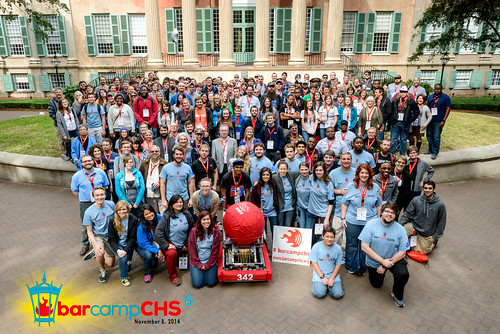
Finally, I once again had the pleasure of shooting the group photo for the conference. Here’s most of the attendees and volunteers who make BarCampCHS happen every year:

BarCampCHS 2014 Group Photo

And here’s a photo of me taking that photo, courtesy of Andy Paras form the Post & Courier:

Joeonladder


A Tale of Two Cameras

Grand Canyon National Park
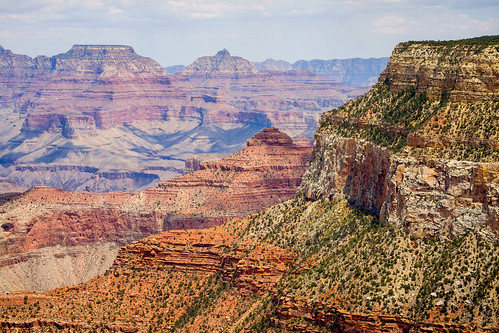
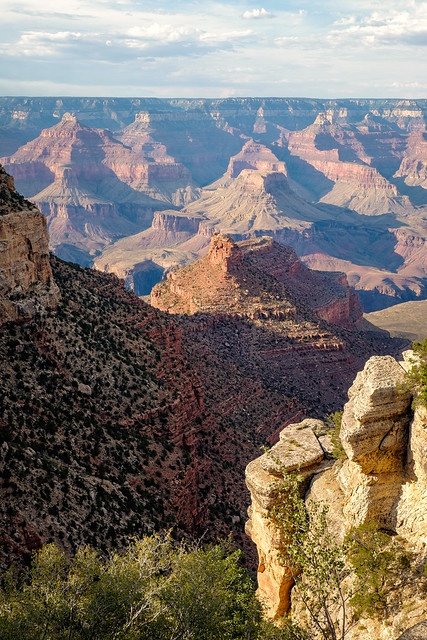
Grand Canyon South Rim 7/25/2014 at 1:30PM

Grand Canyon 2014
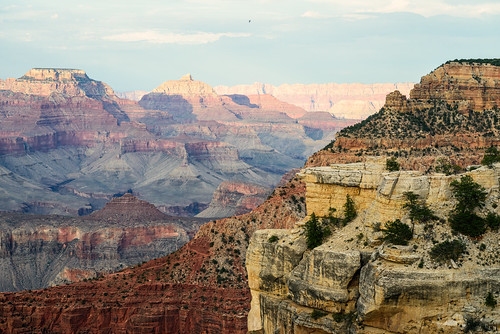
Grand Canyon South Rim 7/25/2014 at 6:55PM

What we have here are some photos I stumbled upon from my recent west coast vacation that are very similar compositions of roughly the same area of the Grand Canyon taken with two different cameras. I didn’t do this on purpose, but I was pretty impressed with the similarities in the overall quality of the images that two very different cameras produced. If I had planned out this post while I was out there, I would have shot two identical shots on a tripod with both cameras back-to-back so the time was the same, but I didn’t and still found the quality of the images comparable. Artistically, these are pretty ordinary photos of an extraordinary place, but I could spend all day from sunrise to sunset shooting and at the end of the day, and if I’m lucky, I might have a photo or two that I would be proud of (I’ll show you those in a different post soon).

Let’s talk about the non-technical differences of these first two photos caused by the time of day. The photo at the top was taken in mid-day sunlight. You can see a lot of hard contrast, you can see the shadows of the clouds on the canyon below, and everything is lit pretty evenly from the front to the back of the image. The second photo is at the tail-end of the day, the light is directional and lower in the sky to the left of the frame. Everything in the front and middle are in the shadows, while the back is hit with very warm sunlight. So when I’m comparing these two images, I’m not thinking about which image is more aesthetically pleasing, but how well the camera’s handled the situations at hand.

Both of these images display what I would consider a fantastic demonstration of dynamic range. There are details in both the shadows and highlights, and the transition and color is very much like what I saw with my naked eyes. If you had a less-than-capable camera, the top image’s areas of contrast would be completely black, while the bottom image’s highlights would be blown out.

One photo was made with my “Pro” camera, the Nikon D800 – The camera I use for commercial work, and the other was made with my “Fun” camera, the Fuji X-T1 – The camera I use for just about everything else these days. The Nikon is a full-frame 36 Megapixel beast of a camera, while the Fuji is a 16 Megapixel cropped sensor camera that is quite small because it’s also a mirror-less camera. Can you guess which one is which?

Here are the settings for the top image: f/11, 1/210, 55mm ISO 200

Here are the settings for the bottom image: f/8, 1/250, 70mm ISO 400

The top image was made with the Fuji X-T1 using the 18-55mm f/2.8-4 “kit” lens, and the bottom was made with the Nikon D800 using the 24-70 f/2.8 lens. You could get the Fuji with the kit lens for less than the cost of just the Nikkor 24-70 lens itself!

Now, let’s take a look at two images taken at wider angles closer to the same time of day with the two different cameras. These two images are very different compositions so it’s a little harder to compare them.

Grand Canyon 2014
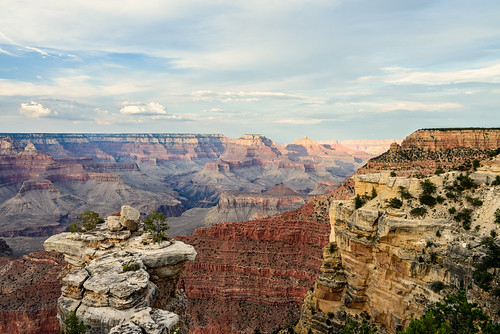
Grand Canyon South Rim 7/25/2014 at 6:00PM

Grand Canyon 2014
Grand Canyon South Rim 7/25/2014 at 7:00PM

Here are the settings for the top image: f/8, 1/160, 27.7mm ISO 200

Here are the settings for the bottom image: f/8, 1/250, 28mm ISO 400

Once again, the Fuji is on top and the Nikon on the bottom. It’s pretty crazy how well the Fuji stands up to the Nikon. Realistically, you can make similar exposures with an iPhone, although there wouldn’t be nearly as much detail when blown up or printed and the dynamic range wouldn’t be as defined. But, when looking at them at this size on your phone or computer, they would look pretty close.

So that leads me to this last comparison that lesser cameras would crumble under – A sunrise.

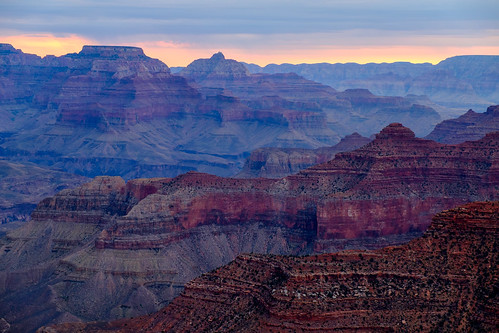
Grand Canyon Sunrise (Nikon D800)
Grand Canyon South Rim 7/26/2014 at 5:45AM

Grand Canyon Sunrise (Fuji X-T1)
Grand Canyon South Rim 7/26/2014 at 5:50AM

Same two cameras and same two lenses. This time the exposures are only 5 minutes apart. Now, there is a huge difference in the focal distance as the image above is wider than the second sunrise image. Also, the image on top was sitting on a tripod using a smaller aperture and a long exposure so it’s definitely sharper. The handheld image was shot with a faster shutter speed, larger aperture and higher ISO to compensate. These differences certainly affect the look of the image, so the comparison isn’t technically ideal.

Here are the settings for the top image: f/11, 0.4 seconds, 42mm ISO 100

Here are the settings for the bottom image: f/5.6, 1/60, 55mm ISO 400

As you may have figured out by the settings (the Fuji’s native ISO is 200), this time the Nikon is on top. The Fuji doesn’t compete with the clarity of the Nikon, but I believe that’s mostly because of the difference in the way the image was captured. Overall though, the Fuji made an image that if I told you that I used the same camera for both images, nobody would question it. Given the setup, I was able to compensate for my use of the Fuji handheld instead of on a tripod and make a very solid and richly colorful image. Therefore, I think the comparison works aesthetically.

In conclusion, this very unscientific comparison interested me simply because I never set out to do it in the first place. All of the images were created with no bias for comparing them later – They were just made to capture the scenes with the tools at hand. The fact that I’m able to use a smaller, cheaper, and all-around more enjoyable camera and make images that stand up against a top-of-the-line DSLR makes me happy. The Nikon still technically out-performs the Fuji, but not by a whole heck-of-a lot in these situations.

One last thing – All of these images were given very similar post processing RAW conversions using Lightroom/PS/Color Efex Pro. No elements were removed, and the only cropping was to straighten some of the images.

Another last thing – Robert Donavan sent me this link to Tom Grill’s blog where he did a very similar comparison using a D810 and the X-T1. I think he was a bit more concise with his argument about the use of the final image and how they compare for what he does.


Summer Time

Mackenzie With A Sparkler

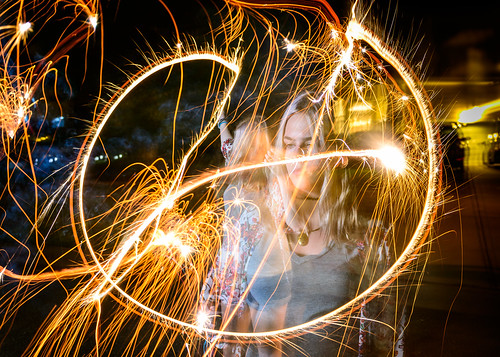
It’s been a very busy year so far – July 4th seems to sneak up and remind me just how fast time slips by. I’ve been busy growing my other business while still working this one. In fact, I surprised my crew yesterday by dragging in a light and a backdrop to the office for some surprise headshots:

Rashaud
Rashaud

Benjamin
Ben

Speaking of headshots, I’ve been doing a lot lately for various professionals in the area. A few years ago, you could only thrive from doing headshots in a major market, but because of social media every professional needs one, not just actors and comedians.

Here’s a couple I did this past week:

Dr. Kelsey Harris Headshot
Dr. Kelsey Harris

Molly Slade
Dr. Molly Slade

I’ve also discovered that my Fuji X-T1 is quite the capable headshot camera. The two headshots of the guys in my crew were taken with the Fuji, while the two doctors were taken using my Nikon D800. While the flexibility gained by the controls, full frame sensor, and lens selection of the Nikon are paramount to shooting professionally, the Fuji’s results are almost indistinguishable when the output is simply an internet profile picture. The only drawback I found with my current lighting rig is that I need to close down the aperture on the Fuji a couple of stops because it shoots natively at ISO 200 and it’s a cropped sensor. That leads to more depth of field when shooting with strobe lights. For headshots like these, it’s not a problem though. For creative portraiture using these strobes it might be limiting, but I think a ND filter or two would help in that case. The look of a lens at it’s proper focal length that you get from a full frame sensor when compared to a cropped one can’t be beat, but like the US Soccer team’s performance in the World Cup game against Belgium, it comes really close by giving it its all – And that’s nothing to be ashamed of.

Sorry, I fell into a technical wormhole. Back to the photos…

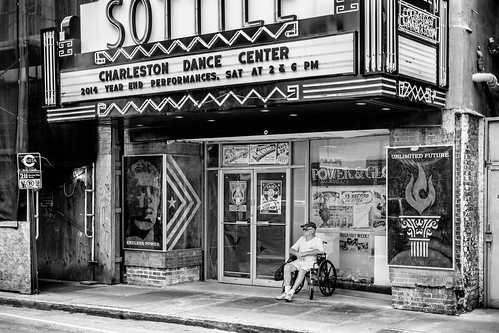
Sottile Theater Installation Obey
Shepard Fairey Installation At The Sottile Theater

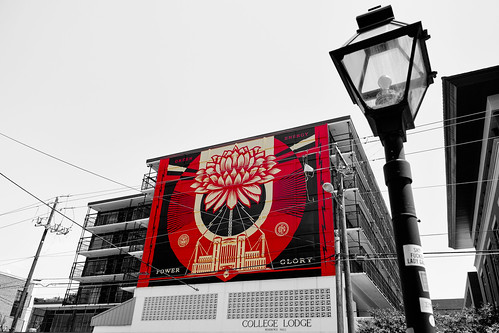
If you haven’t stopped by the Halsey Institute of Contemporary Art to see the exhibit of Shepard Fairey and Jasper Johns, you’ve got ’til July 12th to do so. The work is amazing and inspiring. Shepard Fairey has a few installations in the Charleston area, including the one above at the storefront of the Sottile Theater on King Street. There’s also a few murals that he’s put up, such as this one on one of the College of Charleston’s dormitories:

Shepard Fairey Mural in Charleston, SC
Selective Color Still Lives!

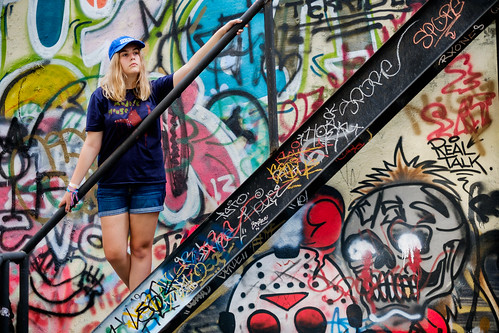
I do love some street art. In the right places, like the back alleys of the city where people store their trash, they bring color and joy. I find the story told by the street artists to be just as compelling as the story told by the architects on the main streets.

Fire Escape
The Other Part Of King Street

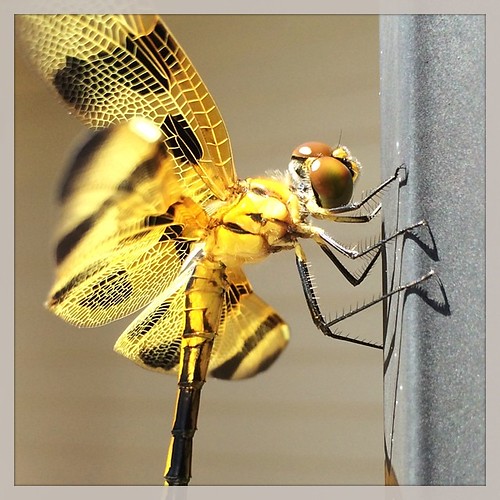
On another note, every once in a while I get reminded of just how amazing the camera in my pocket (the iPhone) is. I snapped this little dragonfly while walking into a client’s office the other day:

Dragonfly posing for an pic!
Dragonfly Instagram

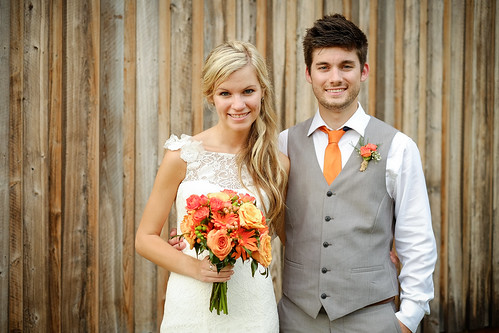
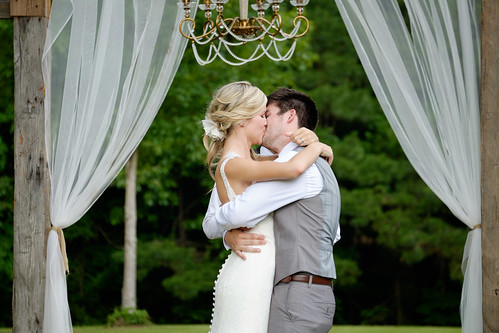
I also got to go to a wedding that I wasn’t working at for the first time in a looooong time. I still managed to take a few photos, but only because I wanted to, not because I had to!

Samantha & Jerry
Samantha & Jerry

Samantha & Jerry
Samantha & Jerry

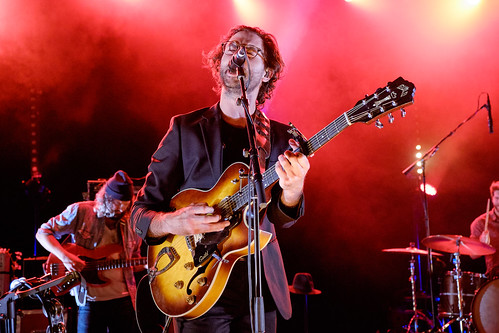
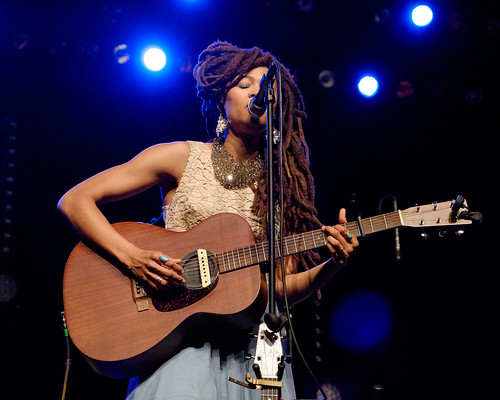
I’ve been seeing as much music as possible and spending some great time with my daughter in the process. We had front row center seats to see the Head and the Heart and Valerie June recently:

The Head and the Heart in Charleston 2014
The Head and the Heart

"Time tells all, but we only get a little slice of it... Then we gotta change" #ValerieJune
Valerie June

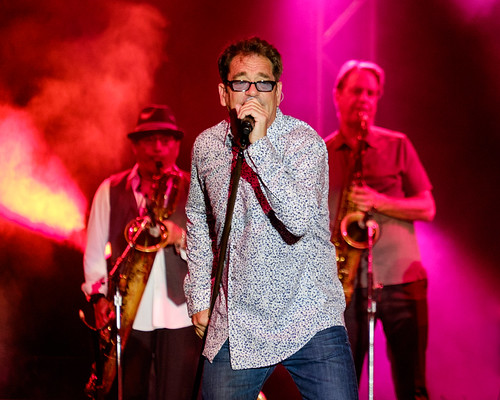
At the start of the summer I surprised my daughter during our “school’s out weekend trip to Disney World” with a visit to Universal Studios to see Huey Lewis & The News!

Huey Lewis & The News at Universal Studios
Huey Lewis & the News

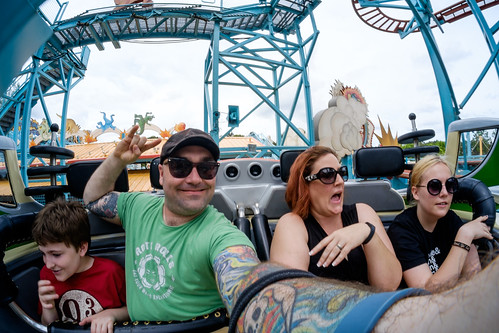
Speaking of Disney World, I captured this family photo with a Rokinon fish-eye lens on my Fuji X-T1 while we rode Primeval Whirl in the Animal Kingdom:

Animal Kingdom 2014
The Nienstedt Family

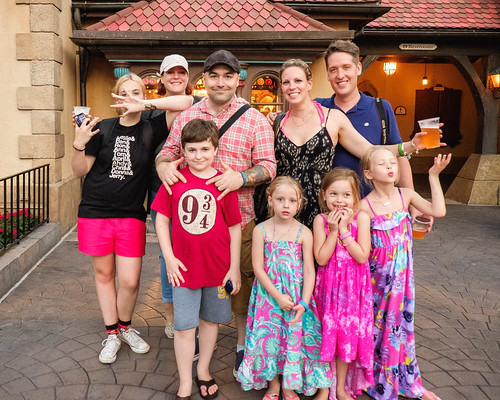
And while we were walking through Epcot’s World Showcase, we ran into some old friends. It’s Paulie Latex and Jenny Jelly of Latex Generation fame! Paul used to sing and play guitar in my band and Jen was our merch girl. I wrote a song about them when we were teenagers about how they would never last. I then wrote a song a few years later about being astonished that they were still together. Now they’ve got 3 girls and have been together for somewhere near 20 years. Holy crap was I wrong!

Latex Generation Family Photo Disney World 2014
Photo by Mrs. Edel

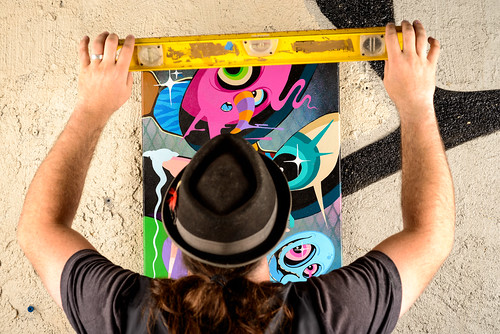
Local artist Patch Whisky asked me to shoot some of his artwork to be reproduced as prints that he’s now selling on his website. It was a different animal to shoot his monsters, but they sat well for the shoot…

Patch Whisky
Patch Whisky

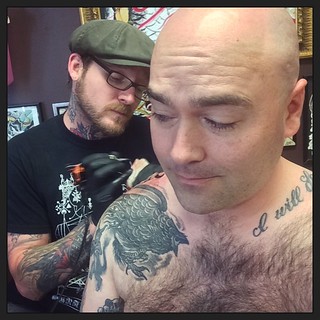
On the topic of artists, I sadly had to say goodbye to one of my favorite artists who gathered his family up and moved to the West Coast. Here I am getting one last tattoo from Rob Junod at Holy City Tattooing Collective:

Getting the Junod one last time (In Charleston) #holycitytattooingcollective #tattoo #IWantYourSkull #nipslip #organicsweater
Rob Junod & a Shirtless Me

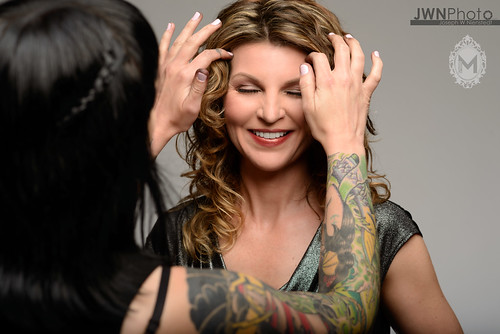
Rob’s wife, Amanda Rose, is a talented hair & make-up artist. I worked with with her recently for Shelly Waters, who hired me to shoot the cover of her upcoming CD. I’m bummed that the Junods had to leave, but I’m happy to see where their journey takes them as they are both immensely talented.

Shelly Waters and Amanda Rose

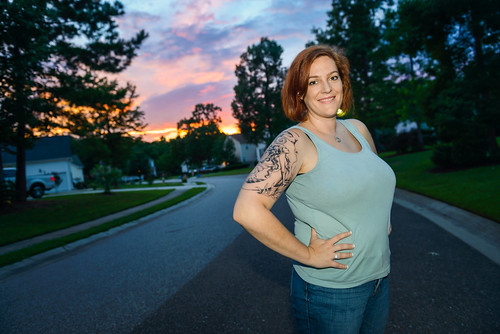
And finally, since we’re on the topic of tattoos and art, my wife Amy paid a visit to Margo at Holy CIty Tattooing Collective just yesterday to start work on a new piece on her bicep. It’s just an outline in this picture and it already looks amazing!

Amy's New Tat Sunset
Amy

I think that about wraps it up for this post. We’re planning a road trip later in the summer, so hopefully I’ll capture some fun photos of that adventure. It’s gonna be filled with plains, trains, and automobiles for sure!


Walking With The D800

21st Century Photography Group Photo Walk

Warning: Nerdy Photographer Talk Below

After Nikon announced the D800, I started watching for the D700 prices to fall enough to where I felt justified in purchasing a previous generation body. But the day after I rented a D800 from CharlestonAVGear for a wedding I found myself placing an order for Nikon’s newest (and IMO finest) camera.

Then I started reading the various photography forums and panic started to creep in because it appeared that I might not get this camera until August!

I had a delivery estimate from Amazon, and then early last week the estimate vanished and was replaced with “unknown”. Gahh! I started following this thread on NikonRumors because some posters were letting people know when various retailers had stock available. I got lucky on Tuesday morning because someone posted that NikonUSA.com had them listed in stock. I quickly ordered one and moments after I placed my order they were listed as out of stock again. Regardless, on Wednesday morning I had the new camera in hand! The funny thing was that I got a notice from another fine camera retailer, Robertscamera.com, later in the day on Wednesday that they had some in stock, so I shared that info on the Nikonrumors forum that helped me out and some other shooters were able to get D800’s from them. Paying back on the forum that helped you is a good recipe for internet karma. And as of now it seems that a lot of people are getting the camera’s they’ve had on back-order for months, so I am assuming that the supply is reaching the level of demand to some degree.

21st Century Photography Group Photo Walk

So, I was itching to go out and use my new tool, since it’s a very different animal than my previous body. The local photography group, the 21st Century Photography Group, was hosting a photo-walk at the College of Charleston on Sunday. A perfect opportunity!

21st Century Photography Group Photo Walk

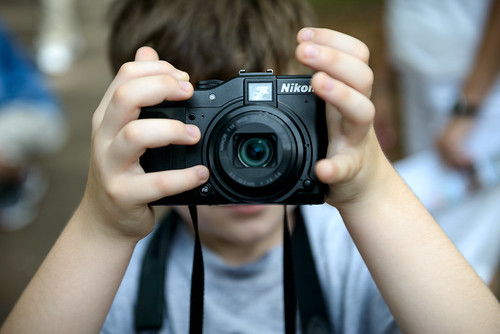
I brought my son Kegan along, who was shooing with my P7000.

21st Century Photography Group Photo Walk

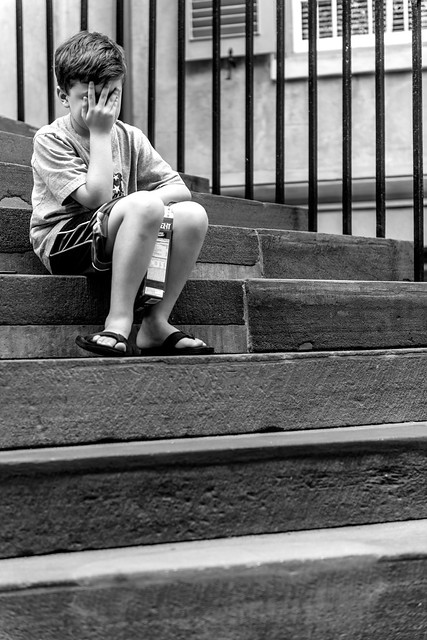
Unfortunately it was quite hot and he was not feeling the whole walking part of the photo-walk. He did get a box of crackers to snack on, but even that couldn’t sooth the savage Kegan 😉

21st Century Photography Group Photo Walk

I’ve been shooting with a cropped sensor for so long now that switching to a new full-frame sensor is introducing a whole new way for me to approach the things I am used to. The focal lengths are now properly represented, so my 50mm lens is a true 50mm instead of the 80mm equivalent on a cropped sensor camera. This means I’ve got to get closer! That has the effect of decreasing the available depth of field, so focusing properly is crucial. The 36 mega-pixel sensor in the D800 also brings another challenge: The resolution is so high that it is not forgiving at all if you have bad technique hand-holding the camera. You can see the effects of camera shake when you view things at the full resolution. Luckily, most people aren’t viewing your images like that, but I think it’s a valuable thing because it challenges you to improve your technique!

21st Century Photography Group Photo Walk

It’s not easy changing the class of bodies either. My D90 is laid out very differently than the D800, so I’m constantly hitting the wrong buttons because they’re not where I’m used to finding them. That’s OK, it’s only a matter of going out and shooting as much as possible that will quickly remedy it. I did have some moments of panic when shooting a wedding with it, but I’ll talk more about that in a future post.

21st Century Photography Group Photo Walk

I can’t wait to shoot some studio stuff with this camera. The resolution is so amazing. I’ll be sure to write another post soon about that experience. For now, I’m buried with post-processing from previous shoots. The good news is that my computer seems to be dealing with the giant NEF RAW files from the D800 quite well, so one of my biggest fears has been put to bed. It does take a tremendous amount of time uploading the full resolution jpegs to Flickr though, but that’s something I can happily deal with 😉

On a side note, I checked out one of Apple’s new Retina Display MacBook Pro’s this afternoon. Holy Balls. My D800 photos look even better on that thing than I could have imagined. It looks like I’m going to need to book a bunch of these real soon!


Privacy Settings
We use cookies to enhance your experience while using our website. If you are using our Services via a browser you can restrict, block or remove cookies through your web browser settings. We also use content and scripts from third parties that may use tracking technologies. You can selectively provide your consent below to allow such third party embeds. For complete information about the cookies we use, data we collect and how we process them, please check our Privacy Policy
Youtube
Consent to display content from - Youtube
Vimeo
Consent to display content from - Vimeo
Google Maps
Consent to display content from - Google