Category: Insight

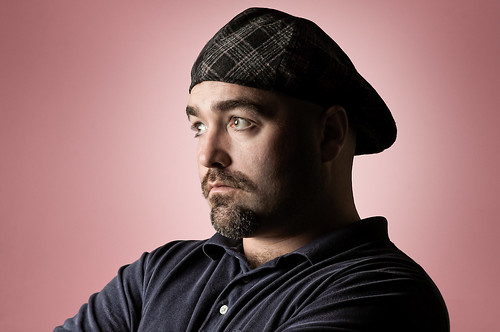
Mutts, Music, & More

2nd Sunday On King St-43

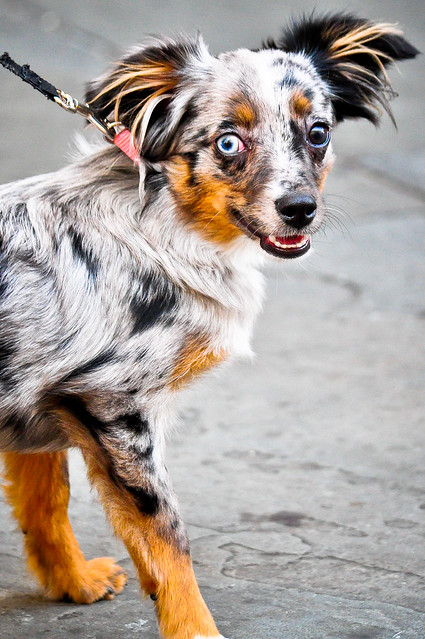
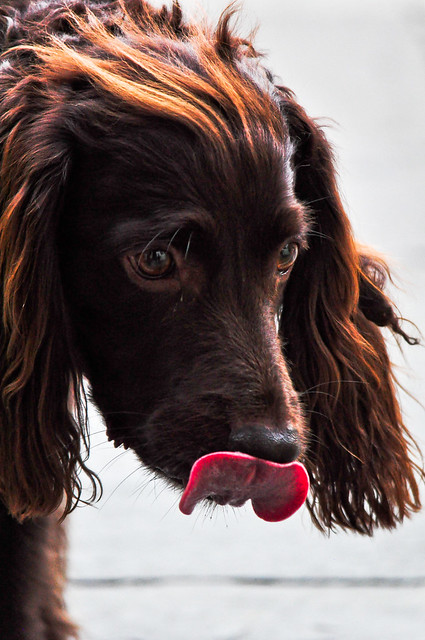
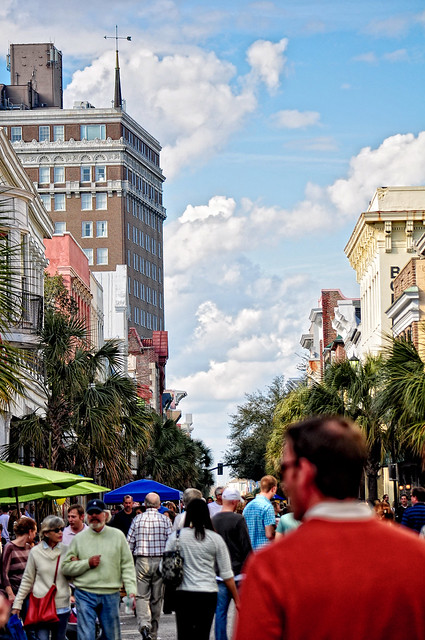
Today was the 1st 2nd Sunday on King Street for 2012 in Charleston, SC. The weather was perfect for Charleston’s monthly block party. Last time I shot one of these, I decided that I needed to focus on shooting more dogs the next time I go, so today was that next time. Let’s start off with the most interesting dog I saw today, a Toy Australian Shepherd:

2nd Sunday On King St-48

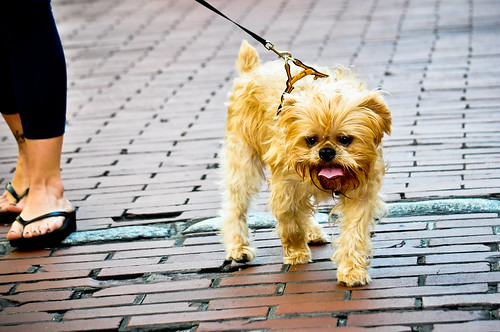
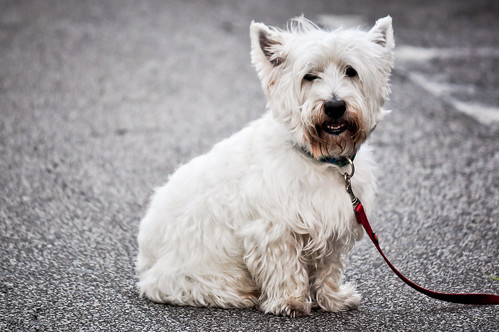
Here are some other stand-outs that we saw:

2nd Sunday On King St-41

2nd Sunday On King St-25 2nd Sunday On King St-38 2nd Sunday On King St-13

2nd Sunday On King St-36

2nd Sunday On King St-21

2nd Sunday On King St-15

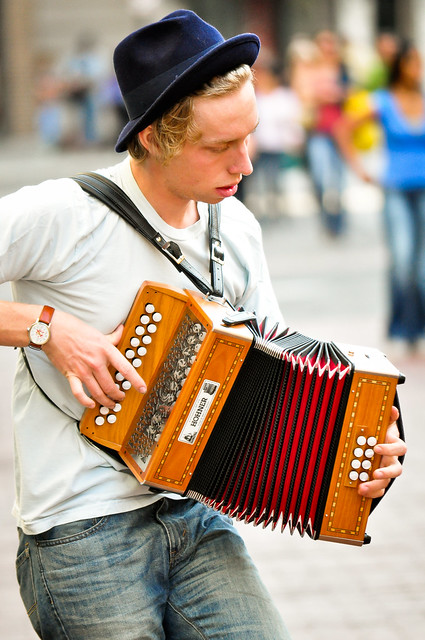
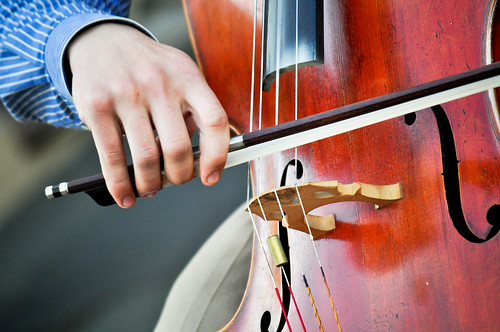
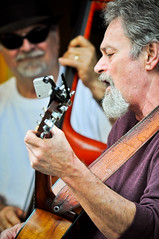
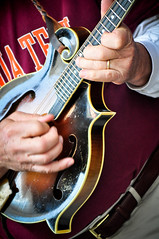
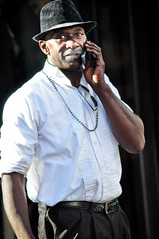
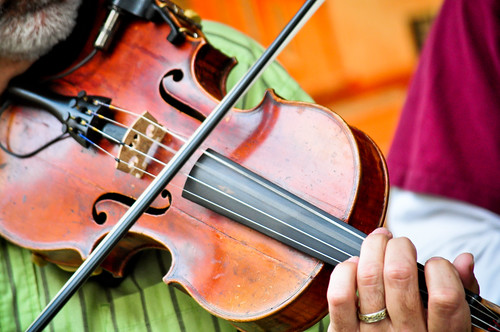
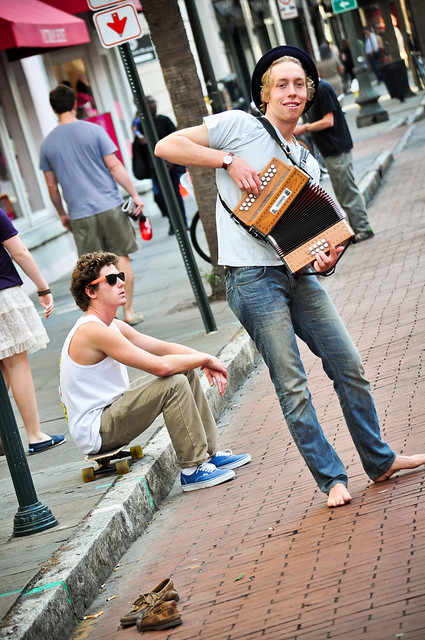
There was also plenty of music courtesy of Shrimp City Slim, Sollie “Puddin” Jenkins, Michael Lindsey, and accordionist Matt Lohan (pictured at the top of this post). Here’s some shots of the musicians on King Street:

2nd Sunday On King St-18

2nd Sunday On King St-29 2nd Sunday On King St-27 2nd Sunday On King St-49

2nd Sunday On King St-28

2nd Sunday On King St-44

2nd Sunday On King St-30

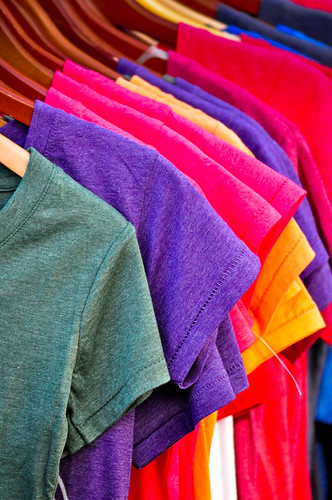
Some stores brought their wares out onto the streets…

2nd Sunday On King St-26

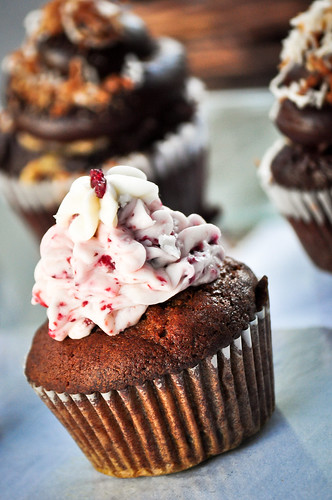
And restaurants their food…

2nd Sunday On King St-33

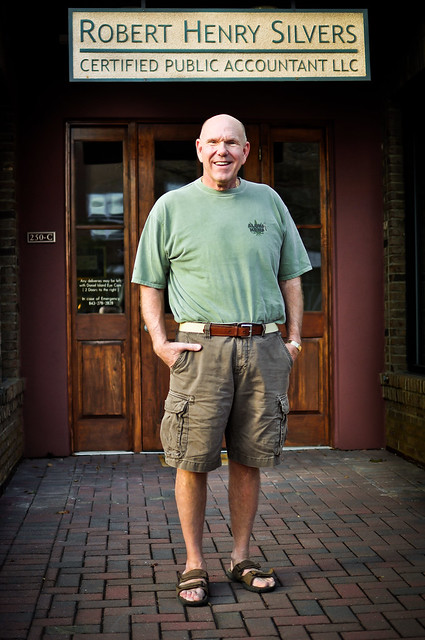
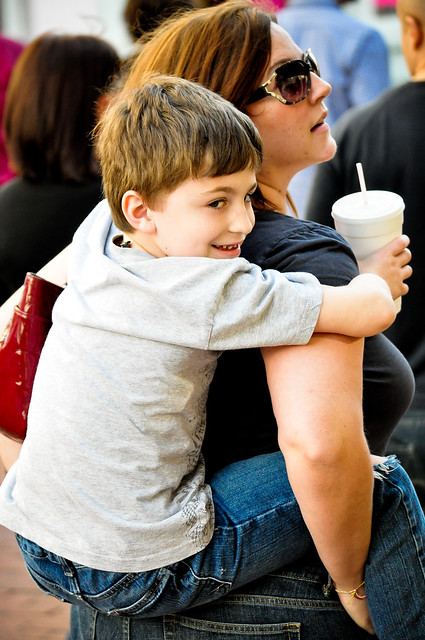
There were plenty of interesting people from all walks of life enjoying the unseasonably mild weather. It felt more like early fall than early winter.

2nd Sunday On King St-51

2nd Sunday On King St-50 2nd Sunday On King St-19 2nd Sunday On King St-39

2nd Sunday On King St-53

We had a great Mediterranean lunch at Taziki’s Restaurant, but had to cut our trip a little short with the news that Amy’s cousin gave birth to her daughter over at MUSC. Crystal was the subject of my very first wedding shoot a couple of years ago! Here’s a shot of her with Kegan in the hospital:

Crystal & Kegan

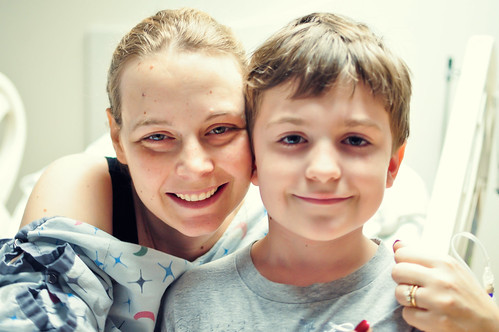
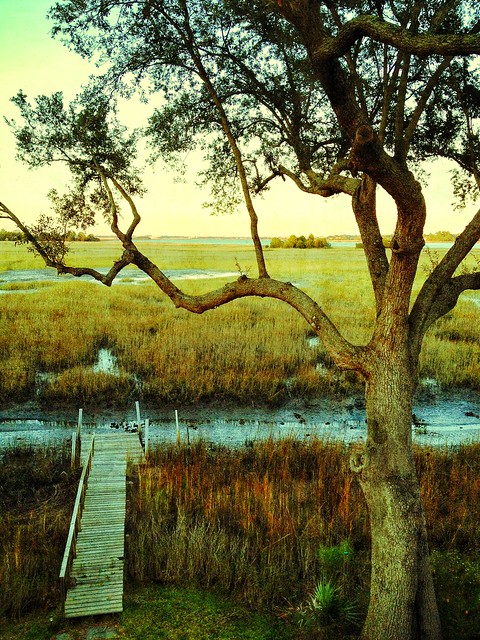
Congrats to the proud parents! After we left the hospital, we stopped by my brother-in-law’s house over in James Island to check out his girlfriend’s new chicken coup. While we were there, there was one of those phenomenal Charleston sunsets, and I used my iPhone to capture this shot of the colorful sky through the trees:

James Island Sunset


Natural Light Portrait

Bobby

Here’s one of my clients who today became an unknowing portrait subject of mine. I received a really cool book for Christmas by Chris Orwig called “People Pictures: 30 Exercises for Creating Authentic Photographs“. The title of the book really spoke to me, and the cover of it screamed “BUY ME!” so I had to add it to the wish list 😉

I just started reading it this morning, and I was happy to see that the forward was written by one of my favorite photo authors David duChemin, who’s latest book, “Photographically Speaking: A Deeper Look at Creating Stronger Images” I’ve also received for Christmas and have been reading.

So the first exercise is to take a very quick portrait with minimal equipment. I was working with Bobby at his office replacing some computer equipment when I saw that the clouds had covered the sun at one point enough to get an environmental portrait outside in front of his doorway. This was the initial shot I made:

Bobby

I framed him just outside of the entranceway to his office with his sign hanging overhead so that it looks almost like it was put there in post. He’s in the light and the background is in the shadow. The short-lived cloud acted as my light diffuser and I chose the slight angle to keep all of those elements together while avoiding as much of the reflections in the windows as possible. I positioned Bobby dead center to balance the sign in the shot. The shadows of the entranceway formed a natural vignette, although I did add a little more vignetting in post even it out on the bottom half of the frame. I shot this with a 35mm prime lens at f/1.8 & ISO 200. I was in Aperture Priority with a +1/3 EV and it chose 1/1250 of a second for the shutter speed. I shot a few frames to nail the composition and a few more to adjust the exposure, and got my shot within a minute. It was that easy, and that was the point – don’t worry about lenses, lights, or filters. Just grab the camera and take a simple portrait of a person without forcing it.

The problem is that once I get the bug, it’s hard to squish it. Inside, I shot a few more shots, including the one at the top of this post which I really ended up liking. He’s sitting between two windows, which made for really cool rim lights. I shot it in manual mode at f/1.8, 1/40th of a second, and ISO 200. I got in close to throw everything past his eyes into a slight blur. I also removed a few blemishes and smoothed the skin slightly in Photoshop (a backlit natural light portrait can be a little unforgiving on anyone over the age of 25) and that’s it. The book is really not about flattery though, it’s about connecting with people, which I believe was a successful attempt here.

There’s also a Flickr group based around the exorcises in the book, and so far there are some really talented photographers participating.


Photo-Tech Update

Charleston

I was recently “forced” into an upgrade of my iPhone to the new 4S model (by forced, I mean I was eligible for upgrade pricing and the home button on my 4 wasn’t working, so I bought a new one). I have to say that I’m floored by the quality of the new iPhone camera. Combined with the amazing photo editing software available on iOS such as Snapseed, you can make truly stunning photos. I’m not saying anything new here, but the newer cell phone cameras have enough resolution where editing photos is far less destructive (at least it’s less noticeable). Photos such as the one above are now at a resolution suitable for printing at a decent size! The dynamic range seems more realistic, and the image stabilization helps combat Mr. Blurrycam (this is especially effective for taking video). I’m very excited about it.

Business End

TechCrunch brought this service to my attention. CameraTrace claims to be able to find your lost camera based on an embedded serial number in your EXIF data. The concept is very interesting, but it seems to me the type of person who is stealing photo equipment will not be uploading pictures to Flickr. It’s more likely that the camera will be sold on Craigslist or in a WalMart parking lot to an unassuming poor photographer who will be the one who gets caught with the stolen goods (I know, because I recovered my stolen camera in a WalMart parking lot from a guy who was reselling my D40 on Craigslist that he obtained in a WalMart parking lot). Still, you might get your camera back! The issue I have is that sites like Flickr and 500px are not nearly as popular as Facebook has become for the average person sharing their photos. If they can find a way to search against Facebook photos, then I’d fully support this service. $10 is a pretty small amount to register your camera though, and it will give you an edge in case you do ever fall victim to camera theft.

Christmas 2011

The last thing I wanted to talk about is the Nintendo 3DS and its 3D camera. As far as I know, this is the first widely distributed 3D camera in the world. It’s unfortunate that Nintendo was cheap in the actual camera quality, because the potential is far greater than the reality. Regardless, a 3D still camera is an amazing tool. As photographers, we’ve been forever battling to interpret 3D reality in only two dimensions on film, paper, and/or digital screens. We struggle to find compositional tools to define depth, but with an actual 3D camera, you can see the depth. The cool thing is that it challenges you to exploit that depth, which actually carries over into a 2D conversion of the same photos. By trying to make a better 3D photo, you are actually making a better 2D one as well. I know that sounds crazy, but it makes sense when you really think about it. By trying to isolate and draw the eye to your subject, you instinctively use the techniques that photographers have been practicing for years. From using the rule of thirds to moving closer to finding leading lines, those techniques become second nature when composing in 3D because you are seeing the actual depth! I think the Nintendo 3DS could be a great training tool for teaching composition.


Merry Christmas 2011

Family Photo

I’m a lucky man. Look at that photo up there – my family is just an awesome group of people. We’re truly grateful for our health and happiness. I setup my portable studio in our living room this evening and we each posed individually. I put this composite together for my personal Facebook Timeline poster, but it turned out so cool that I wanted to share it with y’all.

It has been a great year for me. I’ve accomplished a lot of my goals despite a physically rough start. I’ve grown a lot as a photographer, and with the help of events like Help-Portrait and Angel Walk, I’ve grown as a person. Speaking of Help-Portrait, If you were watching ABC World News on Christmas Eve, you might have caught a spectacular piece about it. It was especially awesome for our MUSC Kids Help-Portrait team because photos from our event were featured in the piece, including this photo of Jesse who inspired my wife and I to start our group:

Dasinger Family

What’s that you say? You didn’t catch it? Well it is almost 2012 – we have the internet to save the day! Check out the piece here.

That brings me to my next point. Jesse was saved by a bone marrow donor. An anonymous awesome person was matched to Jesse and was able to save this sweet boy’s life. Giving service in the form of photography is a fantastic gesture to celebrate our humanity, but I think we can do more in a different way. Today I signed up as a bone marrow donor and I want everyone who reads this to think about doing the same. It’s easy, but I won’t say it’s painless. What’s a couple of days of discomfort compared to a human life? Besides, you have a very slim chance of actually being matched – but you are increasing the odds that a potential recipient will find a match by registering. If you do get matched, all of your expenses are paid (except time off from work) and you’re fully covered medically for the procedure. Furthermore, you will officially become the most amazing person in the world to someone who’s life you’ll potentially save!

Here’s the skinny, go to this website to get all of the details. Sign up here to get your swab kit. That’s it. I also put a widget to the right of my blog in case you forget. If anything, you’ll get that shiny happy feeling when you hit submit on the sign-up form like you just gave a loved one the present they’ve been begging for all year.

If you have the means and are lucky enough to be healthy enough to be able to do so, I encourage you to just do it. I hope you have a fantastic holiday this season no matter what your beliefs are, because we are all here now and all we truly have is each other. Merry Christmas!


Help-Portrait Charleston 2011

Help-Portrait CHS James Island

I had the pleasure of not only organizing a Help-Portrait event at MUSC Children’s Hospital again this year, but also of volunteering as a shooter for the Charleston Help-Portrait group at the Convoy of Hope event on James Island. I want to share some of my favorite shots from the day.

Help-Portrait CHS James Island Collage

This was a lot different from the event I organized. I was one of three shooters, we had 2 editors, registration volunteers, and a makeup artist all in one tent!

Help-Portrait CHS James Island

Here are a couple of shots from my phone of the other two shooters at the event:

Help-Portrait Doug
Doug DeLong

Help-Portrait Hansje
Hansje Gold-Krueck

I also got to shoot some other event volunteers, such as these mimes who were performing:

Help-Portrait CHS James Island Mimes

As well as the local fire department:

Help-Portrait CHS James Island Fire Department

I shot a lot of families. It can be challenging to get a group to fit within the borders of a portable collapsible background. There was a lot of convincing on my part to get people as close as possible to each other. Luckily, that also usually got people laughing right away.

Help-Portrait CHS James Island

When shooting kids, I tried to get them to also pose without their parents so they could let their personalities show. Something about taking a picture with adults makes kids squirm, but when they’re with other kids they really seem to open up.

Help-Portrait CHS James Island Collage

I also shot a little differently than I did with the MUSC event. I shot in JPEG normal to make the file sizes smaller and also let the camera handle the JPEG conversions to speed up the processing. I shot over 54 different subjects – and I was one of 3 photogs! Needless to say the editors were very busy.

Help-Portrait CHS James Island

The other change I made was to slightly bump up my ISO to 250 to make my flashes work a little less. I worked 7 hours and never had to change the batteries!

Help-Portrait CHS James Island

I have to say, it’s nice to let someone else worry about leading every once and a while. Being a professional means a lot more than just taking pictures! For this event though, I just had to worry about setting up and making people smile. I still love leading, but it was nice to have a break from the “business” end of things for a change.

Help-Portrait CHS James Island

All in all it was a really successful event. I had a blast, and the subjects I interacted with were all unique and interesting people from all walks of life. I didn’t get a chance to check out the rest of the event, although we had a stage right next to our tent so we were jamming to lots of gospel music, which I was enjoying to the point of ridiculousness (although that could have been the exhaustion kicking in). Everybody was in such high spirits though that it was hard not to have a sore face from smiling all day long. You can view the rest of my portraits from the event here.


Help-Portrait MUSC Kids 2011

Maya

Every once in a while you take a photo that reminds you of why you love photography. Help-Portrait is an event where every time you press the shutter you make that picture.

Marquaja

On Friday, our small group of volunteers headed back to the atrium at the MUSC Children’s hospital in downtown Charleston, SC to give portraits to families of children who are being cared for there.

Megan

This year, the organizers of Help-Portrait have reversed their stance on sharing the photos of the subjects and have in fact encouraged us to do so. I’d like to share the photos I took of our 13 subjects during the event.

Morgan

It’s amazing to be able to give the families of these kids something in a situation where so much has been taken from them. There is something about a kid smiling with you despite the struggle they’re fighting that makes you value the life we have.

Riley

Sarah

Chandler

Amy was in charge of gathering hats for our wardrobe since hair & make-up really wouldn’t work in this situation. For all the hats that we brought, the girls mostly liked the feather boa!

Lashonda

Emily

As I’ve mentioned before, the inspiration for us to bring Help-Portrait to MUSC Children’s Hospital came from leukemia survivor Jesse Dasinger. Last year, he was unable to participate due to his health. This year, he’s doing amazingly well and was able to drop in with his family to get his picture made:

Dasinger Family

I did have on technical problem that arose from a bad cable, and I had to retake Christopher’s photo here because the first attempt failed. He was a trooper, and was able to re-create the magic:

Christopher

D'Marcus

One of the brightest moments for me was when this girl, Amouri, came to get her photo made. She was also the last subject I shot. I grilled her a bit at first and found out she was a cheerleader. I knew she would be a great subject. She said something that made me feel tremendously enlightened about what goes on at MUSC. I asked her how she was feeling, and she said “I feel amazing”.

Amouri

Another change introduced in this year’s Help-Portrait was the involvement of the participants. We came up with the idea to bring plain wooden picture frames to let the kids decorate them with – they loved it! John Lindroth took this shot of Megan:

Here’s the team photo shot by one of the staffers at the hospital:

Help-Portrait Charleston SC MUSC Kids Team

Drew, John, & Eugene also have some photos of the event that I’ll share soon. All of the photos will be available here. I also participated in the Charleston Help-Portrait group at the James Island Convoy of Hope event yesterday. I’ll be sure to write up another recap of that event soon! Stay tuned…


Last Week of Movember

Movember Week 3

All right loyal photo enthusiasts, friends, family members, lurkers, and internet bots. I know you’re reading this (I see the analytics reports). It’s time to give back! Help me raise money for men’s health charities through my Movember page. Even if it’s a couple of dollars. Anything you can afford to donate will help.

Movember Week 2

Over the past 3 weeks, I’ve gone through the effort of making self portraits to document my facial hair growth. I do have an ulterior motive though – I’m trying to get your attention with them. Much like the actual mustache on my face starts conversations with the people I see on a regular basis, I’m posting these pics online to spark your interest in helping us men folk out.

Movember Week #1

The time is here and now. Head on over to my MoSpace page and help out if you’re planning on helping. We’ve only got this last week to go, and I’d really like to see just how much of a difference this little website can make.

Thanks for reading,

Joseph W. Nienstedt


Emily & Joe

Emily & Joe

Last month I shot a really cool wedding on Folly Beach in South Carolina. The couple was amazing as they were willing to do just about anything – they truly had fun at their wedding and it shows in their pictures. Lets be honest, how many people have a wedding party photo like this?

Emily & Joe

I did do a lot of more formal portraits such as this (which is probably one of my favorite shots of the day because of that amazing southern sunset):

Emily & Joe Sunset

But I’m sure a shot like this will make them smile pretty wide when they’re old and gray:

Emily & Joe

Joe & Emily really weren’t your traditional couple, which is a perfect fit for me since I’m not a traditional photographer! I did make sure to cover the basics of wedding photography though, such as capturing the elements of an American wedding.

WeddingCollage1

Here’s the bride getting prepared:

WeddingCollage2

And the first look:

Emily & Joe

The respective wedding party portraits:

WeddingCollage7

The ceremony:

WeddingCollage4

And the first kiss:

WeddingCollage5

The signing:

Emily & Joe

And then of course, everybody’s favorite part of the wedding, the reception. Here are some elements of their tables:

WeddingCollage3

The first dance:

WeddingCollage6

I did grab the newlyweds to do some sunset portraits during the reception. Joe didn’t know that he was going to be my movable sandbag for a few shots:

WeddingCollage8

After the sun went down, they partied:

WeddingCollage9

And Joe found the garter and Emily fed him some cake:

WeddingCollage10

I can honestly say that with couples as fun to shoot as this, wedding photography can be a blast. I consider myself lucky to have been their photographer for their special day.

Emily & Joe


Goodbye


Grandma meets Kegan

When I was in grammar school, the teachers would always ask me, “Joseph, why do you talk SO LOUD??” and my reply was simple and honest; “Try living with my Grandparents”. Yelling was the standard form of communication in my childhood home. My grandmother would start every conversation with “You need to speak loudly and s-l-o-w-l-y”.

Being raised by your Grandparents is not an easy thing for a kid. My daughter asked me just this past weekend if I ever had sleepovers at my house when I was a kid, to which I replied “No honey, I lived with my grandparents and my room used to be their closet before I moved in” Those are two things that make for an unattractive sleepover situation.

My Grandmother was a force to be reckoned with. She was the lady who called the cops on the local kids when they set off fireworks on the 4th of July (It’s quite illegal to do that in NY). She would send me to the corner grocery store and add up the receipt – if I was a penny short she would send me back to the store to get that penny just because of the principle of it. She once wrote a letter to a trucking company stating that two of their male drivers must have had a deep love interest with each other because they were driving next to each other and talking to each other through their windows, and they couldn’t get enough of each other to the point that they were holding up the passing lane. There was also the time I watched her lay down on the floor in the hallway and then when she was in the right position, she yelled bloody murder. She cried out that she had tripped over one of my toys that was on the floor where it didn’t belong! She didn’t know that I was behind her watching the whole thing unfold, and I didn’t bother telling her that either – it was always better to go along with her version of events.

My grandmother loved to cook, but unfortunately my grandparents both had special diets that older people tend to be on, and therefore most of her food had the consistency of leather boot soles with a side of soggy vegetables. It didn’t taste much better than that sounds either. My brother used to hide his food on the expansion slats underneath the dining room table because he couldn’t bring himself to eat some nights. The day she found his stash, she piled up the rotting food on his plate and made him sit there in front of it until bedtime. I was well known in high school as being the only senior that still ate cafeteria food every day because I thought it was amazing stuff! My friends thought I was weird.


My Grandparents

It may sound like I’m being hard on this woman, but she was a hard woman. She was also a caring and loving mother to me who spent her retirement raising my brother and I when we needed someone the most. She never had children of her own (she was my grandfather’s second wife), and she never once treated us like anything other than her own children. She never held it over our heads that she was doing us the biggest favor in the world by sacrificing her golden years for us – even when we went through our complete asshole teenage years. She always sincerely told me that I could be whatever I wanted to be and I never doubted it. She instilled a confidence in me that prevailed over the deep feelings of rejection and depression that can easily overcome those of us who come from a broken family. She genuinely loved me, and I loved her. It was through her that I learned the determination to become an artist, the work ethic to become an entrepreneur, and the courage to become a husband and father.

Thank you Grandma, I miss you.


BarCampCHS Session Wrap-Up

BarCampCHS Group Photo
Group Photo of the BarCampCHS attendees

Yesterday was the 3rd annual BarCampCHS event, and like last year it was held over at the College of Charleston campus in downtown Charleston, SC. As mentioned in an earlier post, I held a session on Off-Camera Flash. Before I talk about the highlights of my presentation, I wanted to share a bit of the BarCamp experience.

BarCampCHS
30 Seconds To Pitch

After you register and get your bag o’ swag, the attendees gather in an auditorium and the people who plan on holding sessions get 30 seconds each to pitch their idea. As you tell everyone what you plan to do, a counter is counting down behind you (a few people did have to get the mic taken away from them mid-thought). In reality, you only got about 25 seconds to pitch since people started counting down the final 5 seconds. I found it quite entertaining, especially when some mouthy participant trying to hawk a couponing network-marketing scheme went over his 30 seconds and tried to continue without the mic. He was followed by @CaananTully who pitched a session on saving money at the supermarket without using coupons. The crowd applauded loudly. Afterward, the attendees lined up to vote on which sessions they’d like to attend.

With that, sessions began about a myriad of topics, although it was highly concentrated on computer programming. Some of the more popular sessions focused on geek culture, including a session about modifying old Nintendo Entertainment System games such as Super Mario Brothers.

BarCampCHS
Eugene Mah Flaunts His Bathrobe Style

Eugene Mah took a lot of great photos of the days events, and they can be seen here. There is a BarCampCHS Flickr Group to check out, as well as my full set of photos. Twitterer @Pataford has a Ustream channel with some video he took. If you have some content I missed, please let me know in the comments! Now, on to my creative session:

Off-Camera Flash 101 Session


Slides from my BarCampCHS presentation

I started off the presentation by a short introduction and recap of my session from last year on photo editing. I showed some of the photos we made and edited and started talking about the creative use of lighting in the shots. This led to a brief discussion on why you would want to use off-camera flash. I also touched a little on why you would ever use your on-camera flash, and showed an example of fill flash outdoors during a bright and sunny day.

Next, we talked about shooting in manual mode – both on the camera and on the flash. We talked about the benefits of TTL as well as its shortcomings and why it’s important to know how to use manual flash, especially when working with light modifiers. I explained how when dealing with off-camera flash, you can control your ambient light with your shutter speed and your flash power with your aperture settings. Someone asked about ISO settings, and I explained that you want to shoot in your camera’s native ISO when dealing with lighting to produce consistent and clean images.

The next part of the session dealt with the different methods of getting your flash off of your camera. The first method was using bounce flash. I explained that even though the flash is still technically on the camera, the light source is now whatever you are bouncing the flash off of, which is indeed off of the camera. @TheKingOfGames volunteered to be our model as we took some sample shots. We started with a shot with the flash on the camera to reference the difference.


Straight Flash on the Camera

As you can see, the shot is not all that flattering. Someone in the class said “It looks like something you might see on Facebook”. I then showed the differences when bouncing the flash off of the ceiling or wall. In the following shot, I used the projector screen to bounce off of, which was really bright and reflective:


Bounce Flash Off A Wall

You can immediately see the difference in the quality of light. I talked about the softness and direction of the light, which made for a more defined image whereas the straight flash shot was very flat.

Next we talked about using a wire to move the flash off of the camera. The benefit being reliability while being able to cheaply transmit TTL information, with the downside being limitations of the cable’s length. We briefly talked about the different standards in cables, including PC Cables, 1/8″ Audio-Style Cables, and TTL Cables. I had a TTL cable that I use with my bracket, so we took a test shot using the bare flash:


Bare Flash Using a TTL Wire

Since I only had a short cable, I was able to demonstrate the limitation of the distance I could place the flash away from the camera (about arm’s length).

We then talked about wireless flash. I covered the three main methods of shooting wireless: Optical, Infrared, & Radio. We discussed the benefits and issues with each method. Optical is cheap but unreliable. Infrared can transmit TTL information, can be cheap depending on the hardware you already own (it also can be quite expensive if your camera doesn’t support it), and how you can control the flash settings from the camera. It’s also limited to line of sight and is very unreliable outdoors. I took a test shot using the pop-up flash on my D90 in commander mode to fire an SB-600 on a mini tripod to camera right:


IR Wireless Flash Test Shot Using an OmniBounce Diffuser

I spent the most time on radio triggers. I talked about the Pocket Wizards and Chinese knock-offs. I explained that you can buy about six Cactus v5 triggers for the price of one Pocket Wizard Plus II and according to many reviews and tests, the Cactus v5 is more reliable! I also touched on the newer Pocket Wizards and Radio Poppers that are able to transmit TTL information. I explained that for the cost of that convenience, you could be investing in some great lights! Sure it would be nice to justify having the top of the line triggers, but there’s no shame in buying a set of reliable knock-offs when you can achieve the same end-result for a fraction of the cost.


Photo by Daniel Vice @sharpstick on Twitter

I started doing some shots using an umbrella. I demonstrated how to control the flash power by changing the aperture, and then mixing ambient light with flash by adjusting the shutter speed. I showed how to match the ambient florescent lighting and flash lighting by gelling the flash with a green gel and setting the white balance in the camera to florescent.


Umbrella Look

I also talked about sync speed. I demonstrated what happens when you shoot faster than your sync speed:


Shooting Faster Than Your Sync Speed

I then changed the umbrella and set it up as a shoot-through umbrella and showed how it created a different look.


Photo by Daniel Vice @sharpstick on Twitter

I took a few shots as I moved the light around to get a softer look.

BarCampCHS Lighting Session
Shoot-Through Umbrella Look

I also altered the model’s position a bit and added another flash onto my camera at its lowest power setting to try and achieve a small catchlight in his eyes. This was our final result, which will hopefully make for a nicer Facebook profile pic than what we started with 😉

BarCampCHS Lighting Session
Final Shot

We did some Q&A, and I shared some resources for learning about camera lighting. Here’s my list:

joemcnally.com – Joe McNally
strobist.com – David Hobby
zackarias.com – Zack Arias
kelbytraining.com -Scott Kelby

I also wanted to add a pair of new eBooks by Piet Van den Eynde on Craft & Vision. You can pick up each of the two eBooks for $5 each, or buy them both at the same time for only $8. He’s done an excellent and thorough job in the first book of introducing the reader to off-camera flash, and takes you much further in the second one. I think it’s definitely worth more than $8!

Tech Specs For My Presentation

Gear:
Camera: Nikon D90
Lens: Tamron 17-50 f/2.8 VC
Flash: Nikon SB-600
Light Stand: Manfrotto 5001B
Umbrella: Photek Softliter II
Wireless Triggers: Cactus v5
Gels: Cokin Photogels
Mini Tripod: Jobi GorillaPod

I ran the presentation on an iPad hooked up through a projector using Keynote for the slides and Photosnitch for the live demo. I used an EyeFi wireless SD card to transmit the photos to the iPad sans cables.


Privacy Settings
We use cookies to enhance your experience while using our website. If you are using our Services via a browser you can restrict, block or remove cookies through your web browser settings. We also use content and scripts from third parties that may use tracking technologies. You can selectively provide your consent below to allow such third party embeds. For complete information about the cookies we use, data we collect and how we process them, please check our Privacy Policy
Youtube
Consent to display content from - Youtube
Vimeo
Consent to display content from - Vimeo
Google Maps
Consent to display content from - Google