Articles Tagged with: SC

Brewvival 2011 Photo Essay

Charleston Brewvival 2011

When I first arrived at the old Navy Base in North Charleston on Saturday for the second annual Brewvival, I felt a similar feeling as when I walked through the doors at CupcakeCamp. Elation. As a fan of real beer, not that swill most people pass off as beer at sports bars and chain restaurants, I was in heaven. Everywhere I looked, I was surrounded by real honest-to-goodness beer!

Charleston Brewvival 2011

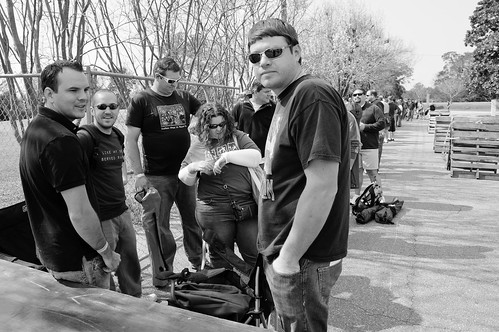
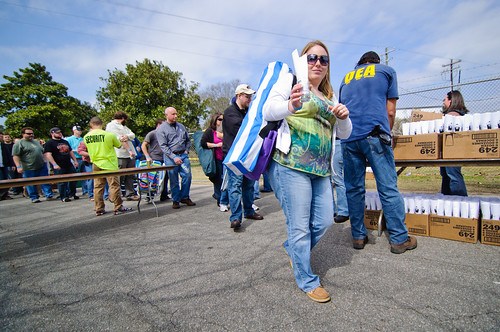
After I pinched myself a few times, I remembered that I had a job to do. I had to captured the day in photos. Where to start? Well, there was the huge growing line of attendees awaiting for the 12 o’clock hour to strike so they could start the party. I walked to the front of the line and met this group of folks who had arrived an hour early to be the first to enjoy the heady goodness that was to be dispensed throughout the day.

Charleston Brewvival 2011

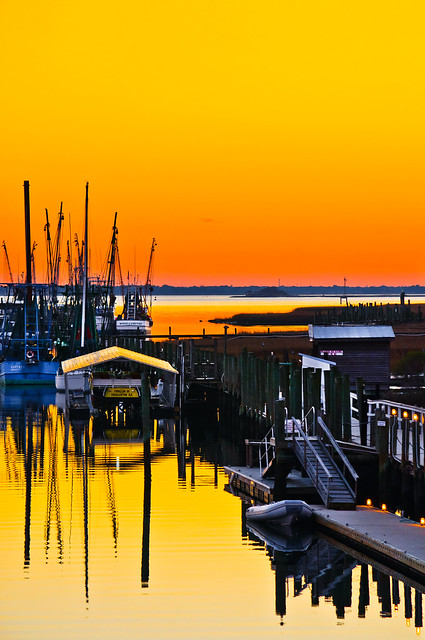
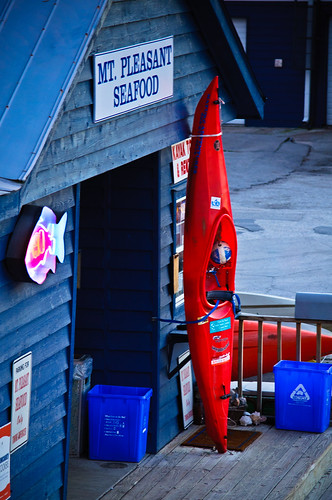
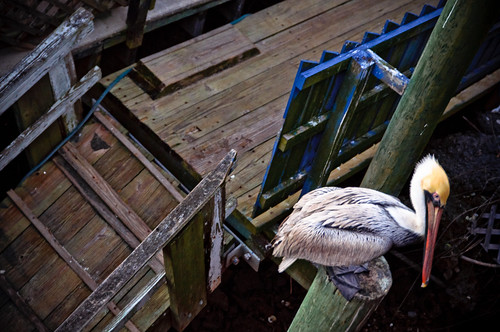
I realized I had a few minutes to check out the grounds before they were filled with festival goers. I walked around taking in the sights of each booth.

Charleston Brewvival 2011

Charleston Brewvival 2011

Charleston Brewvival 2011

Soon, the “gates” opened and some of the happiest people on earth were welcomed with a program and a beer glass as they entered the festival.

Charleston Brewvival 2011

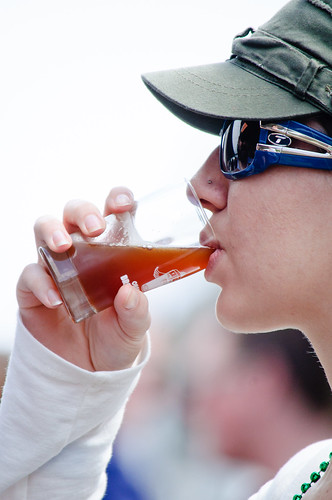
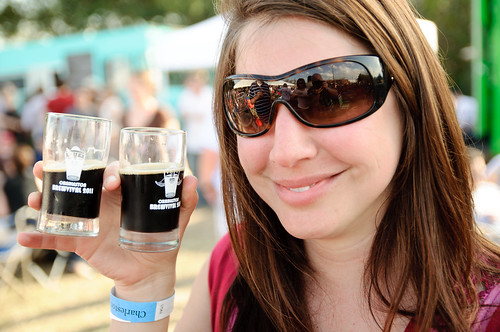
And so it began. People lined up at the booths and started sniffing, tasting, and in some cases, even licking their beer!

Charleston Brewvival 2011

Charleston Brewvival 2011

Charleston Brewvival 2011

Charleston Brewvival 2011

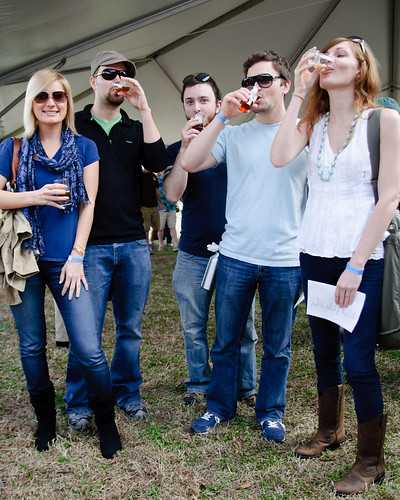
The organization of the festival was brilliant. Lines moved quickly, each brewer was organized in alphabetical order, and everyone had a list of what each brewer had to offer so there was little doubt as to where you could get the beer you wanted to try.

Charleston Brewvival 2011

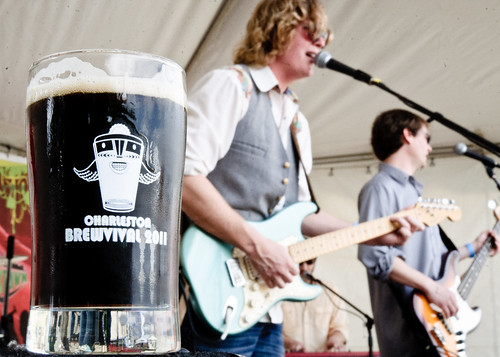
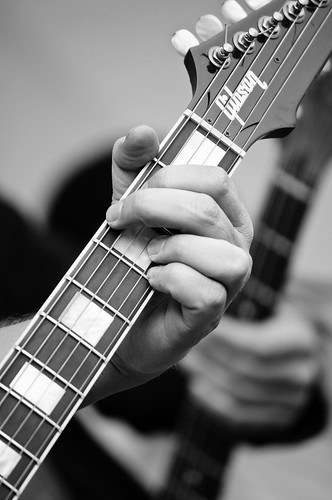
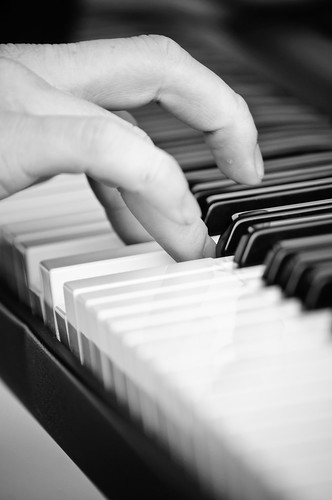
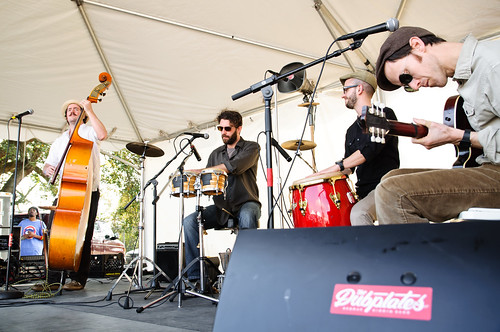
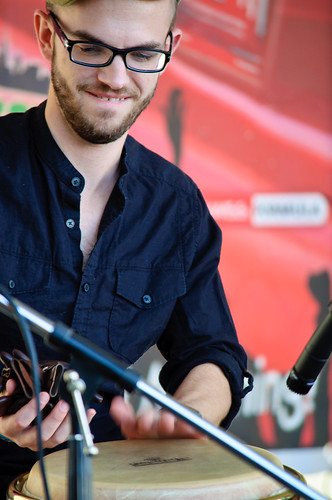
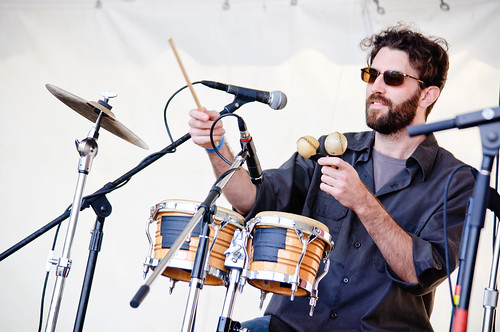
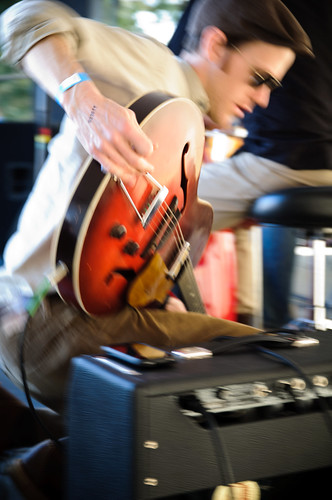
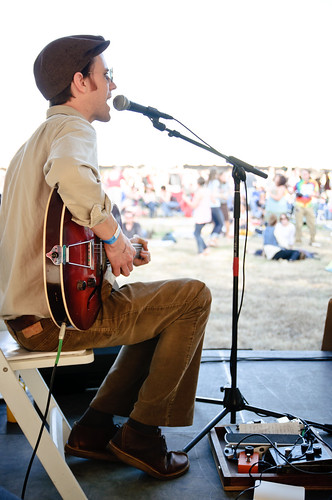
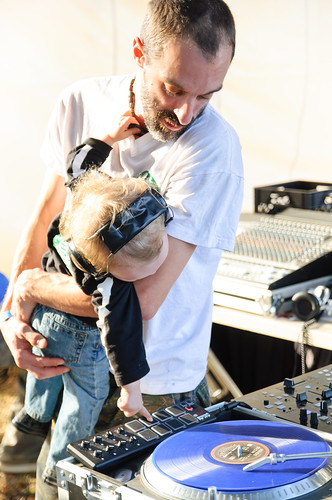
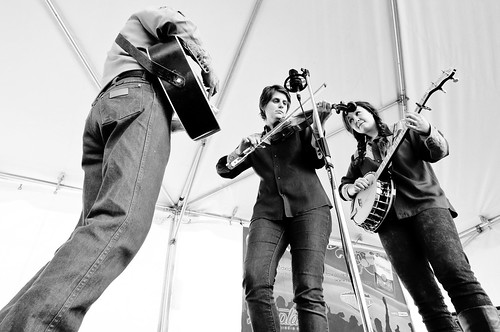
Soon after the gates opened, the rock began with the sounds of Gaslight Street (featured in the photo at the top of this post). Now I was getting into my groove – I love beer, photography, and rock n’ roll (not in any particular order).

Charleston Brewvival 2011

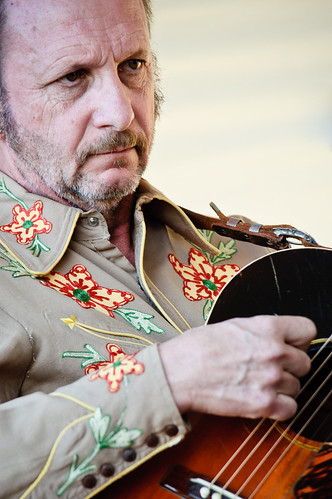
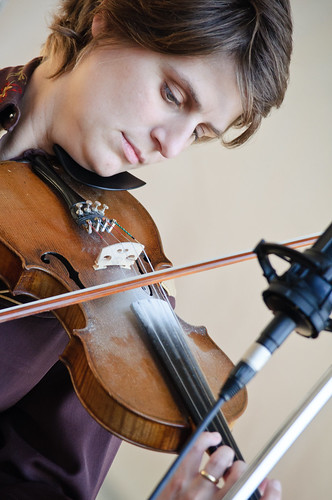
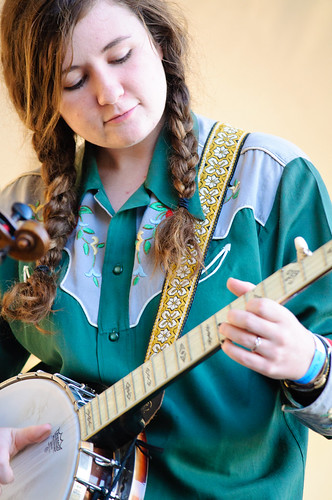
I started to get into it and got in close on the instruments…

Charleston Brewvival 2011

Charleston Brewvival 2011

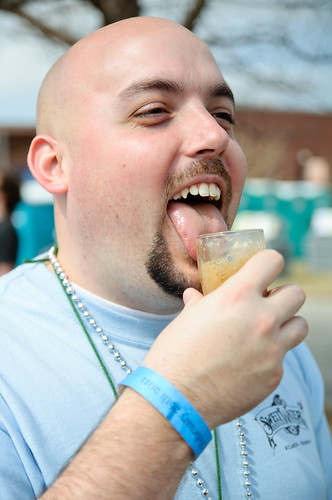
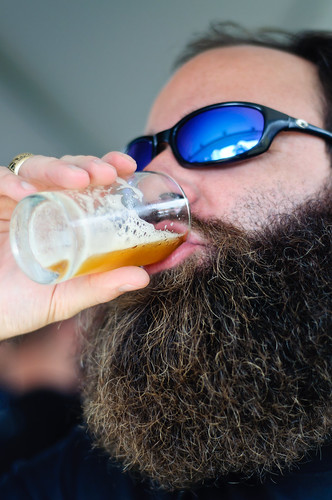
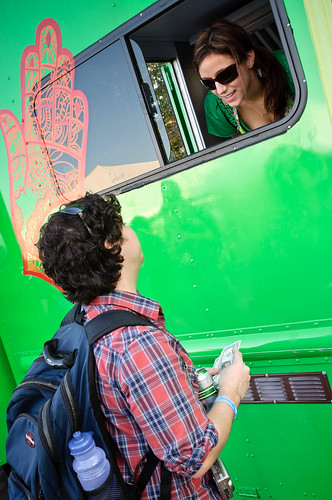
I decided to head back into the crowd for more shots of beard beer drinking!

Charleston Brewvival 2011

Charleston Brewvival 2011

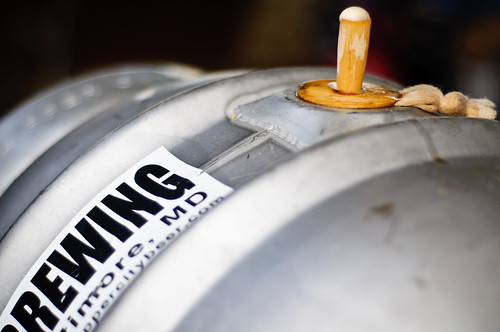
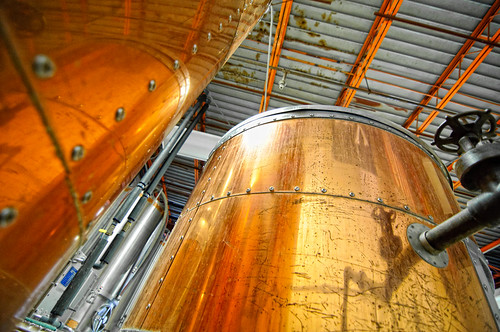
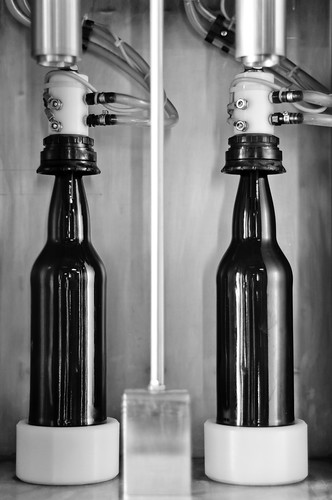
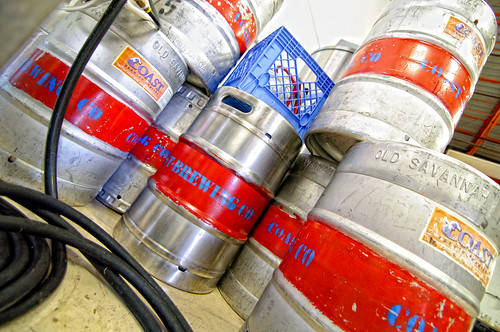
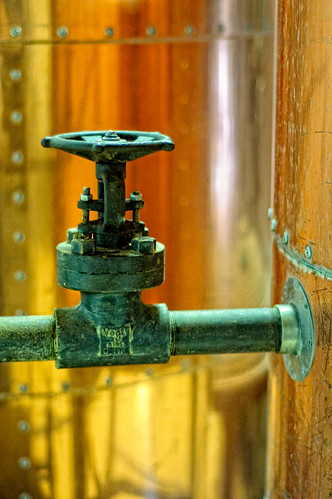
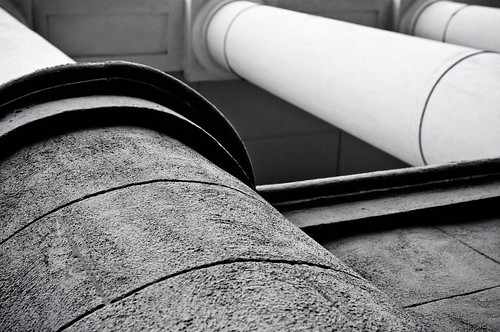
It was lunch time, which I spent inside of Coast Brewery’s facility and enjoyed some amazing home-made food that was prepared for the vendors and brewers. While I was in there, I decided to take some shots of the inner workings of the brewery.

Charleston Brewvival 2011

Charleston Brewvival 2011

Charleston Brewvival 2011

Charleston Brewvival 2011

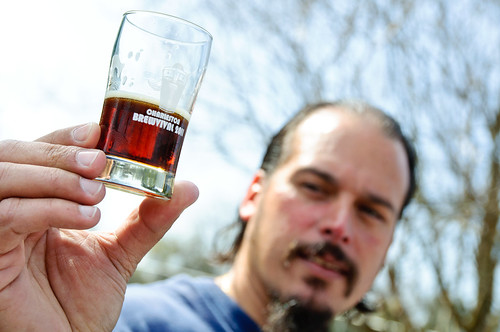
After I was done inside Coast, I headed back outside to the festival with an idea for a shot. I wanted to get the darkest beer I could find and fill one of the Brewvival beer glasses and get a shot of the band behind it. I set the aperture as small as I could to get the most depth of field (and showcase the plethora of dirt on my camera’s sensor). I believe it captures the essence of the day. The shot up top is my favorite, and here is an alternate of the same shot in the key of G:

Charleston Brewvival 2011

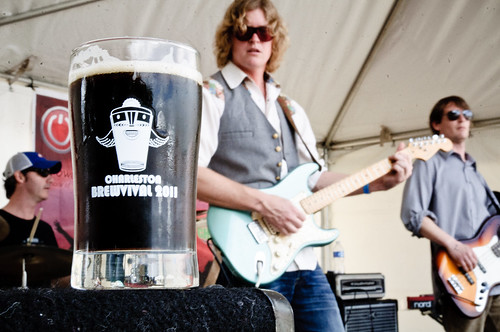
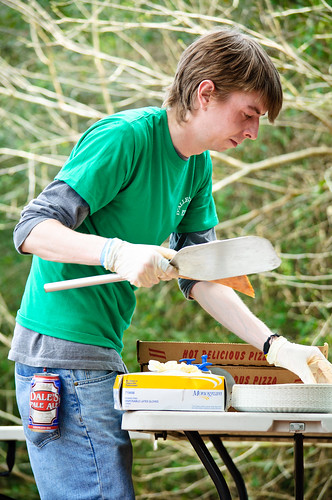
The beer I used was Palmetto Brewing’s Espresso Porter, which was amazing to say the least (I had to drink it because I wasn’t about to waste it). I also checked out some of the food vendors. We had D’Allesandro’s Pizza, Ted’s Butcher Block, Roti Rolls, as well as others on hand to keep the drinkers paced and satisfied.

Charleston Brewvival 2011

Charleston Brewvival 2011

Charleston Brewvival 2011

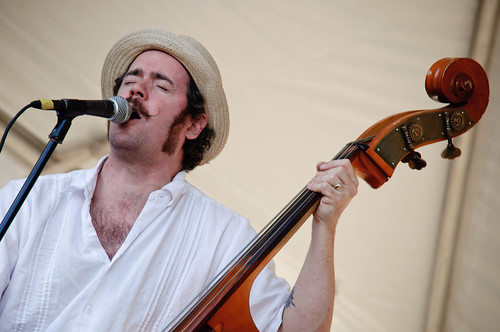
Next up on the stage was the Garage Cuban Band, who played a trippy Latin-flavored soulful sound that was perfect for the occasion.

Charleston Brewvival 2011

Charleston Brewvival 2011

Charleston Brewvival 2011

Charleston Brewvival 2011

Charleston Brewvival 2011

Charleston Brewvival 2011

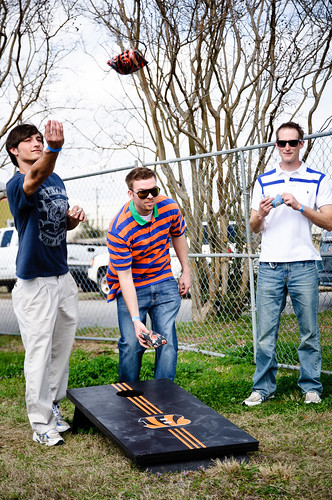
Phew – this is a long post, and I’m still going! After checking out a riveting game of bean-bag toss, I met up with some Twitter Friends.

Charleston Brewvival 2011

It’s @JasonCZ & @SkimTheOcean

Charleston Brewvival 2011

Charleston Brewvival 2011

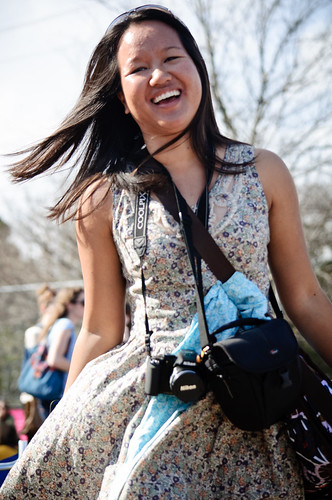
I tried to explain to Jason the art of being a creep with a camera at an event such as this. Sometimes the shot you want is of people off their guard, such as these:

Charleston Brewvival 2011

Charleston Brewvival 2011

Charleston Brewvival 2011

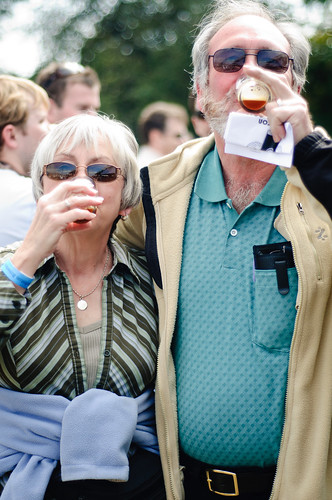
When people know they are being photographed, the tend to step out of their natural character and when you combine that with beer, it may look something like this:

Charleston Brewvival 2011

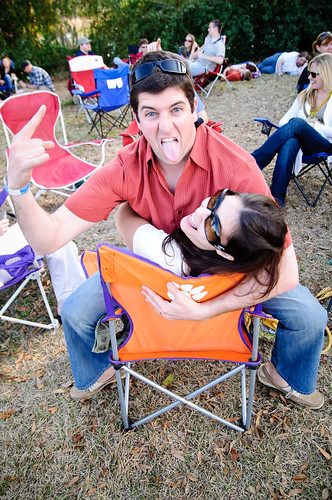
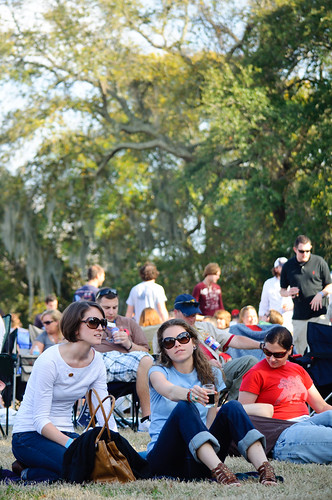
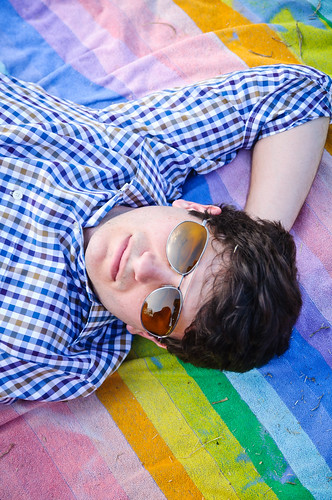
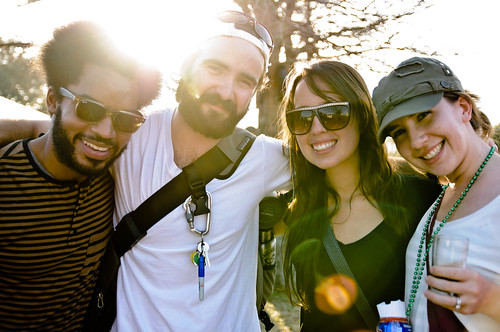
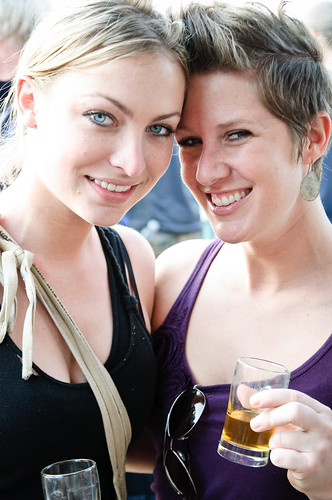
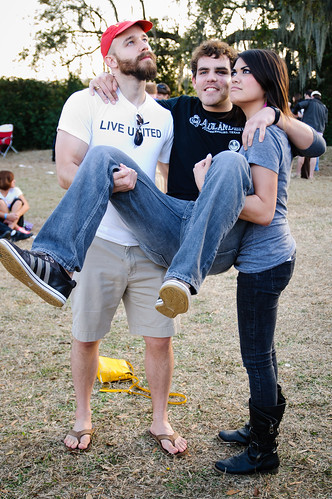
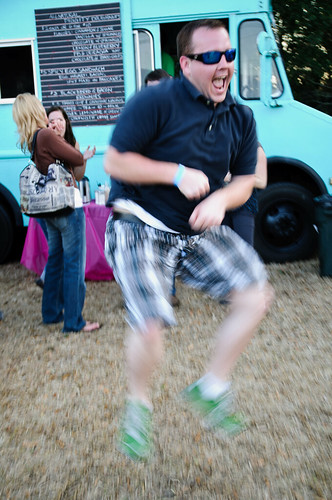
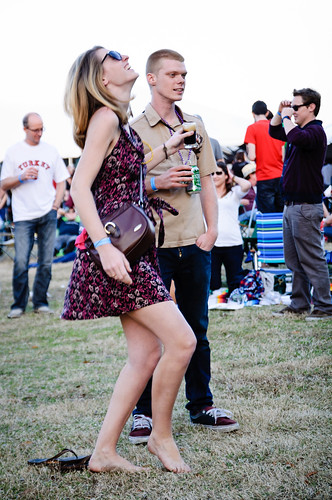
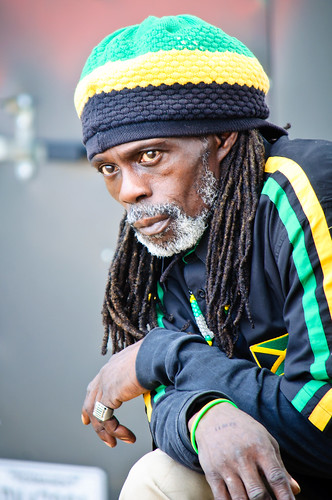
As the day went on, people came out of their shells and it was much easier to approach them for candid shots. Here are some of my favorites:

Charleston Brewvival 2011

Charleston Brewvival 2011

Charleston Brewvival 2011

Charleston Brewvival 2011

Charleston Brewvival 2011

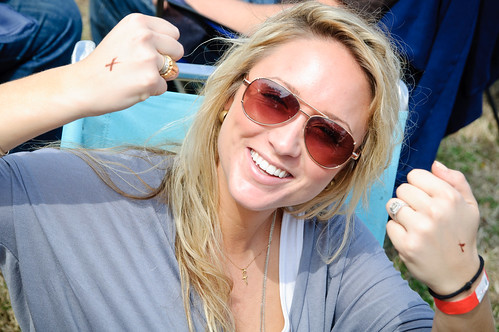
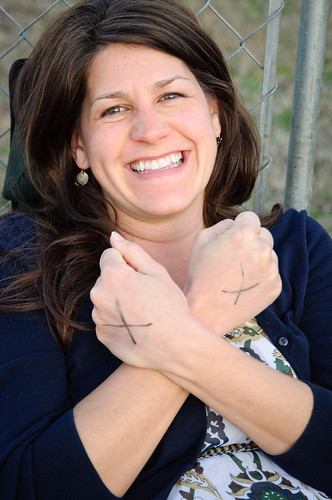
Let’s not forget the unsung heroes of the day. I’m talking about the designated drivers who, donning their straight-edge X’s on their hands, sacrificed partaking in the alcohol bevicide for the good of their fellow man.

Charleston Brewvival 2011

Charleston Brewvival 2011

Guess what time it is? It’s banjo picking, fiddle sticking, foot stomping time! Fire up the Dukes of Hazard car chase scene soundtrack and check out these shots of the SC Broadcasters!

Charleston Brewvival 2011

Charleston Brewvival 2011

Charleston Brewvival 2011

Charleston Brewvival 2011

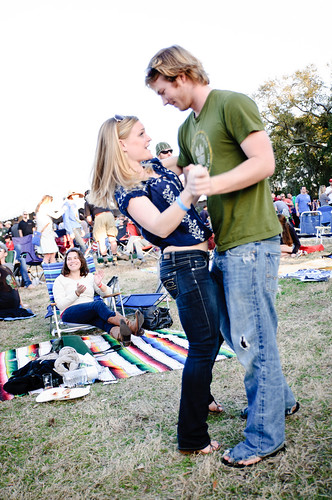
Right about now, the people started to get the itch and some dancing ensued.

Charleston Brewvival 2011

Charleston Brewvival 2011

Charleston Brewvival 2011

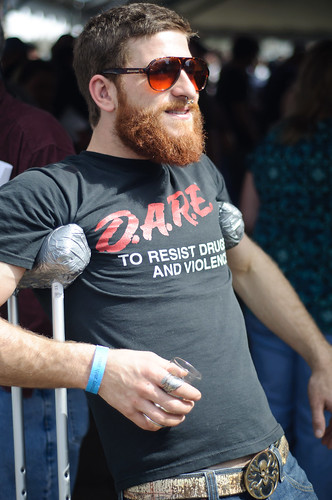
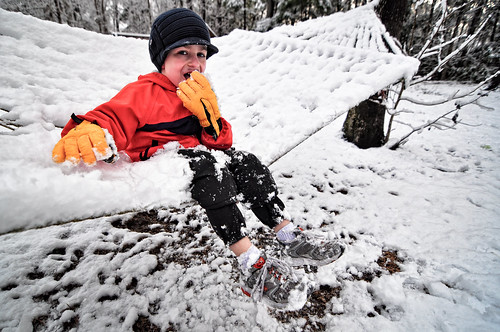
The day was winding down, and somebody with temporary tattoos on his head was getting his skull licked, so I took that as my cue to wrap up my photo shoot.

Charleston Brewvival 2011

I had a blast, and I can’t wait until next year’s event. Until then, I raise my glass to the Brewvival crew and Coast Brewing for putting on a spectacular festival. Cheers! I leave you with this picture of this guy looking awesome.

Charleston Brewvival 2011

Check out the whole set of 247 photos on my Flickr!


Second Sunday On King St.

February 2nd Sunday

Late last year, the city of Charleston decided after the success of the “Do the Charleston” festival to regularly close King Street to traffic on the second Sunday of each month so that the pedestrians could take over (you can read more about the origins here). Today I was finally able to bring the family for an afternoon downtown and also to do some street photography.

The diptych above was a group of people watchers in Ye Ole Fashioned Ice Cream and Sandwich Cafe. They were having a blast commenting on what everyone was wearing, and I told them I was turning the camera on them next!

February 2nd Sunday
1/100th of a sec | f/4.5 | 62mm | ISO 200

It didn’t take long for me to start looking for some decent light and interesting people to shoot. It was mid-day, so the light was harsh and three quarters of the street was in shadow. I found that the slivers of light between buildings was a great side-light opportunity and looked for opportunities to use it.

February 2nd Sunday

I also looked for people who were doing just ordinary things, like eating some lunch…

February 2nd Sunday

…or drinking some coffee…

February 2nd Sunday

…or talking on the phone…

February 2nd Sunday

…or walking their dog…

February 2nd Sunday

…or flipping me the bird while double-fisting some beverages…

February 2nd Sunday

…or looking as happy as can be…

February 2nd Sunday

…or just as pretty as can be.

February 2nd Sunday

I was hoping to get a lot of shots of people dressed up as characters from the “Where’s Waldo” series as there was an attempt to break the Guinness World Record for the most people dressed like Waldo in one place (more info on that here). Unfortunately, they fell quite short of the record. I did grab a shot of these two festive Wandas:

February 2nd Sunday

As with any outdoor Low Country event, the dogs were out en masse. I think the next time I attend one of these Second Sundays I’m gonna focus on capturing the dogs – there were so many awesome dogs out.

February 2nd Sunday

Getting down to the dog’s perspective makes for an interesting composition:

February 2nd Sunday

These dogs looked really excited to be out and about:

February 2nd Sunday

I also made some black & white shots – I knew when I shot this one that it would be perfect as a monotone image – the contrast and negative space are just shouting to be devoid of any distracting colors.

February 2nd Sunday

All in all, I had a blast and cant wait to do it again. I have a hefty set of photos on my Flickr stream if you want to see some of the other shots I made today. Street photography is a fun and exciting way to exercise your creative mind, and you end up meeting interesting people in the process.

February 2nd Sunday


One Year Ago Today

Day 162 - Snow In Charleston

I was searching through my Flickr stream for some valentines day photos when I realized that one year ago today, Charleston, SC was buried in snow! I know my buddies up north aren’t that impressed, but I think it’s surreal to see palmetto trees covered in snow:

Mac Reenacts A Scene From "A Christmas Story"

The snow started vanishing by that afternoon, but the kids made the most of it while they could. They built snow forts:

Mac Playing In The Snow In The Backyard

Had snowball fights with the neighborhood kids:

Carolina Vs. Clemson Snowball Fight!

Tried to make a snowman:

Mac Rolling a Snowball

And of course, made snow angels:

Kegan Makes a Snow Angel

With all of the snow that the rest of the US has gotten this season, we’ve been able to grin as we put on nothing more than a sweatshirt to stay warm here in the low country. These photos remind me that it’s very possible to be put back in our places with a good old fashioned snow storm. My hammock just doesn’t look so relaxing in all of that snow!

Don't Eat The Yellow Snow!

Looking back on the technical side, I should have manually set the white balance on these shots – it’s all over the place when using AWB in the snow.


Walking The Shem Creek Bridge

Shem Creek
1/30th of a sec | f/2.8 | 17mm | ISO 200

Last night I was driving through Mount Pleasant as I find myself doing on a pretty frequent basis, and the time was right, the location was right, and I was prepared. I approached Shem Creek just as the sun was bidding adieu to the coast of South Carolina and pulled into a parking lot. I slung my camera on my shoulder set to manual mode with a fixed ISO of 200 and started walking up the bridge. As I approached the middle, I quickly brought the camera up to my eye and checked the internal light meter. As I tend to do, I made it set to be ever so slightly under-exposed and started firing away. this is what I caught:

Shem Creek Sunset
1/80th of a sec | f/5.6 | 55mm | ISO 200

I dug the foreground of the boardwalk, so now I wanted to isolate the mid-ground area a bit more. I took a few steps forward and zoomed in a little to get this:

Shem Creek Sunset
1/100th of a sec | f/8.0 | 72mm | ISO 200

All the while I keep adjusting my exposure values – specifically the aperture and shutter speed. In the moments just after a sunset, every second that passes dramatically changes the light. Once again I took a few more steps forward and zoomed in a bit tighter to get this:

Shem Creek Sunset
1/60th of a sec | f/7.1 | 100mm | ISO 200

I checked the back of my camera and knew I had the shot I wanted. Now It was time to explore. I kept walking and came up to a glorious blue building that rents kayaks and has a seafood market in the back. How blue is it?

Mt. Pleasant Seafood
1/20th of a sec | f/4.5 | 55mm | ISO 200

That’s pretty damn blue. I needed to capture the entrance to the building. When you get that kind of red against that kind of blue, you can’t go wrong.

Mt. Pleasant Seafood
1/20th of a sec | f/4.8 | 125mm | ISO 200

I really dug the convergence of lines from the wood siding and the angles of the metal roof. The light was really starting to fade, so I switched out to a faster lens and shot this:

Mt. Pleasant Seafood
1/13th of a sec | f/2.8 | 50mm | ISO 200

I decided to look down off the side of the bridge and lo and behold, there were a couple of pelicans perched a few feet below me. I braced the camera on the railing of the bridge and composed some shots of the big birds.

Shem Creek Pelicans
1/30th of a sec | f/2.8 | 50mm | ISO 200

When shooting in this low amount of light at pretty slow shutter speeds it’s quite difficult to capture these birds sharply. They never cease twitching their beaks and adjusting themselves when you are as close as I was. It’s best to set your shutter to burst mode and let it rip once you have your composition. You can shoot a dozen shots and possibly only get one that’s decently sharp if your lucky! You could always bring out a flash, but you’ll get one chance before you send that bird soaring to the other side of the creek.

Shem Creek Pelicans
1/5th of a sec | f/2.8 | 50mm | ISO 200

I was quickly losing light, I was shooting at speeds that require bracing the camera on something sturdy, and I was getting pretty damn cold (at least for just a sweatshirt – guess I wasn’t as prepared as I thought). I only had a couple of more shots left in me, so I started to get a busy composition of the waterside of the blue seafood/kayak building when one of the birds flew right into the composition and landed in the perfect spot to become the focal point of this shot:

Shem Creek Pelicans
1/5th of a sec | f/2.8 | 50mm | ISO 200

Talk about a lucky break! I started to walk back to my car and fired off the shot at the top of this post. The color in the sky was no longer as magnificent in this location (although as I drove home the colors in the sky were unusually deep – the horizon was almost brown for a few moments). I decided to create a split-tone image which basically worked out as such: I first converted the shot into a black and white image, and then I gave the highlights an orange tone and the shadows a blue tone. The result is what you see above. It can add a little more mood to a black and white image as well as make something starkly different. It definitely stands out amongst the rest of the images I shot last night.


More Than One Way

robo-rainbow from mudlevel on Vimeo.

I saw this video this morning (via engadget.com) and thought it was really interesting. As I read through the comments on Engadget, there was one troll on there who was complaining about the uselessness and inefficiency of the machine. I had to chime in and “feed the troll” as they say because it’s apparent that some people don’t see something like this for what it really is. There’s always more than one way to interpret art, and for something like this, the end result is not the whole point of the piece.

One Way

As you watch the video, which was carefully filmed and edited together, you see a man assembling a machine attached to a bicycle. You get close up shots of the metal work, the fitting of the electronics, and the movement of the gears and chains. Each shot isolates a feature and is dramatically demonstrated until we see it all in action – which is shown with a wide shot of it painting a rainbow on a wall. Now, to someone who’s not paying attention, the art was in creating the machine and the filming of the assembly of it. The rainbow itself was just a mere punchline to a well setup joke. If this was about painting a perfectly symmetrical rainbow, then it would be nutty. There are plenty of ways to paint a rainbow without going through the effort that was put into this.

The art is in the creation of it all. The steampunkish contraption itself, the storytelling in the filming, and the final execution all work together. It’s the act of creating something because you can. The message I took from this was that the journey is always more important than the destination. What’s your interpretation?


Pseudo HDR

New Car, Old Charleston
1/1000th of a sec | f/6.3 | 17mm | ISO 1600

Some photos just scream to be in High Dynamic Range, but sometimes you don’t have your tripod with you, or you took the shot and later realized you want it to be in HDR. That’s OK, there are quite a few ways to get the effect of an HDR image without using multiple exposures. I used to take an image and then save 3 different versions of the photo as tiffs – one correct exposure, one I pushed the brightness up to overexpose it and another that I pushed down to underexpose. I would then recombine those in Photomatix to create an HDR image – it works pretty well, but it’s a lot of work.

Here is an example of an image I made using that method:

Kegan Shuts His Eyes

I’ve since found a more efficient way to get the effect and it takes a fraction of the time. I use Nik Color Efex Pro’s Tonal Contrast filter. By running the photo through this plugin first, I’m able to push the dynamic range of the photo by manipulating contrast highlights, midtones, and shadows. The HDR look is really pronounced by pushing the midtone contrast way ahead of the others. Here’s a screenshot of the Tonal Contrast filter settings for the photo up at the top of this post (click it to enlarge):

Nik Efex Pro 3 Tonal Contrast

I also pushed the saturation, because I like my HDR photos to be over-saturated. In doing so, it made the color of the car a purplish-blue tint. It is actually a dark gray, so when I brought the photo back into Adobe Lightroom, I used the saturation selector tool in the HSL panel to select the car and drop down the saturation. While I was there I also pushed the other colors up even more. Here’s what the settings looked like:

Adobe Lightroom HSL saturation panel

I also made some pretty strong adjustments in the basic panel of Lightroom. I pushed the saturation once more and also heavily applied the clarity slider, which can also be used to enhance the dynamic range of a photo. Here’s what those settings look like:

Adobe Lightroom Basic Panel

So, there you go – the end result looks very much like a traditional HDR photo. One last pointer is to make sure you have your aperture set to a small size (larger f number) so that more of the picture is in focus. HDR usually looks like crap on a photo that is exploiting a very shallow depth of field – the bokeh gets real funky and the effect just looks weird.

Here’s an alternate angle of the shot in the example above:

New Car, Old Charleston
1/250th of a sec | f/6.3 | 17mm | ISO 720


iPhone Photo App Review – 100 Cameras In 1

My Creation with "100 Cameras in 1"
The Albermarle | Charleston, SC

There are hundreds of good photo manipulation applications in the iTunes App Store for the iPhone, and a lot of them seem to favor the trend of vintage photography – a trend that is exploiting the poorer resolution of mobile phone cameras when compared to today’s full featured cameras to create a comfortable photo of moments or things that are reminiscent of the shots from affordable cameras from the time before digital. “100 Cameras In 1” attempts to separate itself from the Hipstamatics and instagrams that lead the charts by doing two unique things in it’s latest release.

My Creation with "100 Cameras in 1"
The Albermarle | Charleston, SC

The first thing that sticks out for me in this app is the use of texture blending as an effect. By blending a layer of adjustable translucent texture – from rough surface areas to stones and splatters, you can add a graphical element to your photos that look as though they were printed on recycled paper with expired chemicals and a clumsy hand. This might sound messy, and to the heavy handed photo editor, it can very well be, but it can also make a common image very uncommon. Not that there’s a substitute for composing a good image, but it can force attention to an image that might get overlooked – bringing out the subtleties in a composition through it’s brand of distracting imperfections. One improvement on this would be the ability to add your own custom textures.

My Creation with "100 Cameras in 1"
Arthur Ravenel Jr. Bridge | Mt. Pleasant, SC

This photo made while crossing the bridge above was a throw away shot that I made while trying to capture this one. In an effort to prove my point, I took this otherwise ho-hum image and gave it new life with 100 Cameras In 1. While it’s still not my favorite image by any means, it is more interesting to me than the original. The texture and color effects add mystery and intrigue – it almost makes you search for a deeper meaning to the photograph. It tasks you to search for a reason amongst the chaos of imperfection.

The other feature that is new to version 2 is the ability to change each of the 100 presets with a granular slider. Depending on the nature of the effect, “the slider will change the effect of the texture using overlay, hardlight, luminosity, the texture itself, or other methods.” states the developer, Stuck In Customs (AKA Trey Ratcliff). What this does is allow you to add a hint of an effect and combine it with other effects to create something truly original without overdoing it. The results are simply amazing, and it becomes almost too easy to create images that would take a good level of expertise in Photoshop to replicate through more traditional techniques.

My Creation with "100 Cameras in 1"

The photo above is of my son – I originally took it on New Year’s day to SMS it to our pediatrician because he was swelling up from an infection. I imported the photo into 100 Cameras In 1 and started playing with the effects. I ended up with an overly saturated image using a texture that created a type of effect on his skin reminiscent of Vincent van Gogh’s painting style.

Here’s a promo video from the Stuck In Customs website. They have a page dedicated to information about the app, including a bunch of sample photographs as well as news and tips.

For only $2, you really shouldn’t even think twice about adding this fantastic app to your iPhone arsenal.


Recalibration

B&W Lines
1/80th of a sec | f/7.1 | 34mm | ISO 200

Like many a tool or machine that you use to get a job done, you creative mind needs to be re-calibrated every once in a while to ensure it’s operating to its full potential. If you feel like your in a slump, or if you’ve taken a break from shooting for awhile, a great way to get back into a groove is to revisit some of the basics.

B&W Lines
1/50th of a sec | f/7.1 | 50mm | ISO 200

I’ve been busy with life and haven’t had time to do much creative shooting lately which has been feeling a bit like a rut, so yesterday morning I picked a building that I pass by quite frequently and pulled over to shoot the basics for a few minutes.

B&W Lines
1/80th of a sec | f/7.1 | 38mm | ISO 200

What were the basics that I was focusing on? Well, the primary theme I set for myself for this set of pictures was lines, and the secondary theme was texture. I concentrated heavily on my composition and moved around to deliberately position the forms of the building in ways that pronounced the direction and conversion of the lines. The best way to define texture in this situation is to search for contrasts – light against dark, straight against curved.

B&W Lines
1/250 of a sec | f/2.8 | 40mm | ISO 200

By getting close and choosing the elements of the photo sparingly, you can find interesting design in most any subject. Once you start to see some of the possible images, the creative juices start to flow and before you know it, you’re shooting in the zone. I believe it’s extremely important to exercise your photographic eyes and to do that, you should properly stretch out by revisiting the basics and re-calibrating yourself.


Street Photography

Day 273 - Xylophone Man On Meeting & Market
0.4 sec f/2.8 11mm ISO 200

One of my favorite forms of photography to create is street photography. I remember showing the shot of the girl doing yoga that is featured at the top of this website (or by clicking here) to someone and they thought that it was weird that I was at the beach just taking shots of random people I didn’t know. I explained that that is the beauty of it – you are capturing real life, not posed life. Once people are aware you are photographing them out in public, they change. Sometimes that change ruins the shot.

I bring this up today because I was turned on yesterday by a post on Chase Jarvis’ blog to a very well known street photographer named Scott Schuman who runs the popular blog “The Sartorialist“. If you have a few minutes, watch the video that Chase shared (just under this paragraph) – it’s very inspirational – it will hopefully make you get why he does what he does.

It also reminded me of the legendary photographer Jay Maisel, who after retiring from doing commercial assignments in the 90’s, focused on street photography as well as teaching and selling fine art prints of his work. If you have a Kelby Training account, there is a fantastic series featuring Scott Kelby and Jay doing a photowalk through New York City. Guys like Jay Maisel and Scott Schuman both stress the importance of exorcising your creative mind, and they do it while approaching strangers so confidently that it’s tough not to be inspired by their skill.

King Street
1/60th of a sec f/5.6 200mm ISO 200

One of the things I’ve been known for here in Charleston, SC is my photographs of local scenes and events. I’ve been inspired to add a new “Street Photography” category to my blog to start sharing some of those posts in one organized place. It’s a way for me to have a place to talk about my life experiences when I choose to bring the camera along with me (which is most of the time). I’ve also added an “Insight” category, which is similar to the “Inspiration” category but focuses more on my soapbox type posts about technique, gear, or business, where the inspiration category is about things, people, or events that inspire me. Finally, I added a sub-menu at the top menu of the blog to quickly access these categories so you can browse the blog posts by whatever topic you’re in the mood to read about.

Have a great 1.11.11 – I’ll be more excited for 11.11.11 though 😉


Get A Little Closer

Buildings
1/2500 sec f/5.0 165mm ISO 200

I took this photo of the columns of a church on Hasell Street the other day in this fashion because the light was really hard. Instead of fighting the light, I decided to get in close to exploit the hard nature of it. By focusing closely in on the lines and contours of the columns, I am able to create a graphically rich and textured photo of one of the more defining elements of a grand old Charleston building.

Sometimes the details of the scene can tell more than a wide literal shot. What is it about the scene that attracts you to it? What naturally draws your eye in the real scene (not the one in the viewfinder)? Try isolating those compelling elements and making a photo about them.

Bowling at AMF West Ashley
0.8 sec f/2.8 40mm ISO 1600

In the scene above, the lights had just dimmed and the black lights came on as “Rock N’ Roll Bowling” started at the AMF West Ashley bowling alley. They must have recently replaced all of their rental shoes, because I immediately noticed everyone’s glowing white laces and trim on their bowling shoes. I put the camera down at foot level and focused on the middle foot. Without showing a ball or pin, most anybody who’s ever been bowling before will recognize exactly what this shot is about.

While you should always move around and find different angles, don’t forget to get in close and fill the frame. A lot of my favorite photos are very simple compositions with only a few major elements. The best way to achieve that is to get in so close that there’s no room for anything else!


Privacy Settings
We use cookies to enhance your experience while using our website. If you are using our Services via a browser you can restrict, block or remove cookies through your web browser settings. We also use content and scripts from third parties that may use tracking technologies. You can selectively provide your consent below to allow such third party embeds. For complete information about the cookies we use, data we collect and how we process them, please check our Privacy Policy
Youtube
Consent to display content from - Youtube
Vimeo
Consent to display content from - Vimeo
Google Maps
Consent to display content from - Google