Articles Tagged with: Harry Potter

Happy Halloween

Trick Or Treat
The big night is finally here!

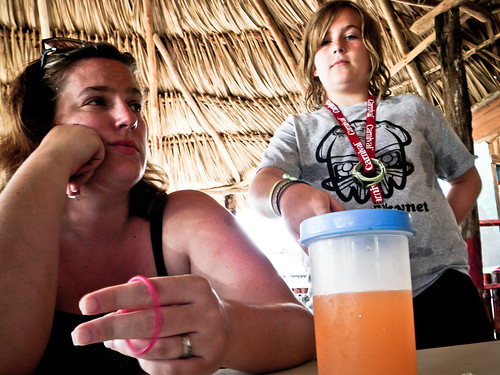
I wanted to quickly wrap up my favorite holiday of the year with some family pics. As you may have read in my last 2 posts (here & here), we’ve had a very busy Halloween weekend.

Halloween Costumes 2011
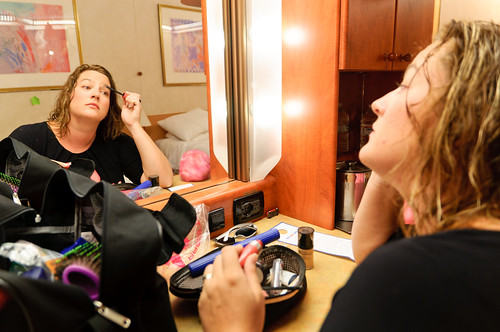
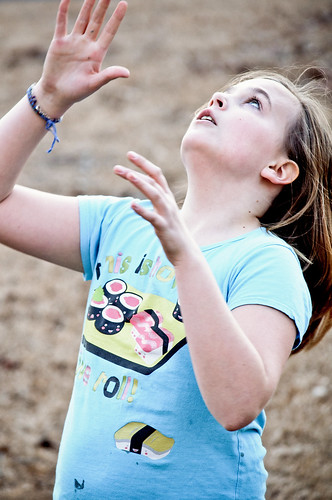
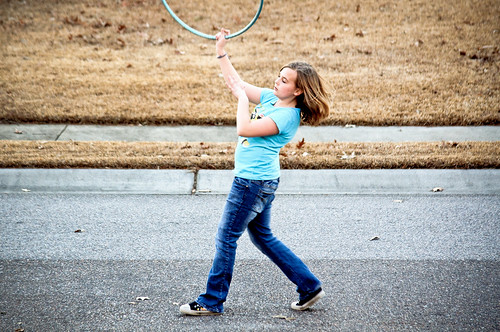
Trying on the Costumes

Above is a shot I took when the kids got their costumes. Below are the portraits I made during one of the photo booths I did this weekend.

GhostWalk - Mac Portrait GhostWalk - Amy Portrait GhostWalk - Kegan Portrait
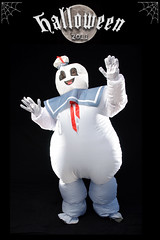
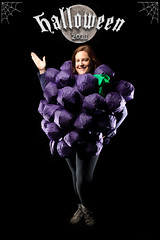
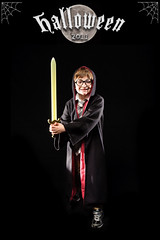
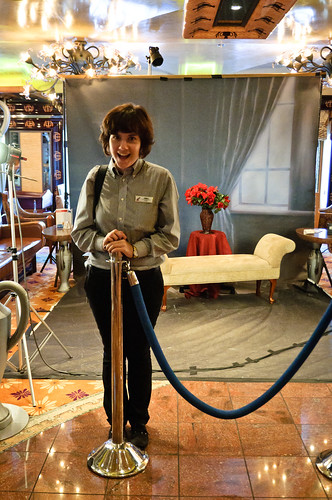
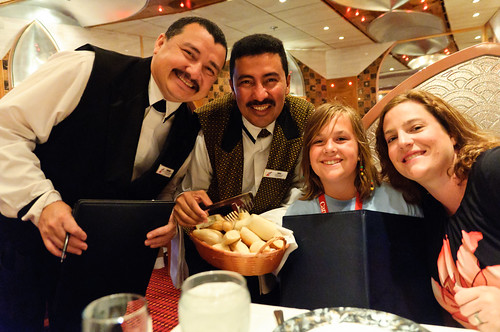
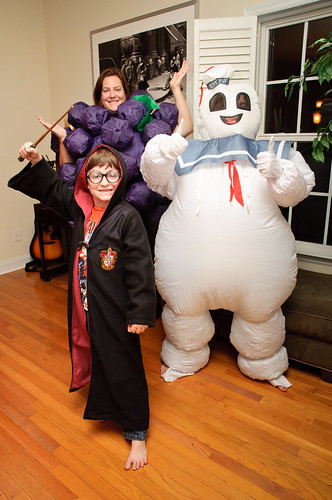
Photo Booth Portraits

We planned on getting our pumpkin carving done on Sunday, but we did not know there was a pumpkin shortage going on! We went to all of the local supermarkets and Walmarts trying to find some pumpkins. We settled on a couple of heirloom pumpkins which were not good for cutting up. I went and got some paint and the kids went to town making their own creations. It turned out to be a creative break from the normal tradition! The kids did awesome.
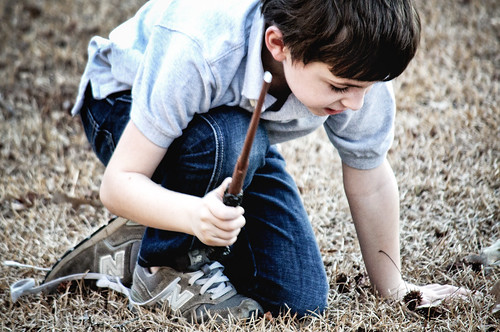

Pumpkin Painting

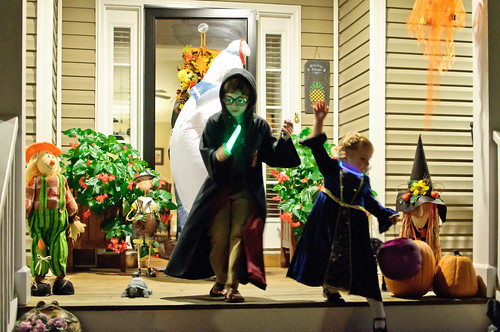
We went Trick or Treating with our neighbors. The adults have decided that we need a similar holiday where you knock on everyone’s doors and ask for beverages. Drink or Treating has all the makings of a great tradition – everyone who participates stocks up on their favorite beer and you just walk around town tasting each other’s brew of choice. No need to call a taxi, as you’re on foot & not far from home. I think we could make this work. Who’s with us?


Trick or Treating


Ghost Walk 2011 Photo Booth

Jana

This post is going to look strikingly similar to yesterday’s, that’s because I used the same setup with some slight modifications. For the WHAIES Masquerade Ball, I had a little problem with my backdrop for the booth. I didn’t have a backdrop! UPS was very tardy with their delivery (next day does not mean next night!!) and I had to head out to the party with a makeshift backup plan. Nothing a little black gaffers tape can’t fix, MacGyver style. I used the school’s stage curtain and some black fabric to make it work. Unfortunately that meant time spent in post production correcting the color shifts between the different black elements. Booooo. This time was different!

Armed with a proper backdrop, I headed out to Summerville, SC for the Ghost Walk/ Harvest Fest/ Harvest Moon Hayride. The new challenge that arose for this booth was being outdoors and contending with very windy conditions. I was positioned up against a brick wall, but the backrop was still about a foot or so away from it. I had to bring down the height of it a bit so that it wouldn’t sail away and I used a combination of tent spikes, stones, and clamps to secure the backdrop. I also left out my umbrellas and used cardboard to flag a pair of bare flashes as the rim lights on either side. Umbrellas are pretty kite-like in the wind, but I actually like the way the non-diffused flashes look for this application. I used a softbox on a heavy-duty c-stand as my main light.

Teeth

Because this photo booth was sponsored by Prudential Southern Coast Real Estate, I didn’t have to worry about collecting money, which meant the tethered laptop stayed at home and I was able to shoot away without administrative concerns (who paid for how many, associating file numbers with names, etc). I shot over 100 portraits in 3 hours! You can check out all of the photos here.

Mira
Mistress Mira Battles Harry (Kegan) Potter!

With that, I’m done with Halloween photo booths for now. Time to carve some pumpkins in preparation for my absolute favorite holiday of the year!


Family Vacation Photos 2011

Cruise-218

I just sat down with my family and my visiting mother to do the old-fashioned post-vacation slide-show deal where we sat in front of the TV and went through our trip pictures shot by shot, reliving the adventures all over again. It brought me back to my childhood when my Grandfather would break out his slide projector and we’d shut the lights and close the curtains to watch them up on his portable movie screen. The technology has changed but the tradition remains, and I thought I would share some of the hi-lights of our recent trip with you.

Olivander's Wand Shop

Our trip started out at Universal Studios in Orlando, FL (I had a previous post with some of my shots of Hogwarts here). Our first stop was Olivander’s Wand Shop, where my daughter Mackenzie was chosen to be the wizard who gets to have a wand choose her.

Kegan & The Elder Wand Honeydukes Family at Hogwarts

Wizarding World of Harry Potter

While we were there mainly for the Wizarding World of Harry Potter, we did take advantage of the rest of the park, including Jurassic Park.

Jurassic Park

Kegan posed nicely on this typical photo attraction:

Surfer Kegan

After a long day in Orlando, we drove over to Tampa to stay the night before embarking on our cruise. I shot this from our hotel room just after the sun went down:

Tampa Sunset

The next morning, we woke up early and got some last minute shopping for stuff we forgot to pack and then headed onto the boat. We ate a quick lunch and greased our vacation wheels a bit with some umbrella drinks, followed by a jump in one of the pools. Luckily I had my Pentax Optio W80 in my pocket all charged up and ready to shoot.

Cruise-3

Kegan stole some kisses from his mommy in the hot tub, while Mac took a spin on the slide:

Cruise-13 Cruise-15

As we departed from Tampa, I tried to get all artsy with the port scenes using my D90 with a 55-300mm lens.

Cruise-18

Cruise-39 Cruise-20 Cruise-35

Cruise-24

As we left Tampa, we had to go under the Sunshine Skyway Bridge, which our cruise ship, the Carnival Legend, clears by only five feet.

Cruise-45

The sunsets heading into the Caribbean are always a must-see show.

Cruise-58

We spent a day at sea relaxing by the pool, drinking fruity cocktails, and eating soft-serve. Kegan shows us here how to walk on water:

Cruise-74

Our first port call was in Mexico on the island of Cozumel. We woke up next to another huge cruise ship across the dock.

Cruise-76

The plan for the day was to ride ATV’s through the jungle. Here I am with Mackenzie on our ATV adventure:

Cruise-89

And here’s Kegan under a hole inside a cave followed by a shot of him holding a baby crocodile:

Cruise-86

Cruise-83

Here I am, all dusty and sweaty as we hike through some Mayan ruins wearing my Wild Tours helmet:

Cruise-88

That was a blast. I wish I had grabbed a shot of Amy holding a python, which is something to behold if you know how much she hates snakes, but they asked us not to take pictures of their snake. The next day we visited Belize where we went cave tubing courtesy of CaveTubing.BZ.

Cruise-105

We had to hike a mile through caves and the jungle with our tubes in hand.

Cruise-107

After about 40 minutes of walking, eating fallen coconuts, and tasting termites, we arrived at the launching point.

Cruise-111

We ventured into the dark caves, linked together, lazily meandering through the Nohoch Che’en Caves Branch Archaeological Reserve.

Cruise-113

Cruise-118

Cruise-123

After the long journey, we were treated to lunch and all-you-can-drink Rum punch back at cavetubing.bz’s compound.

Cruise-125

Before we got back on the ship, Mackenzie had to get some braids in her hair by the infamous Ruth Smith.

Cruise-126

The next day brought us to the island of Roatán, where I awoke early to catch the sunrise as we pulled into the shipwreck ridden bay.

Cruise-138

Cruise-130 Cruise-134 Cruise-133

Cruise-151

After a crazy taxi ride, we arrived at the Bananarama Beach Resort on West Bay Beach to hang out and do some snorkeling.

Cruise-202

Cruise-173 Cruise-171 Cruise-174

Cruise-169

Amy & Mackenzie got to take a ride on the banana boat, where the whole island could hear Mackenzie yelling “BANANA!!!” at the top of her voice:

Cruise-165

Since the West Bay Beach is a public beach, there was no shortage of locals trying to earn a buck from the tourists. These guys were at the least entertaining. Why not make a hat on the end of a dock or maybe catch a barracuda with your bare hands?

Cruise-183 Cruise-206 Cruise-179

The kids had fun swimming out to the floating platform, and jumping off it as well.

Cruise-161

Cruise-225

The water was fantastically perfect. This was the one day I brought my D90 with me on the excursion and I couldn’t of picked a better place to make photos of paradise. I was able to do a little photo-walk on the beach alone for a little while and take in the sights.

Cruise-212

Cruise-180

Cruise-185

Cruise-192

At one point in the afternoon, my wife called me out of the water and told me to look up. I couldn’t believe my eyes when I saw a full rainbow encircling the sun! I wanted to find an element to place it and decided that having the sun peek out from the palm fronds would be the perfect Caribbean scene.

Cruise-215

Phew… only one more shore excursion to go. Here’s a shot of Kegan in our cabin making plans for the evening:

Cruise-227

The next day brought us to Grand Cayman.

Cruise-228

We decided to take it easy and took a quick cab ride to Calico Jack’s where I bought a bucket of local beer and floated in the ocean for a few hours.

Cruise-232

Cruise-233 Cruise-238

Cruise-244

We had one last day at sea before we returned to Florida. Here’s Amy getting ready for dinner:

Cruise-250

I couldn’t resist taking a photo of one of the photographers that lined the sides of the atrium on the way to the restaurant.

Cruise-253

On the last night, I took my wife outside to do our own photo-shoot. Here’s my favorite of the batch:

Cruise-261

After spending a week with your service staff and if you’re lucky to get good people helping you out, you can’t help but get attached to them. Here’s Fernando & George with Mackenzie & Amy:

Cruise-266

And this concludes my vacation presentation. I remember enjoying those “boring vacation photos” as a kid. Our vacations would go by quickly, but the photos brought us right back whenever we would view them.

Many of the pictures featured here were taken on my little Pentax point-and shoot, which, for a tiny little camera with a tiny little sensor, can be a convenient way to freeze your dirty, wet, and hot memories forever. That sounded dirty. Anyway, as usual, I have a slew of photos on my Flickr set.


Winter Desaturation

Winter Kids
1/250th of a sec | f/5.6 | 300mm | ISO 1600

A popular effect in many casual portraits is the washed-out or desaturated look. Taking cues from high fashion photography, people tend to look more attractive as the facial features get even and blown out while retaining a high contrast with their eyes, clothes, and background elements. The difference is in the deliberate heavy-handed approach – you’re not trying to play a photo trick here, you’re making an obvious change to your photo’s look.

Winter Kids
1/200th of a sec | f/5.0 | 180mm | ISO 1100

This effect works best for me when making outdoor photos, and depending on the feel I’m going for, the color of the sunlight and the time of year determines the best course of action. For a bright sunny day, where the grass is green and the flowers are blooming, it’s best to use directional sunlight in the morning or late afternoon and put the subject between you and the sun. The back-light will give a warm yellow halo effect around your subject (make sure to use spot metering to expose for your subject’s face, because matrix metering will be way off when shooting into the sun).

For winter photos, shooting on an overcast day will naturally give you a cold blue color temperature to match the dead grass and barren trees. In the shots here, I was deliberately going for photos that feel like winter in the south. Sure, the temperature was really warm for January when I took these, but the environment and color still help define these as winter/fall shots. The key here is reign in the yellow grass so that it’s no longer a warm yellow. I started the two shots above using Nik Color Efex Pro’s Bleach Bypass. I made more use of the effect’s local contrast slider more than anything else in the plugin. After I did that, I brought the photo back into Adobe Lightroom and performed some tweaks to maximize the effect as detailed below.

Adobe Lightroom Basic Panel

What if you don’t have Nik Color Efex Pro? You can still get similar results using just the basic tools available in Lightroom or Aperture. This shot of my daughter was created without the use of the Bleach Bypass filter. It is less dramatic, but for her I didn’t particularly like the hardness of the filter.

Winter Kids
1/200th of a sec | f/5.0 | 170mm | ISO 1600

You can see that I needed to be a bit more heavy-handed with my Lightroom basic adjustments without the use of Bleach Bypass:

Adobe Lightroom Basic Panel

In the shot below, I used a different approach which resulted in a much warmer effect because I wanted to have contrast between the pavement and the grass. Although it’s more saturated than the other photos, it still has that grainy high contrast and desaturated feel to it. Another factor that is more of a way of exploiting your lenses shortcomings is to shoot at a high ISO. Depending on the lighting, this can give your shots a graininess that looks quite gritty. I’m pretty sure if I was shooting these with faster glass, I would have chosen to add the grain in later to taste, but since I wasn’t, I chose to take advantage of the high ISO look (and by take advantage, I mean I didn’t have much of a choice).

Winter Kids
1/200th of a sec | f/4.8 | 140mm | ISO 800


Privacy Settings
We use cookies to enhance your experience while using our website. If you are using our Services via a browser you can restrict, block or remove cookies through your web browser settings. We also use content and scripts from third parties that may use tracking technologies. You can selectively provide your consent below to allow such third party embeds. For complete information about the cookies we use, data we collect and how we process them, please check our Privacy Policy
Youtube
Consent to display content from - Youtube
Vimeo
Consent to display content from - Vimeo
Google Maps
Consent to display content from - Google