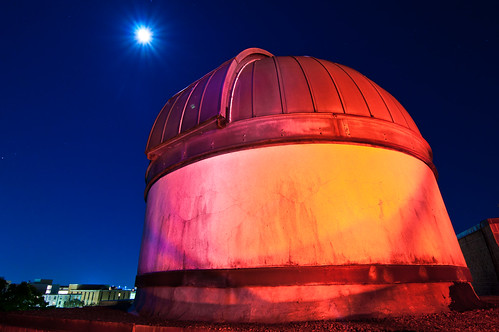
Painting With Light

As I stated in Friday’s post, I love shooting after the sun goes down. One of the coolest techniques you can use to spruce up your long exposures is called painting with light. Basically, you use a flashlight to paint in the object you are trying to photograph in order to make it stand out in the frame. In the image above, there was a lot of ambient light on the right side of the College of Charleston Observatory dome, so I used my Fenix E01 pocket flashlight to fill in the left side.
An alternative to the E01 if you have a camera phone with an LED flash such as the iPhone 4, which is just as bright when using one of the countless flashlight apps available. A step up would be something like the Fenix LD15, which is capable of 117 lumens versus the E01’s 10 lumens (Hint to anybody who’s reading).
What about a much larger object? A puny pocket flashlight can surprisingly make a huge difference, but sometimes you want to really light up a structure, such as this lighthouse. In this situation, a car was parked on the side of the lighthouse and the owner was kind enough to turn on its headlights to illuminate the whole side of the Sullivan’s Island Lighthouse. Even still, I used my pocket flashlight to fill in some of the lighthouse’s left side.

Photography is all about capturing light, so anything that you can use to manipulate or create it is another item in your mental bag of gear. Whenever I shoot something like the photos above, after I compose the shot and take a test frame, I always think of way to improve it while I’m there. You should rarely ever shoot and think about how you can fix it later. In most situations, post processing should be about maximizing the information that you caught, not about changing it completely. Having a flashlight in you pocket that is just a little bit bigger than a AAA battery is a helpful tool to have for more than finding your keys in the dark!