

Pseudo HDR
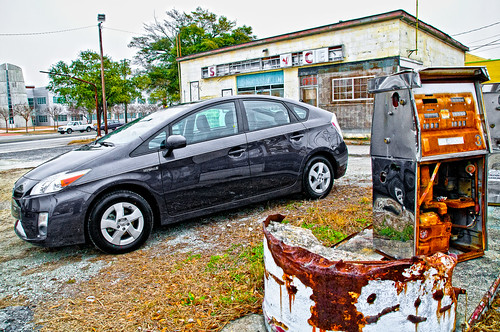
1/1000th of a sec | f/6.3 | 17mm | ISO 1600
Some photos just scream to be in High Dynamic Range, but sometimes you don’t have your tripod with you, or you took the shot and later realized you want it to be in HDR. That’s OK, there are quite a few ways to get the effect of an HDR image without using multiple exposures. I used to take an image and then save 3 different versions of the photo as tiffs – one correct exposure, one I pushed the brightness up to overexpose it and another that I pushed down to underexpose. I would then recombine those in Photomatix to create an HDR image – it works pretty well, but it’s a lot of work.
Here is an example of an image I made using that method:
I’ve since found a more efficient way to get the effect and it takes a fraction of the time. I use Nik Color Efex Pro’s Tonal Contrast filter. By running the photo through this plugin first, I’m able to push the dynamic range of the photo by manipulating contrast highlights, midtones, and shadows. The HDR look is really pronounced by pushing the midtone contrast way ahead of the others. Here’s a screenshot of the Tonal Contrast filter settings for the photo up at the top of this post (click it to enlarge):

I also pushed the saturation, because I like my HDR photos to be over-saturated. In doing so, it made the color of the car a purplish-blue tint. It is actually a dark gray, so when I brought the photo back into Adobe Lightroom, I used the saturation selector tool in the HSL panel to select the car and drop down the saturation. While I was there I also pushed the other colors up even more. Here’s what the settings looked like:

I also made some pretty strong adjustments in the basic panel of Lightroom. I pushed the saturation once more and also heavily applied the clarity slider, which can also be used to enhance the dynamic range of a photo. Here’s what those settings look like:

So, there you go – the end result looks very much like a traditional HDR photo. One last pointer is to make sure you have your aperture set to a small size (larger f number) so that more of the picture is in focus. HDR usually looks like crap on a photo that is exploiting a very shallow depth of field – the bokeh gets real funky and the effect just looks weird.
Here’s an alternate angle of the shot in the example above:
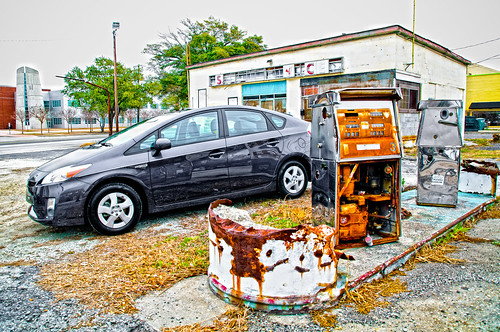
1/250th of a sec | f/6.3 | 17mm | ISO 720
Photomatix can also tonemap a single RAW file, which I’ve done with some success.
Pingback: Bees Up Close! | JWNPhoto
Pingback: Monotone SC Wetlands | JWNPhoto