

Shallow Depth Of Field 101
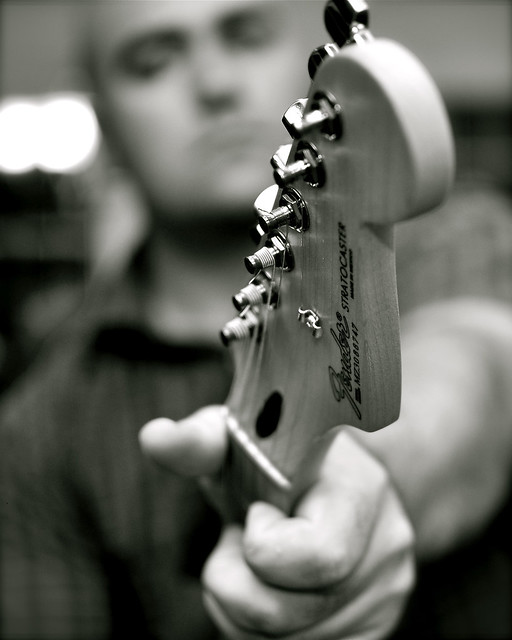
1/30th of a sec | f/1.8 | 35mm | ISO 200
This is a post for the curious photography fans who have looked at a picture and wondered how to get control over making parts of the photo blurry and the main focal point razor sharp. The phenomenon is called a “shallow depth of field”, and what that means is that because a camera can only focus at one precise distance, the plane of focus in your photo is very small or shallow. In layman’s terms, it translates into this: If you have a large depth of field, more of your photograph will appear to be in focus, if you have a shallow depth of field, your focus is more selective. So, how do you control it?
The secret is a combination of things – Mainly your aperture, lens focal length, and your proximity to the subject. Let’s dissect the photo above to illustrate the effects of all of these elements to create that image.
First off is aperture. Aperture simply controls the amount or volume of light you let into the camera when the shutter opens. The larger your aperture, the more light is allowed in. The tricky thing to remember when you first learn about aperture is that the smaller the f-number, the larger the aperture. The effect on depth of field is that the larger the aperture, the shallower your depth of field becomes. The photo above is set at a very large aperture, which is written as f/1.8.
The effect of a shallow depth of field can’t be dialed in just with a large aperture, your lens’s focal length and the distance between your camera and your subject are just as important. I can shoot that same scene using the same settings, but back up the camera 10 feet and focus on the same spot and my whole body and most of the background will be in focus. That is because at 35mm, I’m at a relatively wide focal angle (even though on my cropped sensor D90, this is more like a 50mm lens, but the lens still performs as a 35mm lens optically – that’s a post for another day). So, in order to get the shot above I needed to put the camera very close to the subject (which is me BTW, this was a self portrait). In fact, when I made this photo, I had the headstock of my guitar only inches away from the lens. I chose my 35mm lens to take it because I wanted there to be a hint of the facial features defined as well as fit my upper body in the frame. In the shot below of my son holding a baby turtle, I used a 50mm lens and you can see that beyond the hands, everything becomes just a wash of color.
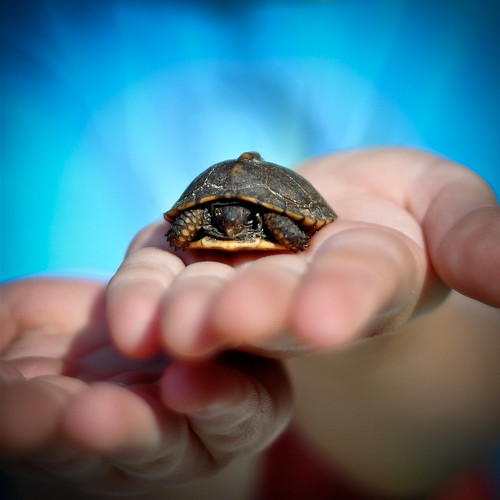
1/2500th of a sec | f1.8 | 50mm | ISO200
Since the focal length of the lens is greater and I’m probably about the same distance from my subject in both photos, you can see the difference that focal length of the lens makes.
What about the quality of the out of focus area?
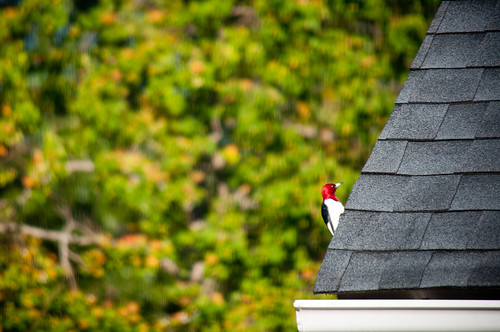
The quality of the out of focus area is sometimes referred to as “bokeh” (which is a word that for some reason gives me the creeps). It’s based on the Japanese word “boke-aji”, which translates into “quality of blur”. Some fans of bokeh will define a good blur quality by the shape, size, and definition of the points of light that are out of focus. Basically, each point of light will take on the shape of the aperture opening, which is generally circular or polygonal. At a large aperture such as the two photos above, the blur is generally smooth. In the photo below, the aperture is a bit smaller, and you can see the points of light as circles in the trees behind the subjects.

1/125th of a second | f/6.3 | 85mm | ISO 450
Artistically, there is no right or wrong when it comes to bokeh, but it does help to understand how to control it – which in many cases comes down to the limitations of your lens. Below is an example of what I would call bad bokeh, because the blur looks unnatural and is distracting.
1/320th of a sec | F/5.6 | 300mm | ISO 200
The reason this is bad is that the circles have what appears to be vertical lines on them. In this shot it’s unnerving! That can happen for a number of reasons, commonly from a scratch or the introduction of dirt on the front of the lens. I believe this shot might be the victim of a fingerprint or dog hair, because using the same setup I took the following shot three minutes later which has much less of the line issue – I most likely wiped off the UV filter I keep on that lens.
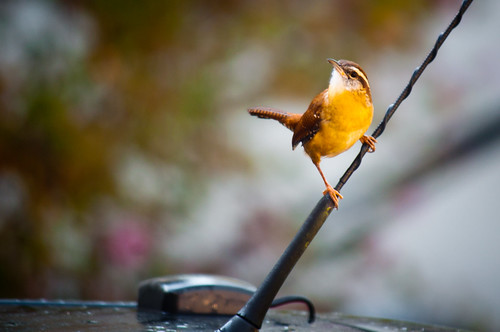
1/40th of a sec | F/5.6 | 300mm | ISO 200
To sum it up, the best way for you to start experimenting with artistically creating a shallow depth of field is to set your camera to aperture priority mode, dial in the smallest f-number you can (which means the largest aperture), zoom your lens to the longest focal length, and get pretty close to your subject. From there you can start to play with your settings to see how your camera and lens handles each setting – remember, different lenses will produce different bokeh, so try and familiarize yourself with which of your lenses make the best bokeh for your vision of the photo you are trying to create.
Pingback: Pseudo HDR | JWNPhoto